
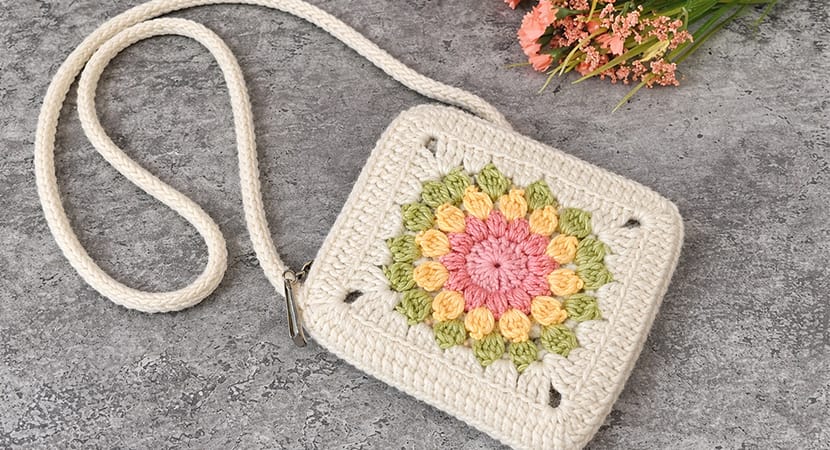
If you’re searching for a crochet project that’s fun, beginner-friendly, and creatively flexible, this sunburst granny square bag is a perfect choice. It’s made from just two squares, a strap, and optional lining, making it simple yet satisfying.
Even better—you can use any yarn you already have, making this an excellent scrap yarn project. Whether you go bold and colorful or soft and neutral, this bag is easy to personalize.
Materials
You can substitute freely, but here’s what was used in the original design:
Yarn (Medium Weight / #4)
- Color A: ~10 yards
- Color B: ~20 yards
- Color C: ~30 yards
- Color D: ~50 yards
(Example yarn: Scheepjes Stone Washed XL)
Tools
- 5 mm crochet hook
- Scissors
- Yarn needle
Stitch Abbreviations (US Terms)
- ch – chain
- st(s) – stitch(es)
- sl st – slip stitch
- hdc – half double crochet
- dc – double crochet
- tr – treble crochet
- sk – skip
- sp – space
Special Stitches
Puff Stitch (pf):
Yarn over, insert hook, pull up loop → repeat 3 times (7 loops on hook), yarn over, pull through all loops, ch 1.
Cluster Stitch (cl):
Yarn over, insert hook, pull up loop, yarn over, pull through 2 loops → repeat 4 times (5 loops remain), yarn over, pull through all loops, ch 1.
Beginning Cluster (beg cl):
Ch 3, then work cluster steps into same stitch.
Sunburst Granny Square (Make 2)
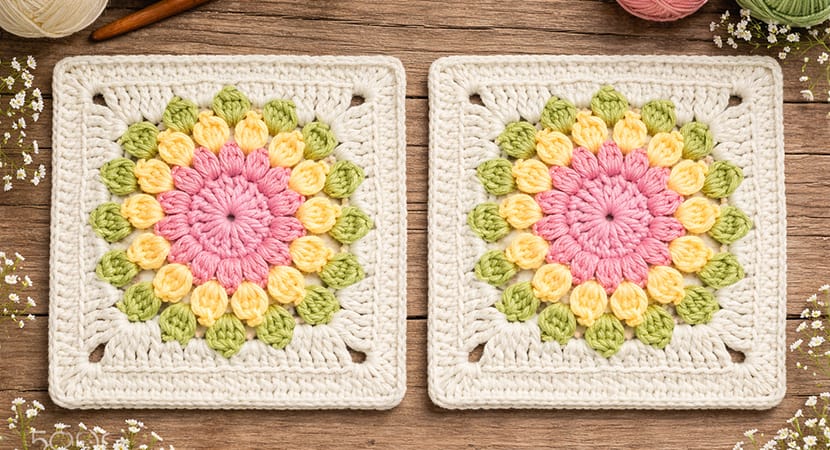
Each square ≈ 7” x 7”
Round 1 (Color A)
- Ch 5, join with sl st to form a ring
- Ch 3 (counts as dc)
- Work 15 dc into the ring
- Join with sl st
Total: 16 stitches
Round 2 (Color B)
- Attach yarn anywhere
- Ch 2 (does NOT count as stitch)
- Make 1 puff stitch in each stitch around
- Join with sl st
Total: 16 puff stitches
Round 3 (Color C)
- Join yarn in any space between puff stitches
- Work beg cl, ch 1
- In each space:
→ 1 cluster stitch, ch 1 - Join with sl st
Total: 16 clusters
Round 4 (Color D)
This round forms the square shape.
- In any space:
→ Ch 4 (counts as tr)
→ 2 tr, ch 3, 3 tr (corner made) - Repeat pattern:
- 3 dc in next space
- 3 hdc in next space
- 3 dc in next space
- (3 tr, ch 3, 3 tr) in next space (corner)
- Continue around all sides
- Join with sl st
Round 5 (Color D)
- Ch 4 (counts as tr)
- Work 1 tr in back loop only (BLO) across side
- In each corner:
→ (3 tr, ch 3, 3 tr) - Continue around
- Join and fasten off
Assemble the Bag
- Place squares right sides together
- Using yarn + needle:
- Sew 3 sides only
- Leave one side open (top)
- Turn bag right side out
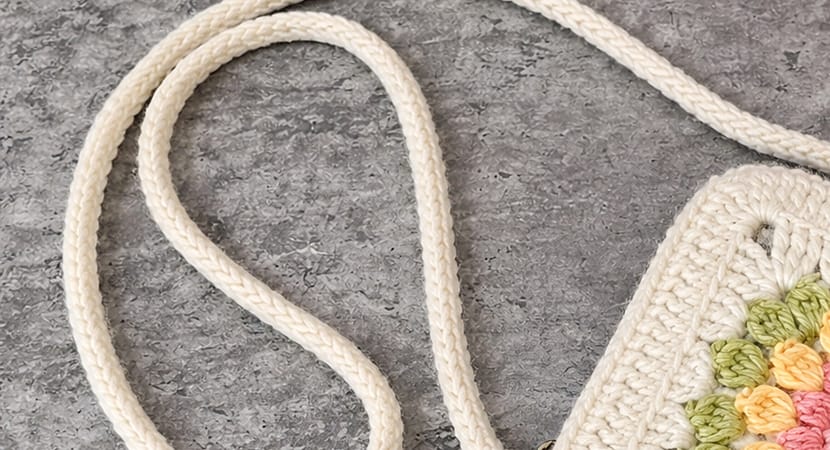
Make the Strap (I-Cord)
Row 1:
- Leave 6-inch tail
- Ch 3
- Pull up loops in 2nd and 3rd chains
You now have 3 loops
Row 2 (Repeat Step):
- Remove 2 loops from hook (hold them carefully)
- With remaining loop:
- YO, pull up loop
- Insert hook into dropped loops one by one, pulling up loops
Back to 3 loops
Continue:
Repeat Row 2 until strap is about 40 inches (or desired length)
Finish Strap:
- YO, pull through all loops
- Ch 1
- Cut yarn (leave long tail)
Attach the Strap
- Position strap ends on inside edges of bag
- Sew securely using yarn needle
- Suggested placement:
→ About ½ inch below top edge
Optional: Add a Lining
While optional, a fabric lining will:
- Strengthen your bag
- Prevent stretching
- Keep small items secure
Tips for Customization
- Mix bold colors for a summer vibe
- Use neutral tones for a minimal look
- Adjust strap length for:
- Shoulder bag
- Crossbody bag
You’re Done!
You’ve created a stylish, handmade crochet bag using simple techniques and creative color choices. This project is perfect for:
- Using leftover yarn
- Practicing stitches
- Making gifts
Enjoy your new bag—and don’t be surprised if you want to make another one!
