
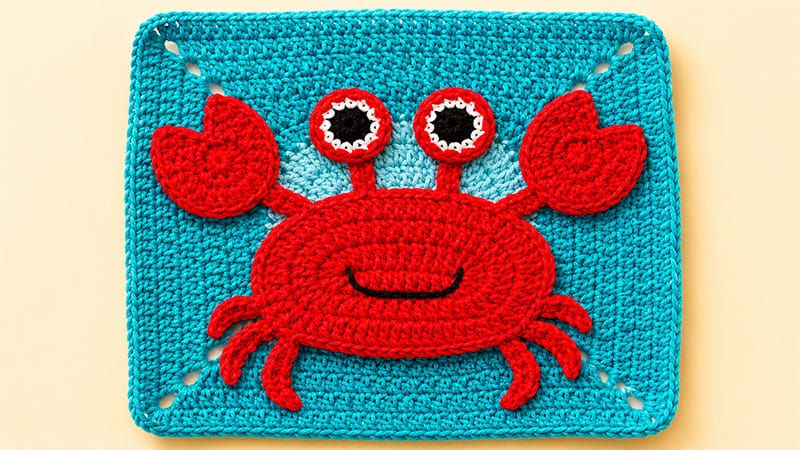
Bring a touch of coastal charm to your next blanket project with this delightful, textured crab granny square component.
Perfect as a standalone applique or as a featured block in an ocean-themed crochet-along (CAL), this pattern combines basic shaping with fun limb extensions to create a dimensional crustacean.
The project is worked in three main sections: a central oval body featuring integrated legs, a set of two oversized pincers, and a pair of expressive, multi-colored cartoon eyes.
Once the individual elements are crocheted, they are layered and stitched together to bring this cheerful sea creature to life.
Master Materials List
- Yarn: Medium-weight / Worsted-weight (Category 4) acrylic yarn
- Main Color: Vibrant Red (approx. 30–40 yards)
- Accent Colors: Small amounts of True White and Deep Black for the eyes and facial details.
- Hook: Size H/8 (5.00 mm) crochet hook (or size needed to obtain your preferred gauge)
- Notions: Tapestry needle for assembly and embroidery, and sharp scissors.
Step-by-Step Pattern Instructions
1. The Core Body & Integrated Legs
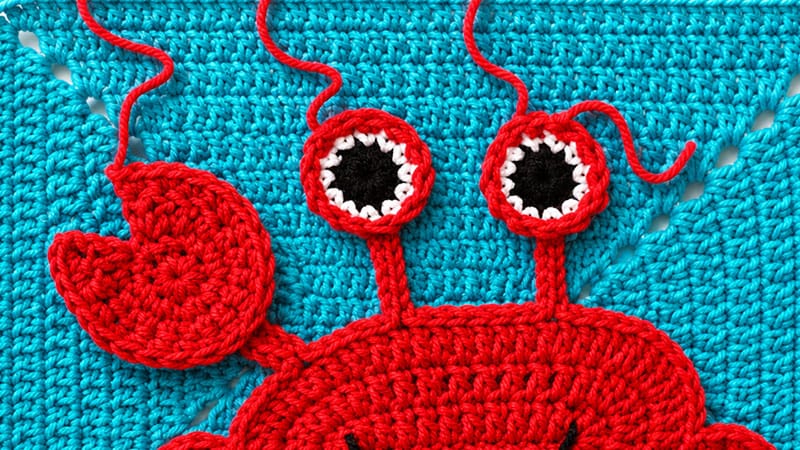
The body begins as a foundation chain worked on both sides to form a smooth oval, with the final round extending out into a series of chains that form the claws and walking legs.
- Round 1: Start by chaining 12. Work a double crochet (DC) into the 3rd chain from your hook. Continue by placing 1 DC into each of the next 8 chains. In the very last chain stitch, work 5 DC to create a smooth turn. Now, rotate your piece to work along the opposite underside of the foundation chain. Place 1 DC into each of the next 9 stitches, and finish with 5 DC in the final loop. Slip stitch to the first DC to join, then chain 2. (Total: 28 DC)
- Round 2: Work 1 DC into the first 9 stitches. Place 2 DC into each of the next 5 stitches to expand the curve. Work 1 DC into the next 9 stitches, and finish the round by placing 2 DC into each of the remaining 5 stitches. Slip stitch to join, then chain 2.
- Round 3: [2 DC in the next stitch, 1 DC in the following stitch] – repeat this sequence entirely around the oval. Slip stitch to join.
- Round 4 (Limbs & Extensions):
- Left Claw Arm Base: Chain 7. Skip the first chain, work 1 single crochet (SC), execute a single crochet decrease (SC Dec) across the next two chains, then work 1 SC in each of the final two chains. Slip stitch back into the main body round to secure. Slip stitch through the next 4 body stitches.
- Eye Stalk 1: Chain 7, then work slip stitches all the way back down the chain. Secure to the body with a slip stitch. Slip stitch across the next 7 body stitches.
- Eye Stalk 2: Chain 7, work slip stitches back down the chain, and secure to the body. Slip stitch across the next 4 body stitches.
- Right Claw Arm Base: Chain 5. Skip the first chain, work 1 SC, place 2 SC into each of the next two chains, and 1 SC in the final chain. Secure to the same body stitch with a slip stitch.
- Transition: Slip stitch along the next 10 body stitches.
- Left Walking Legs:
- Leg 1: Chain 6. Slip stitch in the 2nd chain, SC Dec over the next two, 1 SC in the last chain. Secure to the same body stitch. Slip stitch to the next stitch.
- Leg 2: Chain 9. Slip stitch in the 2nd chain, perform two consecutive SC Decs, 1 SC in the remaining 3 chains. Secure to the same body stitch. Slip stitch to the next stitch.
- Leg 3: Chain 13. Slip stitch in the 2nd and 3rd chains, perform three consecutive SC Decs, 1 SC in the remaining 4 chains. Secure to the same body stitch.
- Transition: Slip stitch along the next 18 body stitches to reach the opposite side.
- Right Walking Legs:
- Leg 4: Chain 10. Slip stitch in the 2nd, 3rd, and 4th chains. Work 2 SC in the next chain, 1 SC in the next, 2 SC in the following chain, and 1 SC in the final 3 chains. Secure to the body. Slip stitch to the next stitch.
- Leg 5: Chain 7. Slip stitch in the 2nd chain, 1 SC in the next two, 2 SC in the next, and 1 SC in the final two chains. Secure to the body. Slip stitch to the next stitch.
- Leg 6: Chain 5. Slip stitch in the 2nd chain, 1 SC, 2 SC in the next chain, and 1 SC in the final chain. Secure to the body.
- Finishing the Body: Slip stitch in all remaining stitches around the perimeter of the body. Fasten off, ensuring you leave a very long yarn tail for sewing.
Detailing Tip: Before assembling, use your tapestry needle and a length of black yarn to embroider a wide, cheerful smile onto the center of the red oval body.
2. The Big Front Claws (Make 2)
Using your red yarn, create two distinct pincers to attach to the arm bases.
- Round 1: Begin with a magic ring. Chain 1, then work 8 SC into the loop. Pull the ring tight, slip stitch to the first SC to close the round, and chain 1.
- Round 2: Place 2 SC into every stitch around. Slip stitch to join. (Total: 16 SC)
- Round 3: Chain 2 and turn your work. Place 2 DC in the very first stitch, 1 DC in the next, 1 half double crochet (HDC) in the next, followed by 1 SC in each of the next 10 stitches. Mirror the start by working 1 HDC, 1 DC, and finally 2 DC in the last stitch. Chain 1 and turn.
- Round 4: Work 2 SC in the first stitch, 2 SC in the second stitch, 1 SC into each of the next 14 stitches, and finish with 2 SC in each of the last two stitches. Fasten off, leaving a long tail for assembly.
3. The Animated Eyes (Make 2)
These layered circles use clean color changes to build a playful, wide-eyed look.
- Round 1 (Pupil): Start with black yarn in a magic ring. Chain 1 and work 12 SC into the ring. Slip stitch to the first stitch to close, pulling through your white yarn on the final loop of the join. Chain 1.
- Round 2 (Sclera): Using white yarn, work 1 SC into every stitch around. Join the round by pulling through your red yarn on the final slip stitch. Chain 1.
- Round 3 (Iris/Border): Using red yarn, work 1 SC into every stitch around to create the outer trim. Slip stitch to join, then fasten off, leaving a long tail for assembly.
Final Assembly & Finishing
- Block Placement: Position your completed red crab body flat onto your prepared granny square base. Use the long red tail to secure the perimeter of the oval and the tips of the walking legs to the square using a running stitch or whipstitch.
- Attaching Claws: Position the two large pincers at the ends of the claw arms, slightly overlapping the body structure to give a dimensional look. Stitch down securely.
- Setting the Eyes: Place the layered eyes over the two top eye stalks, letting them overlap slightly if desired for a cute, expressive look. Secure them in place with your yarn needle, weave in any remaining loose ends on the back of the square, and snip the excess yarn.
