
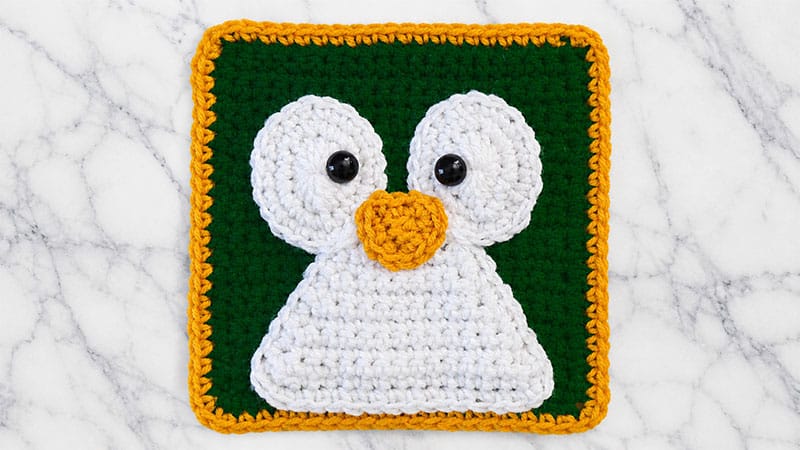
Bring a touch of winter whimsy to your next crochet project with this charming Penguin Granny Square!
Perfect as a standalone motif for pillows, bags, or scarves, this pattern was originally designed as part of a monthly animal-themed Blanket Crochet-Along (CAL).
This project is highly beginner-friendly, working up in just an hour or two using basic stitches like single, half double, and double crochet.
It features a sturdy black backdrop framed in bright gold, topped with a layered penguin body, oversized eyes, and a cute triangular beak.
Pattern Details & Materials
- Skill Level: Beginner / Advanced Beginner
- Time Commitment: 1–2 hours per square
- Hook Size: Size H/8 (5.0 mm) crochet hook
- Yarn: Medium-weight (Category 4) acrylic yarn (e.g., Red Heart Super Saver) in Black, White, and Gold.
- Notions: Tapestry needle, scissors, and two 12mm or 15mm black safety eyes (optional; you can also embroider the eyes).
Step-by-Step Instructions
1. The Base Square
Using Black Yarn
- Foundation: Chain 21.
- Row 1: Single crochet (SC) into the second chain from your hook and into every chain across. Chain 1 and turn. (20 SC)
- Rows 2–23: SC in each stitch across, chain 1, and turn.
- Border Part 1: Do not fasten off. Work a row of SC evenly down the three remaining raw edges of your square, placing 2 SC into each corner to keep them flat.
- Border Part 2 (Color Change): Join your Gold yarn and fasten off the black. Work one final round of SC completely around all four sides of the square, placing 2 SC in every corner. Sl st to join and fasten off.
2. The Penguin Body
Using White Yarn
- Foundation: Chain 17.
- Row 1: SC in the second chain from your hook and in each remaining chain across. Chain 1 and turn. (16 SC)
- Row 2 (Decrease): SC decrease over the first two stitches, SC in the next 12 stitches, SC decrease over the last two stitches. Chain 1 and turn. (14 SC)
- Row 3: SC in each stitch across. Chain 1 and turn. (14 SC)
- Row 4 (Decrease): SC decrease, SC in the next 10 stitches, SC decrease. Chain 1 and turn. (12 SC)
- Row 5: SC in each stitch across. Chain 1 and turn. (12 SC)
- Row 6 (Decrease): SC decrease, SC in the next 8 stitches, SC decrease. Chain 1 and turn. (10 SC)
- Row 7: SC in each stitch across. Chain 1 and turn. (10 SC)
- Row 8 (Decrease): SC decrease, SC in the next 6 stitches, SC decrease. Chain 1 and turn. (8 SC)
- Row 9: SC in each stitch across. Chain 1 and turn. (8 SC)
- Row 10 (Decrease): SC decrease, SC in the next 4 stitches, SC decrease. (6 SC)
- Edging: Do not turn. Work a neat border of SC all the way around the perimeter of this white belly piece, placing 2 SC in the corners. Fasten off, leaving a long yarn tail for sewing.
3. The Eyes (Make 2)
Using White Yarn
- Round 1: Start with a Magic Ring. Chain 1, then work the following sequence directly into the ring: 2 SC, 1 HDC, 3 DC, 1 HDC, 2 SC, 1 HDC, 3 DC, 1 HDC. Slip stitch to the first SC to join, chain 1. (14 stitches)
- Round 2: Work 2 SC in the first stitch, then 1 SC in the next. Repeat this pattern all the way around. Slip stitch to join, chain 1. (21 stitches)
- Round 3: SC in every stitch around. Slip stitch to join and fasten off, leaving a long tail for assembly.
- Safety Eye Placement: Insert your plastic safety eye just to the right of the center of the magic ring on each white circle, securing it tightly at the back.
4. The Beak
Using Gold Yarn
- Foundation: Chain 4.
- Row 1: SC in the second chain from your hook, HDC in the next chain, and DC in the final chain.
- Edging: To round out the beak, continue to work SC stitches along the top edge of the stitches you just made, and rotate to SC around the entire triangle, placing 2 SC in each of the three points/corners. Fasten off, leaving a long tail.
Assembly & Finishing
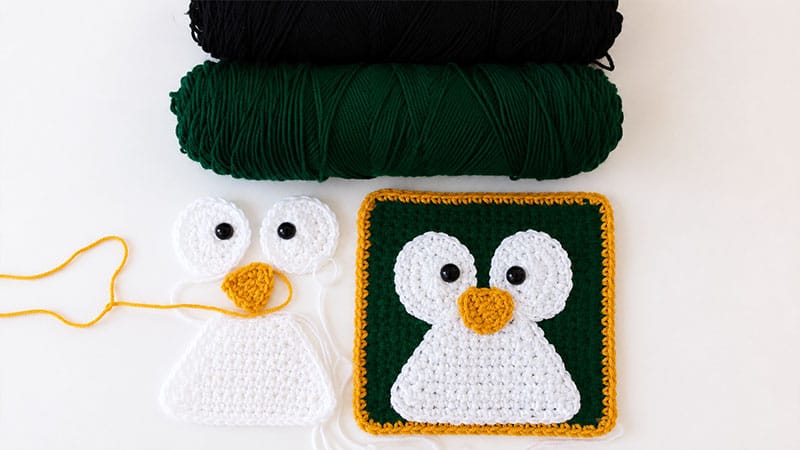
- Secure the Body: Center the white penguin body onto the black base square and stitch it down securely using your tapestry needle and the long yarn tail.
- Attach the Eyes: Position the two white eye circles near the top of the white body piece so they sit side-by-side. Sew them into place.
- Attach the Beak: Place the golden beak centered right where the two eyes meet, slightly overlapping the bottom of the eyes and the top of the body. Stitch it down.
- Weave in Ends: Secure all remaining yarn tails on the back of your square and weave them in neatly.
