
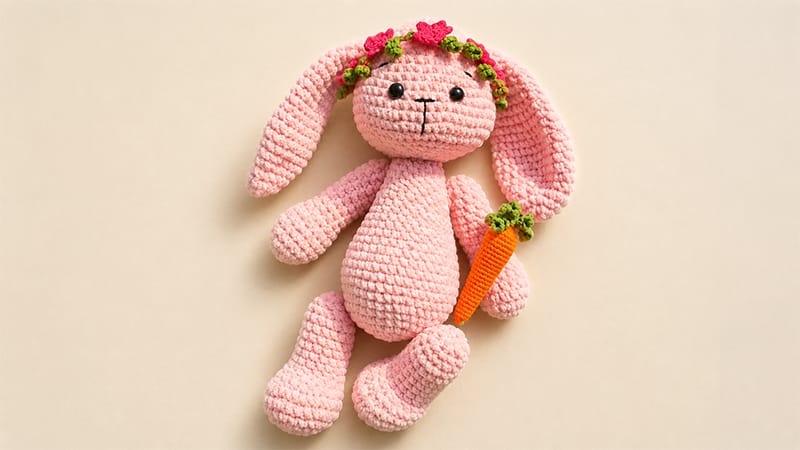
Meet Bunny Moo, an adorable and floppy-eared bunny amigurumi!
Designed with a plush, cozy finish, this sweet bunny comes complete with its very own leafy crown, vibrant blossoms, and a large toy carrot. Perfect for handmade gifts, nursery decor, or adding to your plushie collection, this project uses a soft bulky yarn for the bunny’s body to ensure a fast, satisfying build and a charmingly oversized texture.
Follow the clear, step-by-step instructions below to bring this adorable little woodland creature to life from head to toe!
Pattern Details
- Skill Level: Intermediate
- Finished Size: Approx. 10–12 inches (25–30 cm) tall when using recommended yarn
Materials & Tools
- Grey Plush/Chenille Yarn: ~100g (Bulky Weight)
- Orange Fine Cotton/Acrylic Yarn: ~30g (Sport Weight)
- Green Fine Cotton/Acrylic Yarn: ~20g (Sport Weight)
- Crochet Hooks: 4.5 mm (for body parts) & 2.5 mm (for accessories)
- Safety Eyes: 12 mm (Green)
- Safety Plastic Joints / Cotter Pins: 30 mm (4 sets for movable limbs)
- Stuffing: High-grade polyester fiberfill
- Notions: Tapestry needle, black & white embroidery floss, stitch marker, scissors, straight pins
Stitch Abbreviations
| Abbreviation | Description |
|---|---|
| ch | Chain |
| sc | Single Crochet |
| inc | Increase (2 sc in same stitch) |
| dec | Decrease (sc 2 together) |
| dc | Double Crochet |
| sl st | Slip Stitch |
| st(s) | Stitch(es) |
| […] x N | Repeat instructions inside brackets N times |
Step-by-Step Instructions
1. Legs (Make 2)
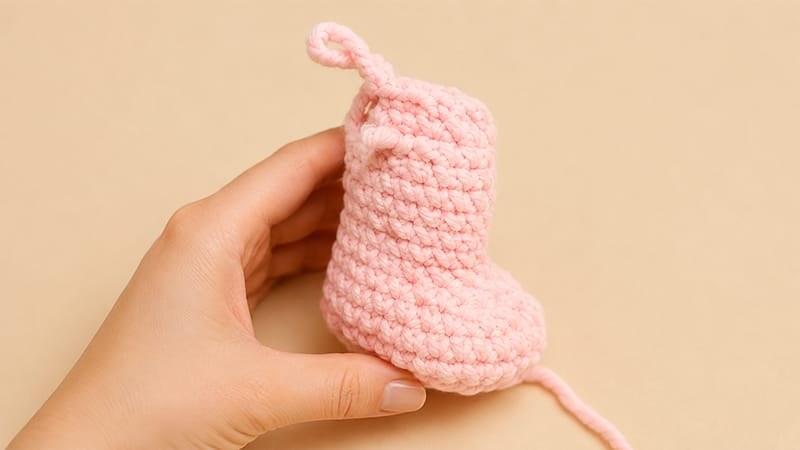
Use Grey Yarn & 4.5 mm Hook
- R1: 6 sc into a magic ring. (6)
- R2: [inc] x 6. (12)
- R3: [1 sc, inc] x 6. (18)
- R4: [2 sc, inc] x 6. (24)
- R5: [3 sc, inc] x 6. (30)
- R6: sc across. (30)
- R7: 9 sc, [dec] x 6, 9 sc. (24)
- R8: 6 sc, [dec] x 6, 6 sc. (18)
- R9–15 (7 rnds): sc across. (18)
- R16: [1 sc, dec] x 6. (12)
Place a 30 mm safety joint between Rnd 15 and Rnd 16.
- R17: sc across. (12)
- R18: [dec] x 6. (6)
Stuff firmly with fiberfill and pull opening closed.
2. Arms (Make 2)
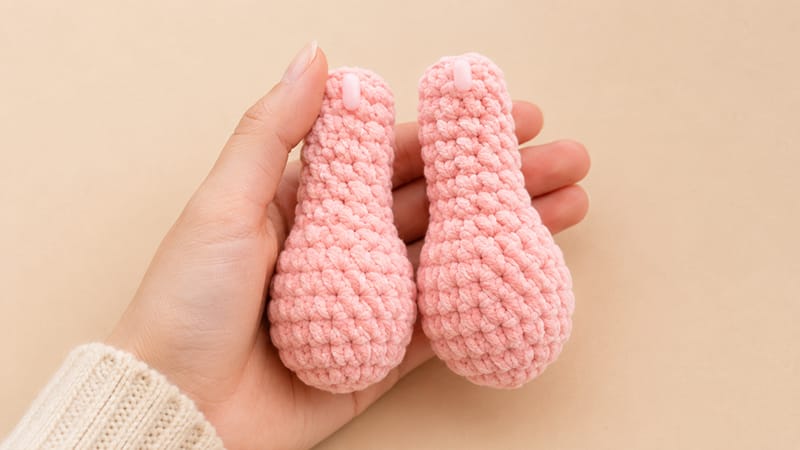
Use Grey Yarn & 4.5 mm Hook
- R1: 6 sc into a magic ring. (6)
- R2: [inc] x 6. (12)
- R3: [1 sc, inc] x 6. (18)
- R4: [8 sc, inc] x 2. (20)
- R5–6 (2 rnds): sc across. (20)
- R7: [8 sc, dec] x 2. (18)
- R8: [1 sc, dec] x 6. (12)
- R9–19 (11 rnds): sc across. (12)
- R20: [dec] x 6. (6)
- Insert a safety joint between Rnd 17 and Rnd 18.
- Stuff lightly and close.
3. Body
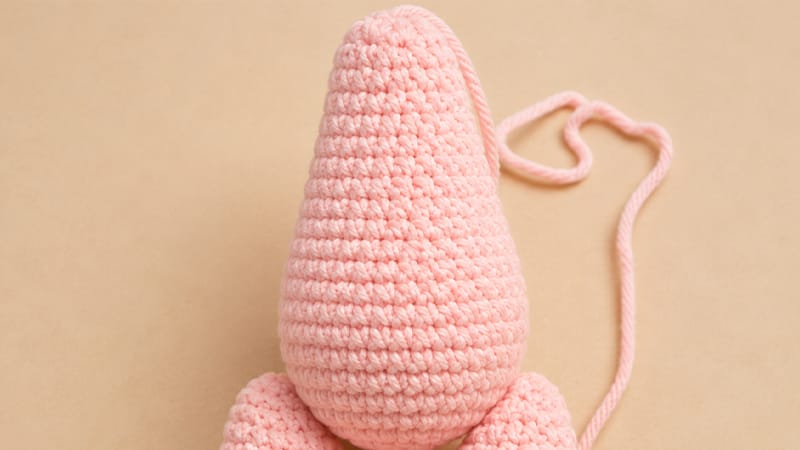
Use Grey Yarn & 4.5 mm Hook
- R1: 6 sc into a magic ring. (6)
- R2: [inc] x 6. (12)
- R3: [1 sc, inc] x 6. (18)
- R4: [2 sc, inc] x 6. (24)
- R5: [3 sc, inc] x 6. (30)
- R6: [4 sc, inc] x 6. (36)
- R7: [5 sc, inc] x 6. (42)
- R8–12 (5 rnds): sc across. (42)
- R13: [5 sc, dec] x 6. (36)
- R14–15 (2 rnds): sc across. (36)
- R16: [4 sc, dec] x 6. (30)
- R17: sc across. (30)
- R18: [3 sc, dec] x 6. (24)
- R19–20 (2 rnds): sc across. (24)
- R21: [2 sc, dec] x 6. (18)
- R22–25 (4 rnds): sc across. (18)
- Attach the Leg joints between Rnd 5 and Rnd 6 of the body.
- Attach the Arm joints between Rnd 20 and Rnd 21 of the body.
- Fill the body firmly with fiberfill.
4. Head
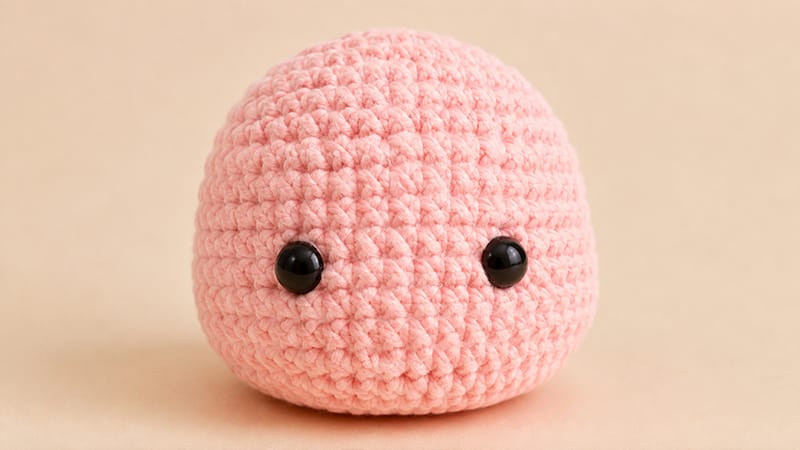
Use Grey Yarn & 4.5 mm Hook
- R1: 6 sc into a magic ring. (6)
- R2: [inc] x 6. (12)
- R3: [1 sc, inc] x 6. (18)
- R4: [2 sc, inc] x 6. (24)
- R5: [3 sc, inc] x 6. (30)
- R6: [4 sc, inc] x 6. (36)
- R7: [5 sc, inc] x 6. (42)
- R8: sc across. (42)
- R9: [6 sc, inc] x 6. (48)
- R10–11 (2 rnds): sc across. (48)
- R12: [7 sc, inc] x 6. (54)
- R13–14 (2 rnds): sc across. (54)
- R15: [8 sc, inc] x 6. (60)
- R16: sc across. (60)
- Position 12 mm safety eyes between Rnd 12 and Rnd 13, leaving 7 stitches between them.
- R17: [4 sc, dec] x 10. (50)
- R18: [3 sc, dec] x 10. (40)
- R19: [2 sc, dec] x 10. (30)
- R20: [3 sc, dec] x 6. (24)
- R21: [2 sc, dec] x 6. (18)
- Stuff head firmly. Sew head onto body, adding extra fiberfill before closing up.
5. Ears (Make 2)
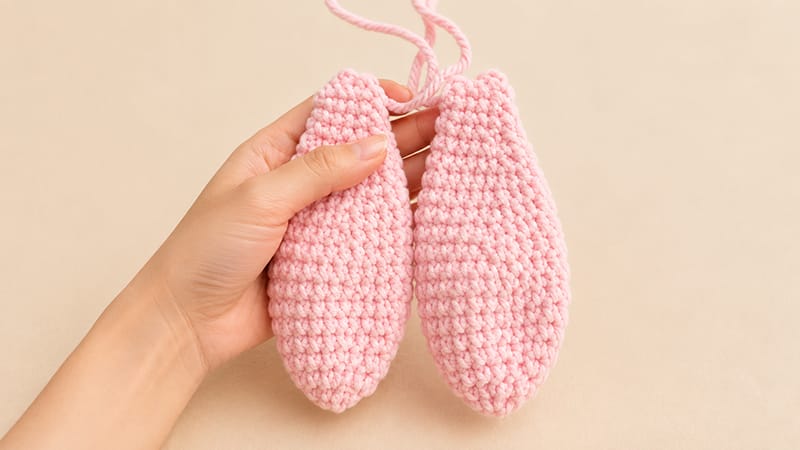
Use Grey Yarn & 4.5 mm Hook
- R1: 6 sc into a magic ring. (6)
- R2: [inc] x 6. (12)
- R3: [1 sc, inc] x 6. (18)
- R4: sc across. (18)
- R5: [2 sc, inc] x 6. (24)
- R6: sc across. (24)
- R7: [3 sc, inc] x 6. (30)
- R8–9 (2 rnds): sc across. (30)
- R10: [3 sc, dec] x 6. (24)
- R11: sc across. (24)
- R12: [10 sc, dec] x 2. (22)
- R13: sc across. (22)
- R14: [9 sc, dec] x 2. (20)
- R15: sc across. (20)
- R16: [8 sc, dec] x 2. (18)
- R17: sc across. (18)
- R18: [1 sc, dec] x 6. (12)
- R19–21 (3 rnds): sc across. (12)
- Stuff lightly. Press opening flat and sc 6 sts across to close. Fasten off, leaving a long tail for sewing to the top of the head.
6. Accessories
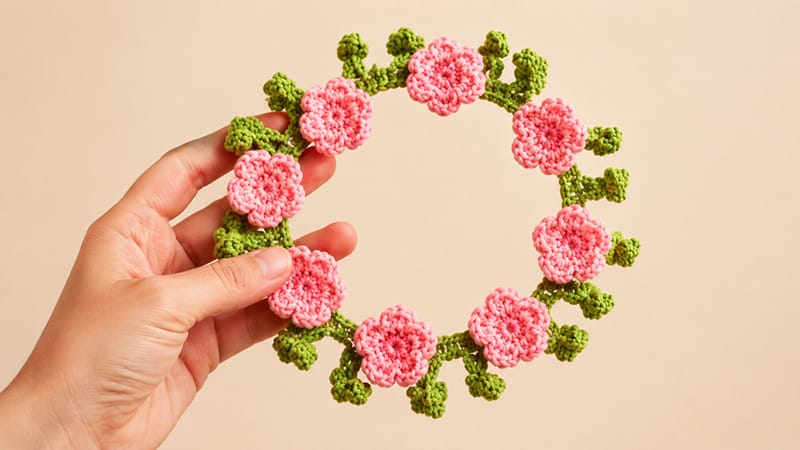
Floral Crown Base
Use Green Yarn & 2.5 mm Hook
- R1: Ch 95.
- R2: Starting in 2nd ch from hook, 5 sc. Repeat [Ch 11, turn, sc back down chain starting in 2nd ch with 1 inc per st (total 20 sc), 5 sc along base chain] 18 times, then 3 sc. Fasten off.
Flowers (Make 8)
Use Orange Yarn & 2.5 mm Hook
- R1: 5 sc in magic ring. (5)
- R2: [(1 sc, ch 2, 3 dc, 1 sc) all into next st] x 5 times to create petals. Fasten off and stitch onto green crown.
Plush Carrot
Use Orange & Green Yarn & 2.5 mm Hook
- (Start in Orange)
- R1: 5 sc in magic ring. (5)
- R2: [inc] x 5. (10)
- R3–5: sc across. (10)
- R6: [4 sc, inc] x 2. (12)
- R7–9: sc across. (12)
- R10: [5 sc, inc] x 2. (14)
- R11–13: sc across. (14)
- R14: [6 sc, inc] x 2. (16)
- R15–17: sc across. (16)
- R18: [7 sc, inc] x 2. (18)
- R19–21: sc across. (18)
- R22: [8 sc, inc] x 2. (20)
- R23–25: sc across. (20)
- R26: [dec] x 10. (10) — Stuff carrot firmly.
- R27: [dec] x 5. (5)
- (Switch to Green)
- R28: [1 sc, ch 11, turn, sc back down chain starting in 2nd ch with 1 inc per st (20 sc total), 1 sc] x 5 to create leafy top. Fasten off.
Assembly & Finishing Details
- Face Embroidery: Using black thread, embroider a cute “Y” shape nose/mouth in the center of the face. Use white thread to add small highlights to the outer edges of the safety eyes for expression.
- Attach Ears: Securely stitch the flattened ends of the ears symmetrically to the upper sides of the head (around Rnd 3 or 4).
- Head to Body Connection: Use a tapestry needle and matching yarn to firmly stitch the head base to the neck opening of the body.
- Crown & Accessories: Wrap the floral crown around the base of one ear or head top and tack it down with a few hidden stitches. Attach the carrot to one of the arms!
