
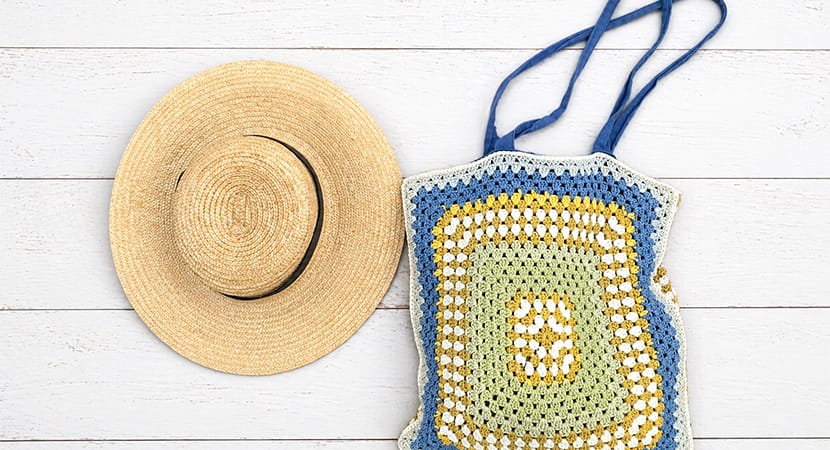
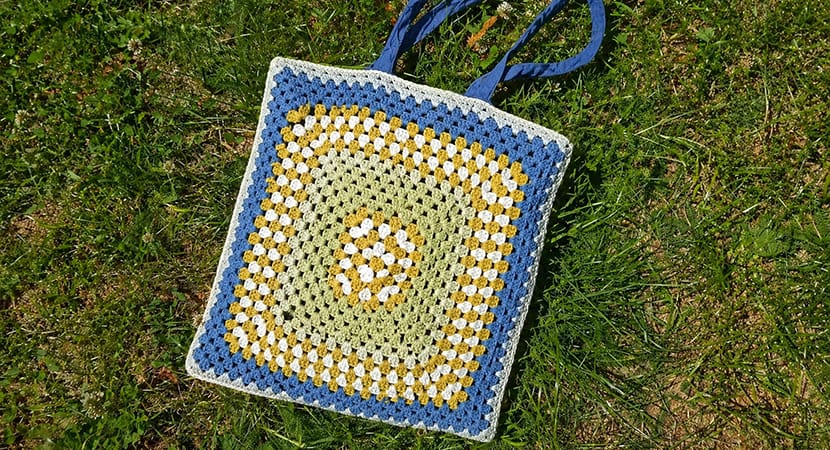
If you love crocheting and have lots of leftover yarn, this project is a perfect way to turn scraps into something useful, sturdy, and beautiful. This tote bag uses classic granny squares combined with a clever trick—a ready-made canvas tote as the lining, so you avoid complicated sewing.
Why This Pattern Works
- No need to sew a full lining from scratch
- Beginner-friendly construction
- Customizable size and colors
- Great for scrap yarn projects
- Durable because of the canvas insert
Materials You’ll Need
- Crochet Hook: 4 mm (US G-6)
- Yarn: ~250 g (8.8 oz) DK weight cotton or cotton blend
- Canvas Tote Bag: Approx. 40 × 40 cm (16″ × 16″)
- Tools:
- Scissors
- Yarn needle
- Sewing needle + thread
Size & Gauge
- Gauge:
10 cm (4”) = 5 clusters (3dc) × 8 rows - Finished Size:
40 × 40 cm (16″ × 16″)
Tip: You can adjust size easily—just add or remove rounds to match your tote.
Important Notes Before You Start
- Work in turned rounds (turn after each round)
- Ch3 counts as 1 double crochet (dc)
- Corners are always made with (3dc, ch2, 3dc) structure
- For color changes:
- Switch yarn on the last yarn-over of the previous stitch
Step 1: Make Two Granny Squares
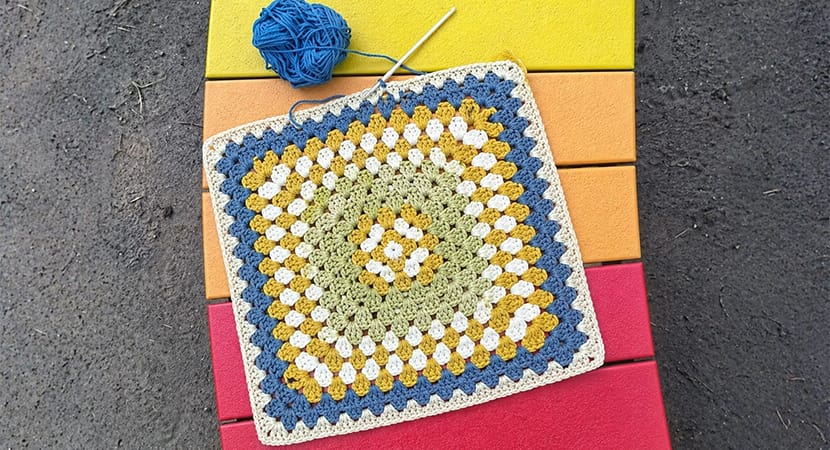
You will crochet 2 identical squares.
Foundation Ring
- Chain 4
- Slip stitch into first chain to form a ring
Round 1
- Ch3 (counts as dc)
- 2dc into ring
- Ch2
- Repeat (3dc, ch2) 3 more times
- Join with slip stitch to top of ch3
- Turn
You now have 4 corners
Round 2
- Slip stitch into first corner space (ch-2 space)
- Ch3, 2dc into same space
- 3dc into next space
- Ch2
- Repeat around:
- (3dc, 3dc in next space, ch2)
- Join + turn
Round 3
- Slip stitch to corner space
- Ch3, 2dc into same space
- 3dc in space between clusters
- 3dc into next corner space
- Ch2
- Repeat pattern around
- Join + turn
Round 4
Same structure, but now:
- Work 2 cluster groups between corners
- Continue corner pattern (3dc, ch2, 3dc)
Rounds 5–18 (Continue Pattern)
Each round increases evenly:
| Round | Clusters Between Corners |
|---|---|
| 5 | 3 |
| 10 | 8 |
| 15 | 13 |
| 18 | 16 |
Keep repeating:
- 3dc in each space
- Increase side length
- Maintain corners
Stop when your square matches your tote size
Finish Square
- Fasten off
- Weave in all ends
Repeat to make second square
Step 2: Join the Squares
- Place squares wrong sides together
- Join yarn at a corner
- Work single crochet (sc) through both layers
Join 3 sides only:
- 1 sc in each stitch
- 3 sc in each corner
This creates a pocket
Step 3: Finish Top Edges
- Continue single crochet along the top edges separately
- This strengthens the opening
Fasten off and weave ends.
Step 4: Insert Lining
- Place canvas tote inside crochet pocket
- Align edges carefully
Step 5: Secure Lining
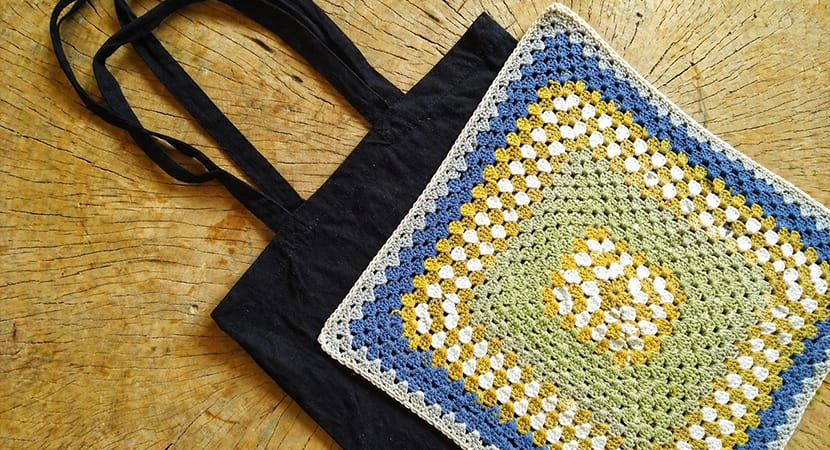
- Sew along the top edge only
- Use small, even stitches
- Attach crochet layer to canvas
This prevents stretching and keeps shape
Optional: “Swiftie” Color Version
Inspired by Taylor Swift’s crochet dress
Materials Adjustment:
- Sport weight cotton yarn
- 3 mm hook
Color Pattern
Square One:
- 4 rounds peach
- 2 rounds each:
- sweet orchid
- coffee
- off-white
- coffee
- off-white
- coffee
- Repeat sequence twice (total 22 rounds)
Square Two:
- Start:
- off-white → coffee → off-white → coffee
- Then:
- 4 rounds peach
- 2 rounds sweet orchid
- Repeat sequence twice
Final Result
You’ll have:
- A fully lined tote bag
- Strong, durable structure
- Unique color design
- Minimal sewing effort
Extra Tips
- Use scrap yarn for a patchwork look
- Block squares before assembly for best shape
- Cotton yarn = sturdier bag
- Add buttons or pockets if desired
This version should be much easier to follow while you crochet step by step.
