
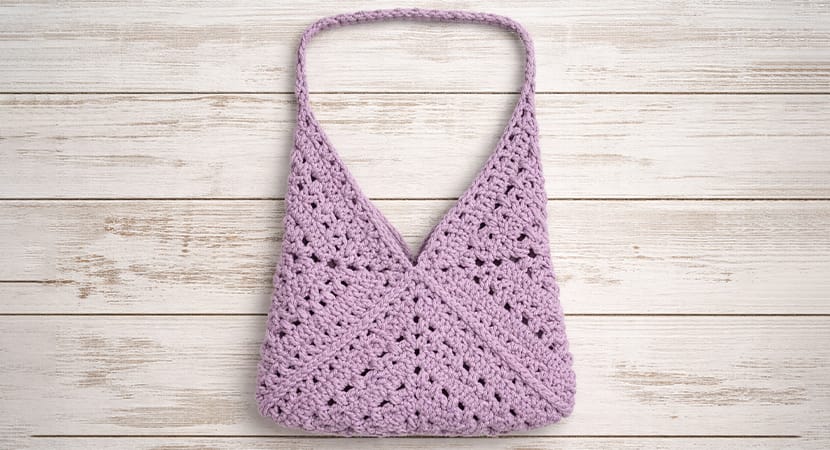
This bag is constructed using a clever yet simple method: three large crochet squares are created, then folded and joined to form the body of the bag.
This modular approach makes the project approachable for beginners while still producing a polished, professional-looking result.
Although the pattern provides a standard size, it is highly customizable. By repeating certain rounds of the square pattern, you can easily increase or decrease the size of your bag depending on your needs.
Materials Needed
To create the Tulip Square Shopper Bag, you will need:
- Yarn: 2 balls of Lion Brand Hue + Me (Bulky weight category 5). Each ball contains 125 meters (125 grams). The sample uses the shade Desert, but any similar bulky yarn totaling approximately 225 grams will work.
- Crochet Hook: 8 mm (US L/11)
- Tools: Tapestry needle and scissors
- Optional Materials: Fabric or an old t-shirt, plus a sewing needle and thread, if you wish to add a lining
Size and Gauge
- Finished bag (flat): Approximately 17 x 17 inches (43 x 43 cm)
- Each square: About 12 x 12 inches (30 x 30 cm)
- Gauge: 10 double crochet stitches and 5 rows = 4 x 4 inches (10 x 10 cm)
Maintaining gauge is helpful for achieving the intended size, but slight variations are acceptable for this type of project.
Stitches and Abbreviations
This pattern uses US crochet terminology. Key stitches include:
- ch (chain)
- sl st (slip stitch)
- sc (single crochet)
- dc (double crochet)
- v-stitch: (1 dc, ch 1, 1 dc) worked into the same stitch
- puff stitch: Yarn over, pull up a loop (3 loops on hook), repeat once more (5 loops total), yarn over and pull through all loops, then ch 1 to secure
(Note: This pattern uses 5 loops instead of the traditional 7.)
Creating the Tulip Squares
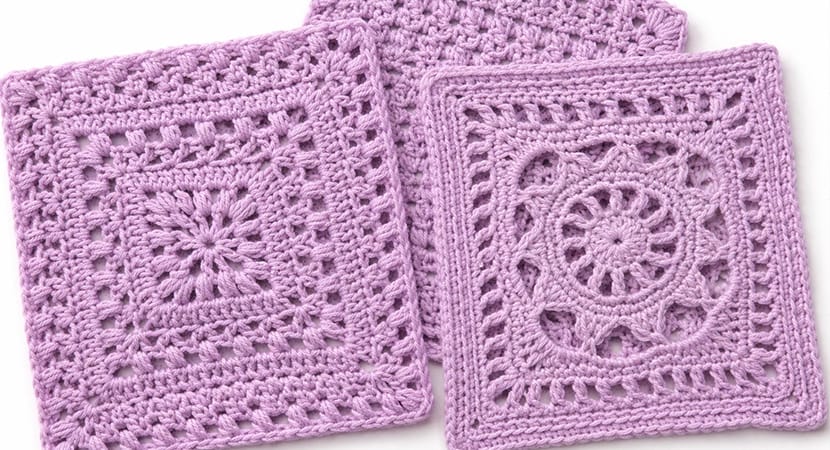
You will need to crochet three identical squares, worked in rounds with the right side always facing you.
Starting Round
Begin with either:
- Chain 4 and slip stitch to form a ring, or
- Use a magic circle
Round 1
Chain 5 (counts as 1 dc and ch 2). Then repeat:
- (1 dc, ch 1, 1 dc, ch 2) three times
Finish with 1 dc, ch 1, and slip stitch into the 3rd chain of the starting chain. Slip stitch into the corner space.
You will now have 4 corners, each containing a V-stitch.
Round 2 (Puff Stitch Round)
In each corner space:
- (1 puff, ch 2, 1 puff), ch 1
Between corners:
- Work 1 puff in each chain space, ch 1
Repeat all the way around, then slip stitch into the first puff and move into the corner space.
You should have 3 puff stitches per side.
Round 3 (Double Crochet Round)
Chain 5, then:
- 2 dc in the corner space
- 1 dc in the next puff stitch
Across each side:
- Alternate 2 dc in chain spaces and 1 dc in puff stitches
In each corner:
- (2 dc, ch 2, 2 dc)
Continue around, ending with a slip stitch into the starting chain.
Each side now contains 11 double crochets.
Round 4 (V-Stitch Round)
Chain 5, then:
- (1 dc, ch 1, 1 dc) in the corner
- Skip 2 stitches
Across:
- Work V-stitches into every third stitch
In corners:
- (1 dc, ch 1, 1 dc, ch 2, 1 dc, ch 1, 1 dc)
Repeat around and join.
Each side will now have 5 V-stitches.
Rounds 5–7
These rounds repeat earlier patterns:
- Round 5: Repeat Round 2 (puff stitch round)
- Round 6: Repeat Round 3 (dc round)
- Round 7: Repeat Round 4 (V-stitch round)
At the end, each square should measure approximately 12 inches (30 cm).
Repeat this process until you have three completed squares.
Assembly Instructions
Once your squares are finished, it’s time to assemble the bag.
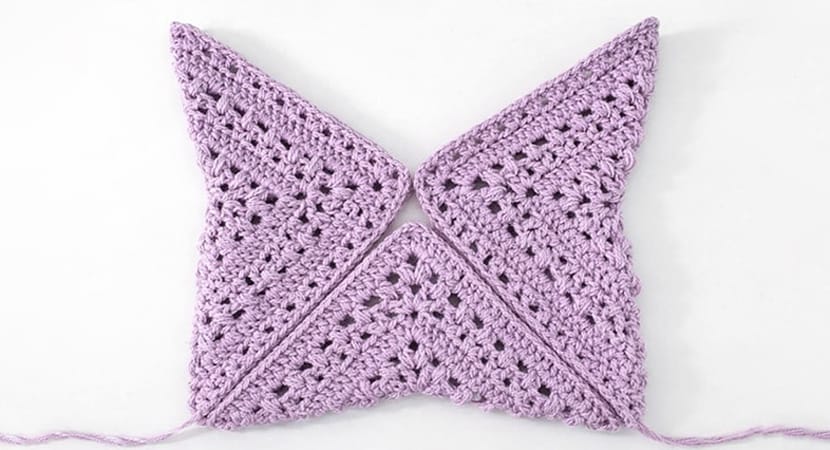
Step 1: Positioning
Lay all three squares flat with the right sides facing up. Fold each square in half and arrange them so they form the sides and base of the bag.
Step 2: Joining
Join the squares using one of the following methods:
- Slip Stitch Join (recommended): Creates a decorative raised seam and works up quickly
- Invisible Seam: Produces a flatter, less visible join
Join all edges carefully to form the bag structure.
Making the Straps
The straps are crocheted directly onto the bag.
Row 1
Attach yarn in a corner ch-2 space:
- Work 3 sc into the space
- Chain 1 and turn
Row 2
- Work 1 sc in each stitch across (3 stitches total)
- Chain 1 and turn
Repeat
Continue Row 2 until the strap measures about:
- 14 inches (35.5 cm)
- Approximately 60 rows
Attach Strap
Secure the strap to the opposite corner:
- Work 3 sc through both layers of the corner space
Repeat for the second strap.
Optional Fabric Lining
Although the bag is sturdy, crochet fabric can stretch over time—especially when carrying heavier items. Adding a lining helps maintain the bag’s shape.
How to Add a Lining
- Cut fabric (or an old t-shirt) to match the bag’s dimensions
- Fold and sew the edges to prevent fraying
- Insert the lining into the bag
- Hand-sew it along the top edge
This step significantly increases durability and prevents items from slipping through stitches.
Customization Tips
- Size Adjustment: Repeat the main square rounds to make a larger bag
- Color Variations: Try multiple colors to highlight the tulip texture
- Handle Length: Adjust strap rows for shoulder or crossbody styles
