
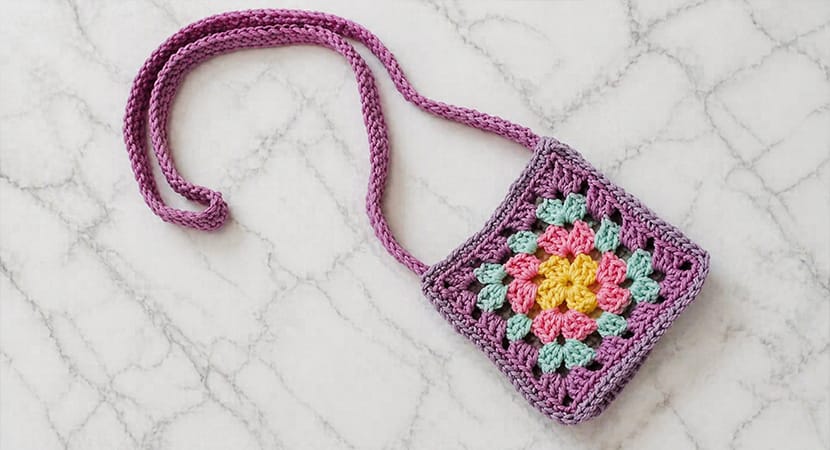
The Granny Square Purse is a simple yet charming crochet project that blends classic granny squares with a functional bag design.
It’s perfect for beginners and a great way to use leftover yarn (“scrap-buster” project). You can customize it into a small purse, kids’ treasure bag, or even a crossbody pouch.
Materials Needed
Gather these supplies before you begin:
- Yarn:
- Worsted weight yarn
- 4 different colors (scrap yarn works perfectly)
- Hook:
- US H-8 (5 mm crochet hook)
- Tools:
- Scissors
- Tapestry needle (for sewing and weaving ends)
Note: Pattern uses U.S. crochet terms (hdc = half double crochet, sc = single crochet, etc.)
Step 1: Make the Granny Squares
You will need:
2 granny squares (same size)
Instructions:
- Use any standard granny square pattern you like
- Make both squares equal in size
- Change colors as desired for a vibrant look
Tip: Using different colors for each round gives a classic boho style.
Step 2: Create the Side Piece (Gusset)
This piece adds depth to your purse so it’s not flat.
Instructions:
- Foundation Chain:
- Chain 39
- Row 1:
- Work 1 hdc in the 3rd chain from hook
- Continue 1 hdc in each chain across
- Total: 37 stitches
- Turn
- Row 2:
- Chain 2 (counts as first stitch)
- Work 1 hdc in each stitch across (37 stitches)
- Fasten off
Adjusting Size (Important Tip)
If the side piece doesn’t fit around your square:
- Too short → increase starting chain to 44 or 48
- Too long → use fewer chains
- Slight stretching is okay
Goal: The strip should fit 3 sides of your square comfortably
Step 3: Assemble the Bag
Now you will join everything together.
Attach First Square
- Place wrong sides facing
- Align:
- One corner of square
- One end of side piece
- Join using single crochet (sc):
- Work through:
- Back loops of granny square only
- Both loops of side piece
- Work through:
- Continue along 3 sides of the square
- Leave the top open
Attach Second Square
- Align second square with other side of gusset
- Repeat same joining method (sc)
Do NOT fasten off after finishing
Finish Top Edge
- Chain 1
- Work single crochet all around the top opening
- This creates a neat, finished edge
- Fasten off and weave in ends
Step 4: Make the Strap
You can customize the length!
Instructions:
- Foundation Chain:
- Chain to your desired length
(short = handbag, long = crossbody)
- Chain to your desired length
- Row 1:
- 1 hdc in 3rd chain from hook
- 1 hdc in each chain across
- Turn
- Row 2:
- Chain 2
- 1 hdc in each stitch across
- Fasten off
Attach Strap
- Use tapestry needle
- Sew both ends securely to inside of the bag
- Reinforce stitches for durability
Step 5: Finishing Options
Option 1: Add Fabric Lining
- Prevents stretching
- Keeps small items from falling out
- Gives professional finish
Option 2: No Lining (Easy Trick)
Place items inside a:
Ziploc bag before putting them in your purse
- Keeps contents secure
- Maintains airy crochet look
Creative Ideas & Uses
This pattern is super versatile:
- Everyday mini purse (phone, keys, lipstick)
- Gift bag
- Kids’ treasure pouch
- Medical holder (neck pouch)
- Anti-theft travel pouch
Final Tips
- Keep tension consistent for best fit
- Use sturdy yarn if carrying heavier items
- Play with colors to create unique designs
- Make multiple versions—it’s quick and fun!
