
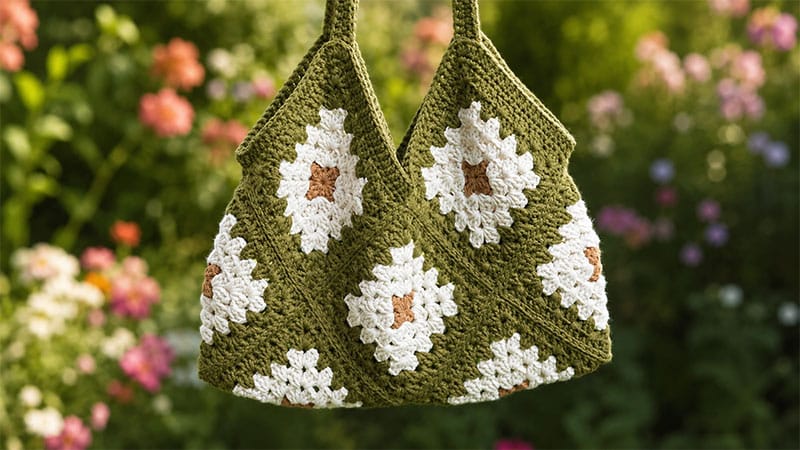
This stylish tote brings together classic vintage charm and modern functionality.
You will be crafting ten individual 6-inch squares and sewing them together to form a roomy, everyday bag.
Bag Dimensions and Details
| Feature | Description |
| Square Size | Approximately 6 inches per square |
| Finished Bag Size | 12 inches wide by 9 inches tall (excluding straps) |
| Total Squares Needed | 10 squares |
| Style | Vintage, Boho-chic, Custom colorways |
Essential Supplies and Terminology
Before diving into the stitches, gather your tools. You can stick to an earthy palette of browns and apricots, or dig into your yarn stash to create a vibrant, customized piece that matches your personal style.
Materials List
- Yarn: 5-ply combed cotton (Recommended shades: Apricot, Light Brown, Dark Brown)
- Crochet Hook: 3.0mm size
- Hardware: Scissors
- Finishing Tools: Yarn needle (tapestry needle)
- Tracking Tools: Stitch markers
Stitch Abbreviations (US Terms)
- ch – Chain
- sl st – Slip stitch
- sc – Single crochet
- hdc – Half double crochet
- dc – Double crochet
- FPtr – Front post treble crochet
- FPtr2tog – Front post treble crochet 2 together
Crocheting the Granny Squares (Make 10)
You will need to construct ten identical squares. Maintain an even tension so that all your pieces measure the same size, which will make assembly much easier.
Round 1: The Center Ring
Create a foundation chain of 4. Connect the last chain to the first chain with a slip stitch to form a closed circle.
Round 2: The First Clusters
Chain 3 (this acts as your very first double crochet). Work 2 more double crochets directly into the center ring, then chain 2 to create your first corner.
Work a set of 3 double crochets into the ring followed by a chain 2. Repeat this sequence two more times. Join the round by slip stitching into the top of your initial chain-3.
Round 3: Expanding the Corners
Slip stitch your way over to the nearest chain-2 corner space. Chain 3, then work 2 double crochets, chain 2, and 3 double crochets all into this exact same corner gap.
Move to the next chain-2 space and work a full corner cluster (3 double crochets, chain 2, 3 double crochets). Repeat this for the remaining two corners and slip stitch to join.
Rounds 4 through 7: Building the Square
To grow your square, you will follow a simple repeating rhythm. Slip stitch to your starting corner. In every corner space of the square, work your standard corner cluster (3 double crochets, chain 2, 3 double crochets). In the flat side spaces between clusters, simply work 3 double crochets. As you add rounds, the number of flat side spaces will increase. Complete 7 full rounds for each square, finishing each round with a slip stitch.
Pro Tip: Place a stitch marker in your chain-2 corner spaces. This helps you easily identify where your corners are, ensuring your square stays perfectly flat as it grows.
Assembling the Bag
Once all ten squares are complete, it is time to build the structure.
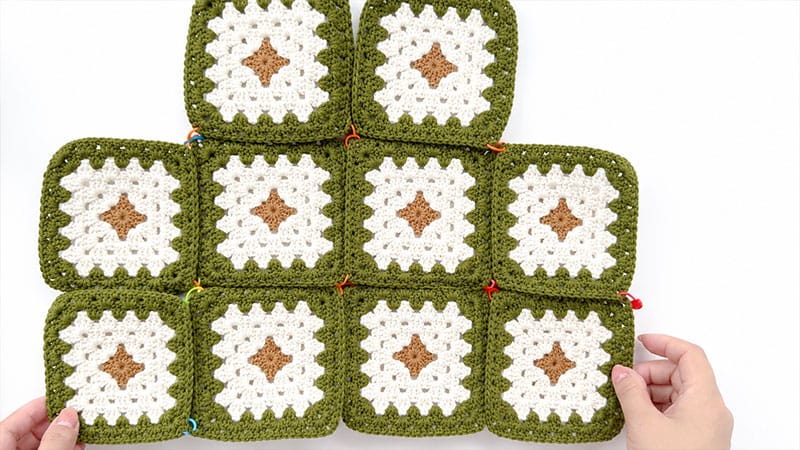
Step 1: Positioning
Arrange your pieces into the shape of a standard 10-square tote. Place the squares you are connecting back-to-back, ensuring the right sides are facing outward.
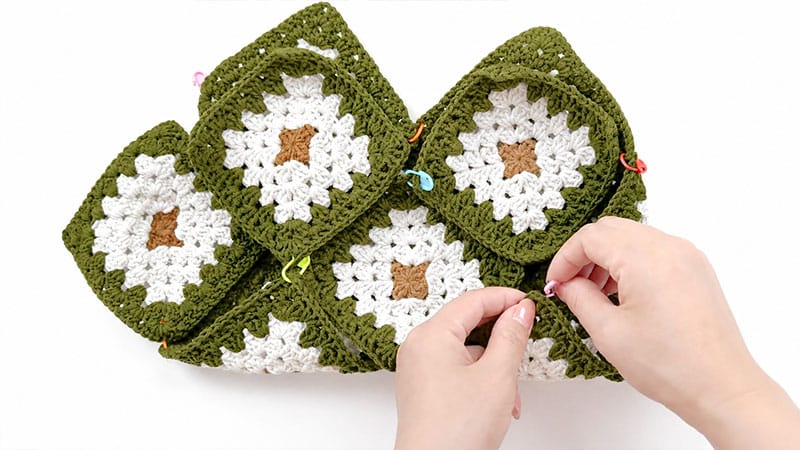
Step 2: Slip Stitch Seaming
Insert your hook into the inner loops (the back loops facing each other) of both squares. Connect them using a slip stitch. Keep your working yarn beneath the fabric as you move along the edge.
Step 3: Navigating Corners
Continue seaming your squares. When you hit a corner intersection where multiple squares meet, only pick up the inner loop of the very first stitch to keep the join from becoming bulky.
Step 4: The Opening
Leave the top edges of your assembled shape completely unsewn to create the opening of your bag.
Step 5: Finishing the Seams
Secure your working yarn with a locking stitch. Snip the yarn and weave the loose tail back and forth through your work several times for a secure finish.
Creating the Edging and Straps
Adding a sturdy border and comfortable straps will give your tote a professional, finished look.
The Top Edging
Round 1: Work single crochets around the entire top opening. Place 3 single crochets into the sharp corner points to allow the fabric to turn smoothly. Work evenly spaced single crochets along the flat edges. Join with a slip stitch.
Round 2: Chain 3 (counts as a double crochet) and work double crochets around the entire border. Just like the previous round, place 3 double crochets in the corner peaks to maintain the shape. Slip stitch to finish.
Crafting the Straps (Make 2)
Step 1: Chain a length appropriate for your shoulder strap (roughly 110 chains).
Step 2: Place a half double crochet increase into the third chain from your hook.
Step 3: Work exactly 108 half double crochets down the length of the chain.
Step 4: Place 3 half double crochets into the very last stitch to smoothly curve around the bottom of the chain.
Step 5: Work 109 half double crochets up the opposite side of the foundation chain.
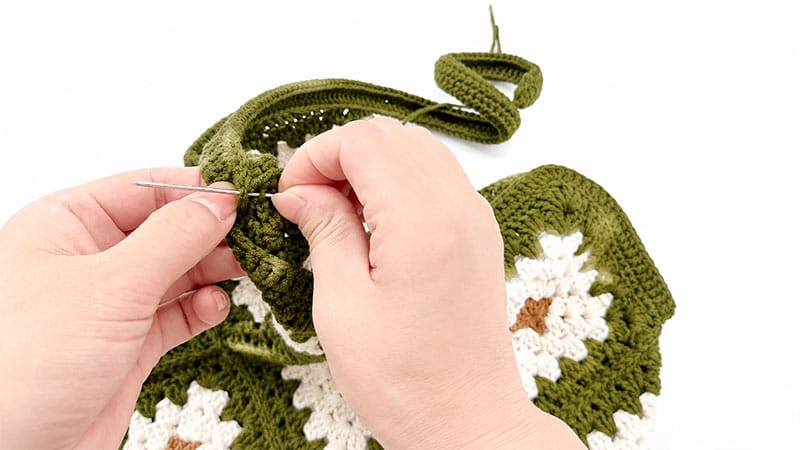
Step 6: Slip stitch to close the strap. Cut the yarn, leaving a generous 12-inch tail.
Step 7: Use your yarn needle and the long tails to securely sew the straps to the highest points of your bag’s body. Weave in all remaining ends.
Long-Term Care Guide
Handmade items require a little extra love to stay beautiful. Follow these guidelines to protect your work.
Routine Maintenance
Use a soft-bristled garment brush to lightly dust the bag after taking it out. Avoid brushing against abrasive surfaces (like brick or velcro) while wearing it, and try not to overload the bag with heavy groceries or books, as this can stretch the combed cotton fibers.
Washing Your Bag
Fill a clean sink with cool water and a dash of mild, wool-safe detergent. Press the bag gently under the water so the soap penetrates the fibers.
Never wring, scrub, or twist the material. Rinse under cool water until it runs clear. Lay the bag completely flat on a dry towel, reshape the squares gently with your hands, and allow it to air dry away from direct sunlight.
Storage
Store your tote in a breathable cotton bag or pillowcase rather than a sealed plastic bin. Lay it flat or stand it up gently. To help it retain its shape during the off-season, stuff the interior with acid-free tissue paper. Adding a small lavender sachet will naturally repel insects and keep the cotton smelling wonderful.
