
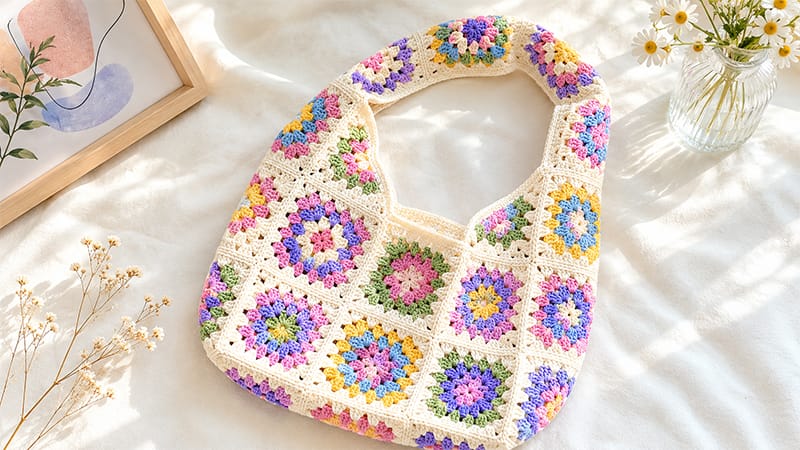
This retro-modern market bag is as functional as it is beautiful. Built from individual geometric motifs, it expands perfectly to hold your daily essentials while maintaining its structural integrity.
- Individual Square Size: 4″ x 4″ (10 cm×10 cm)
- Total Motifs Required: 25 Regular Squares + 4 Triangle Squares = 29 total
- Finished Dimensions: Approximately 5.5″ wide × 17.7″ tall (14 cm×45 cm)
- Bag Interior Depth: 9″ (23 cm)
The Summer Palette Inspiration
While you can use any color story you love, this pattern features a playful, sunny combination:
- Primary Border & Joining: Sky Blue (creates a fresh, cohesive frame)
- Structure & Accent: Navy Blue (adds depth and modern contrast)
- Bright Highlights: Soft Pink & Sunny Yellow (for pops of joy)
- Soft Neutral: Cream/Apricot (balances and blends the palette together)
Tools and Materials
- Yarn: Loopara 5-ply combed milk cotton yarn (or any Sport/Baby weight #2 premium cotton).
- Why cotton? It offers incredible stitch definition, won’t stretch out drastically under weight, and is fully machine washable.
- Hook Size: 3.0 mm (US C/2 or D/3) – Using a slightly smaller hook ensures tight, dense stitches so small items won’t slip through the gaps.
- Notions: Sharp embroidery scissors, a blunt-tipped tapestry needle for assembly, and stitch markers.
Pattern Abbreviations (US Terms)
- ch: Chain
- st / sts: Stitch / Stitches
- sl st: Slip stitch
- sc: Single crochet
- dc: Double crochet
- cl: Cluster (3 dc worked into the same space)
- dec: Decrease (sc2tog)
- sp: Space (the gap created by chains in previous rounds)
Step-by-Step Crochet Instructions
1. The Regular Granny Square (Make 25)
Note: To create a dynamic look, change yarn colors after every round or every two rounds using a seamless color change technique.
[Round 6: 4 clusters per side]
[Round 5: 3 clusters per side]
[Round 4: 2 clusters per side]
[Round 3: 1 cluster per side ]
[Round 2: Foundation Corners ]
[Round 1: Center Ring        ]
- Round 1 (The Base): Ch 4. Insert your hook into the very first chain made and work a sl st to form a tight center ring.
- Round 2: Ch 3 (this acts as your first dc here and throughout). Work 2 dc into the center ring, ch 2. *Work 3 dc into the ring, ch 2.* Repeat from * to * 2 more times. Join with a sl st to the 3rd chain of your starting ch-3. (You will have 4 distinct 3-dc clusters separated by 4 corner ch-2 spaces).
- Round 3: Sl st across the tops of the next 2 dc sts to reach the first ch-2 corner pocket. Sl st into the corner space. Ch 3, 2 dc, ch 2, 3 dc all in that same corner space (First corner built). *Ch 1, skip the next 3 dc, then work (3 dc, ch 2, 3 dc) into the next ch-2 corner space.* Repeat from * to * 2 more times. Ch 1, join with a sl st to the top of the starting ch-3.
- Round 4: Sl st through to the nearest corner ch-2 space. In the corner: ch 3, 2 dc, ch 2, 3 dc. *Ch 1, work 3 dc into the ch-1 side space, ch 1. In the next corner space, work (3 dc, ch 2, 3 dc).* Repeat from * to * around. End with a ch 1 and sl st to the top of the starting ch-3.
- Round 5: Sl st through to the corner ch-2 space. In the corner: ch 3, 2 dc, ch 2, 3 dc. *[Ch 1, 3 dc in the next side space] twice, ch 1. Work (3 dc, ch 2, 3 dc) in the corner space.* Repeat from * to * around. End with a ch 1 and sl st to the top of the starting ch-3.
- Round 6 (Final Border Round): Sl st through to the corner ch-2 space. In the corner: ch 3, 2 dc, ch 2, 3 dc. *[Ch 1, 3 dc in the next side space] 3 times, ch 1. Work (3 dc, ch 2, 3 dc) in the corner space.* Repeat from * to * around. End with a ch 1, sl st to the top of the starting ch-3. Cut yarn, fasten off, and weave in all loose tails securely.
2. The Triangle Half-Square (Make 4)
These triangles are crucial for creating the flat upper rim and structured base of your market tote.
- Round 1: Form a magic loop. Ch 3 (counts as 1 dc), ch 3 (corner space), work 3 dc into the magic loop, ch 3 (second corner), work 1 final dc into the loop. Gently pull the yarn tail to close the ring into a semi-circle. Fasten off this color.
- Round 2: Secure your next color choice to the top of the starting ch-3 from Round 1. Ch 3, ch 3, work 3 dc into that very first ch-3 corner space. Ch 1. In the next ch-3 space, work a full corner: (3 dc, ch 3, 3 dc). Ch 1. In the final dc space, work (3 dc, ch 3, 1 dc). Fasten off.
- Round 3: Secure a new color to the first edge dc. Ch 3, ch 3, 3 dc in the first ch-space. Ch 1, 3 dc in the next ch-1 side space, ch 1. In the central point corner, work (3 dc, ch 3, 3 dc). Ch 1, 3 dc in the side space, ch 1. In the final space, work (3 dc, ch 3, 1 dc). Fasten off.
- Round 4: Attach your next color to the edge dc. Ch 3, ch 3, 3 dc in the first space. *[Ch 1, 3 dc in the next side space] twice, ch 1. Work (3 dc, ch 3, 3 dc) into the center point corner. Repeat the side clusters symmetrically down the opposite edge, ending with (3 dc, ch 3, 1 dc) in the last stitch. Fasten off.
- Round 5: Attach your final border color to the edge dc. Ch 3, ch 3, 3 dc in the first space. *[Ch 1, 3 dc in the next side space] 3 times, ch 1. Work (3 dc, ch 3, 3 dc) into the center point corner. Mirror the side clusters down the remaining edge, ending with (3 dc, ch 3, 1 dc) in the final stitch. Fasten off and weave in ends.
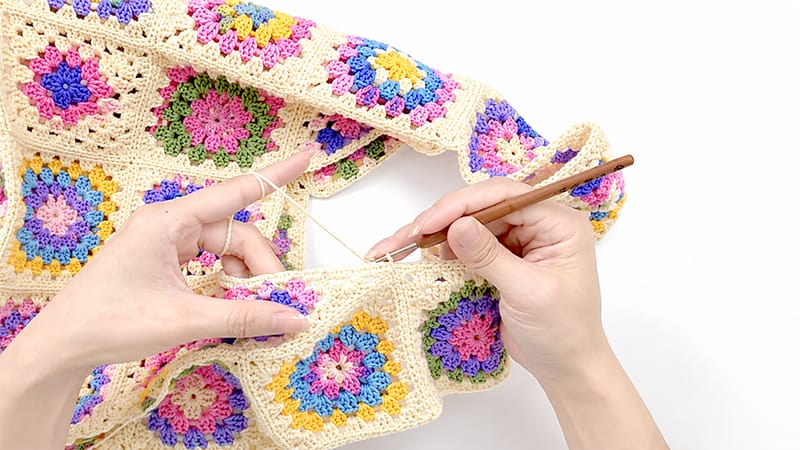
Bag Assembly & Construction
To transform flat squares into a 3D tote bag, you will lay out your pieces in a diamond grid formation, sewing them together using an inside roll stitch (whipstitching through the back loops only for a clean, flat seam).
          [T1]        [T2]         <-- Triangle squares level the top rim
         /[S1]\[S2]/  \[S3]/
       /[S4]\[S5]\[S6]/  \[S7]/
     /[S8]\[S9]\[S10]\[S11]/       <-- Middle body panels
     \ [S12]\[S13]\[S14]/
       \ [S15]\[S16]/
            [Base]                 <-- Bottom structure (remaining squares)
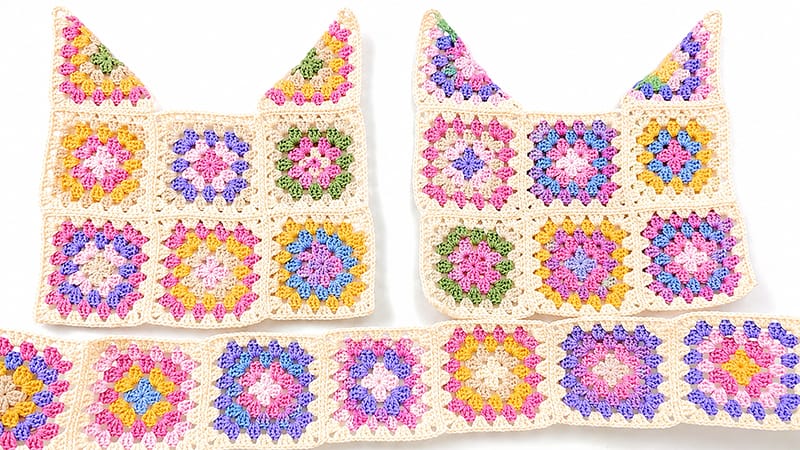
Layout and Body Assembly
- Layout: Arrange your squares diagonally on a flat surface. You will group them into three primary sections: a front panel, a back panel, and a bottom/side gusset band. Use the 4 triangle squares at the top opening of the bag to create straight, horizontal top borders.
- Seaming: Place matching motifs with their right sides facing each other. Using a tapestry needle threaded with your border-colored yarn (Sky Blue), pass through the inner loops (back loops) of both pieces. Stitch consistently from corner to corner.
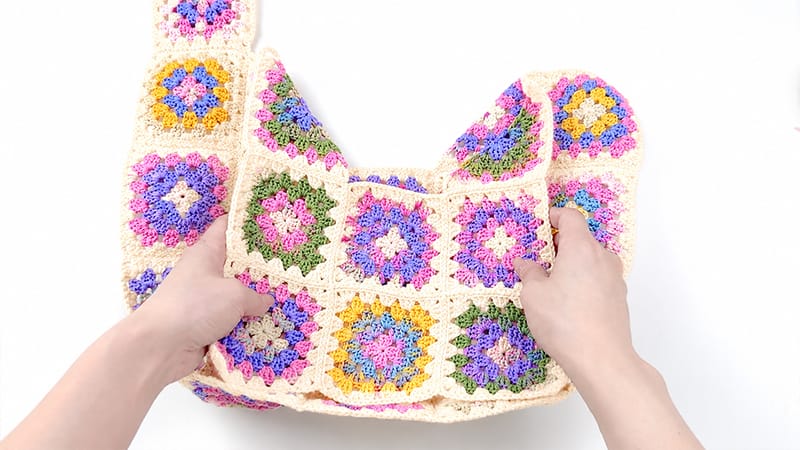
- Constructing the Core: Join the front and back panel grids together by attaching the long strip of bottom and side squares. This wraps around the lower half, instantly turning your flat panels into a deep, functional bag bucket.
Crafting and Anchoring the Straps
- Align the handles directly with the peak points of the top triangles.
- With the wrong sides facing out, whipstitch the base of the strap across three full granny squares along the top edge of the bag frame.
- Repeat this reinforce-stitch step on the opposite side to balance the weight distribution when the bag is fully loaded.
Finishing Edges & Trim
To give the top rim and handles a polished, retail-ready finish, work a structural single crochet border around the entire opening.
- Round 1: Join your border yarn at any seam along the top rim. Work 3 sc into every ch-space across the granny squares. When you reach the valleys or inner drop corners where squares meet, work an sc decrease (sc2tog) to prevent the fabric from bowing or flaring out.
- Round 2: Sc in each stitch around. When reaching the outer peaks of the bag, work 3 sc directly into a single stitch (a 3-sc cluster) to create crisp, clean points.
- Rounds 3–4: Repeat the exact placement of Round 2 along the inner interior lines of the handles and bag opening to reinforce the straps against stretching. Fasten off.
Care, Cleaning, and Longevity
Because milk cotton is highly resilient, keeping your tote pristine is easy with proper maintenance:
Pro-Tip for End Weaving: To ensure your bag never unravels at the grocery store, weave your yarn tails in three alternating directions (left, right, and back left) through the densest parts of the dc clusters.
- Routine Maintenance: Turn the bag upside down and give it a firm shake after shopping trips to dislodge debris. If a thread pulls loose, use a small crochet hook to pull it through to the inside of the bag—never snip it!
- The Wash Cycle: Submerge the bag in lukewarm water mixed with a mild, delicate soap. Squeeze the suds through gently without scrubbing or twisting the fabric.
- The Color Secret: Add a single tablespoon of plain white vinegar to your final rinse water; this locks in the pigments and keeps your pinks, yellows, and blues vibrant for years.
- Drying: Lay the bag flat on a clean towel. Reshape the squares into perfect 4-inch alignments while damp, and allow it to air-dry completely away from direct sunlight.
