
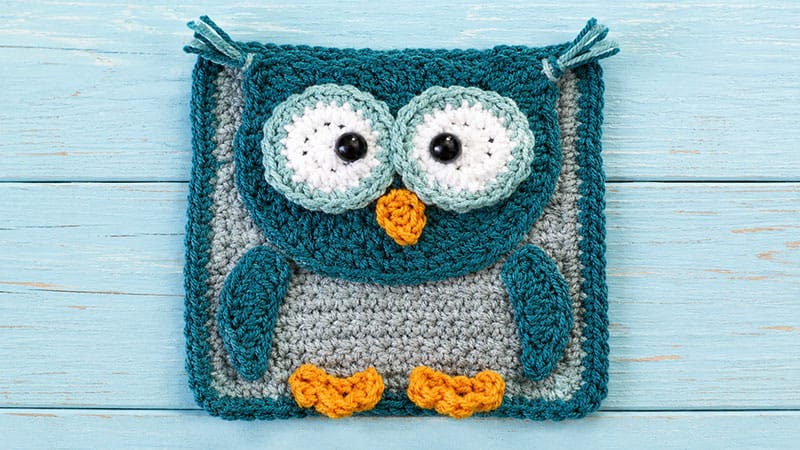
Embrace the cozy vibes of autumn with this delightful Owl Square, originally designed as the 10th installment of a year-long animal-themed crochet-along.
Featuring a textured backdrop and a charmingly detailed owl with feathered-fringe ears, intricate wings, and a cute little beak, this pattern is incredibly versatile.
While initially intended to be joined into a reversible blanket, these squares can easily be adapted into whimsical throw pillows, cozy scarves, or individual coasters.
It is a highly beginner-friendly project that relies on basic stitches and simple shaping, allowing you to whip one up in just an hour or two.
What You’ll Need
Yarn & Tools
- Worsted Weight Yarn (Size 4): You will need four colors—a neutral beige/cream for the background backdrop, a rich brown for the owl’s body, a bright gold for the beak and feet, and a classic white for the eyes.
- Crochet Hook: Size H/8 (5.00 mm) or whatever size is needed to achieve your preferred tension.
- Tapestry Needle: For weaving in ends and assembling the pieces.
Notions (Optional)
- Safety Eyes: One pair of 12 mm or $15 mm black plastic safety eyes. Alternatively, you can use black yarn to embroider sleepy or open eyes if making this for an infant.
Step-by-Step Pattern Instructions
1. The Backdrop Square
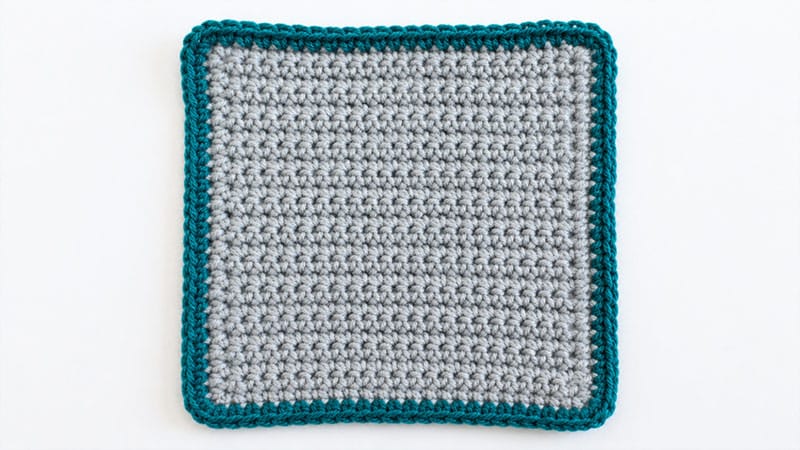
Using your neutral beige yarn, create the base canvas for your owl.
- Foundation: Chain 21.
- Row 1: Insert hook into the second chain from your hook and work a single crochet (SC). Continue to SC in every chain across to the end. Chain 1 and turn your work. (20 stitches)
- Rows 2–23: SC in every stitch across the row. Chain 1 and turn at the end of each row.
- Border Base: After completing Row 23, do not fasten off. Work a row of SC evenly down the three remaining raw edges of your square, placing 2 chains in each corner to help it turn smoothly.
- Border Finish: Drop the beige yarn and join your brown yarn; fasten off the beige. Work one SC into every stitch around all four sides of the square, placing exactly 2 SC into each corner stitch to keep the square flat. Join with a slip stitch, fasten off, and weave in your ends.
2. The Owl’s Head & Body
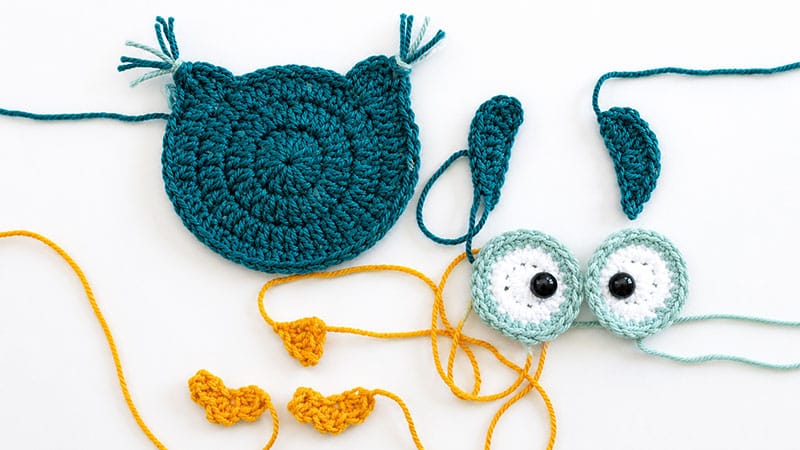
Using your brown yarn, create the circular base for the owl’s head, which incorporates shaped ears.
- Round 1: Form a magic ring. Chain 2 (does not count as a stitch), then work 12 double crochets (DC) into the ring. Pull the ring tight, join with a slip stitch to the first DC, and chain 2. (12 DC)
- Round 2: Place 2 DC into every stitch around. Join with a slip stitch, chain 2. (24 DC)
- Round 3: Work 2 DC into the first stitch, then 1 DC into the following stitch. Repeat from * to * all the way around. Join with a slip stitch, chain 2. (36 DC)
- Round 4 (Shaping the Ears): DC in the first 5 stitches, half double crochet (HDC) in the next 5 stitches, SC in the next 5 stitches, HDC in the next 5 stitches, DC in the next 5 stitches.
- First Ear: In the next stitch, work (1 DC, 2 treble crochets [TC], 1 DC), then chain 2, and slip stitch back into the same stitch.
- Top of Head: Slip stitch across the next 9 stitches.
- Second Ear: In the final stitch, work (1 DC, 2 TC, 1 DC). Join with a slip stitch to the very first DC of the round.
- Finishing: Fasten off, leaving a long yarn tail for sewing the head to the main square.
- Ear Tuft Fringe: Cut two 8-inch strands of beige yarn and two 8-inch strands of brown yarn. Fold them in half, use your hook to pull the loops through the top point of an ear, and pull the tails through the loop to create a fringe tassel. Repeat for the second ear and trim neatly.
3. The Big Owl Eyes (Make 2)
Start with your white yarn.
- Round 1: Form a magic ring. Chain 1, work 10 SC into the ring. Pull tight, join with a slip stitch, chain 1. (10 SC)
- Round 2: Place 2 SC into every stitch around. (20 SC)
- Round 3: Drop the white yarn and join the beige yarn. Chain 1, then work 1 SC into every stitch around. Join with a slip stitch and fasten off, leaving a long tail for sewing.
- Assembly: Secure a 15mm plastic safety eye into the center of each white circle. Position the completed eyes side-by-side onto the brown head and stitch them down securely using your yarn tail.
4. The Gold Beak
Using your gold yarn.
- Row 1: Chain 4.
- Row 2: SC in the second chain from your hook, HDC in the next chain, and DC in the final chain. Fasten off, leaving a tail.
- Assembly: Center the triangular beak right between and slightly beneath the two eyes, then stitch it down securely.
5. Side Wings
Using your brown yarn, you will make two asymmetrical wings to sit nicely on either side of the body.
Left Wing:
- Chain 8.
- Working back down the chain, starting at the 3rd chain from your hook, place 2 DC in that first chain, 2 DC in the next chain, then 1 DC, 1 HDC, 1 SC, and a slip stitch in the remaining chains. Fasten off, leaving a tail.
Right Wing:
- Chain 7.
- Slip stitch into the 2nd chain from your hook, then work 1 SC, 1 HDC, 1 DC, and 2 DC in the subsequent chains. In the very last chain, work (2 DC + chain 2 + slip stitch) to round it out. Fasten off, leaving a tail.
6. Cute Little Feet (Make 2)
Using your gold yarn.
- Row 1: Chain 4.
- Row 2: In the second chain from your hook, work (2 DC + 1 slip stitch) all into that single chain space. In the next chain, work another cluster of (2 DC + 1 slip stitch). In the final chain, work a third cluster of (2 DC + 1 slip stitch) to create a three-toed foot. Fasten off, leaving a tail for assembly.
Final Assembly
       [ Backdrop Square ]
     -----------------------
     |        (Tufts)      |
     |       /|     |\     |
     |      (  O   O  )    |  <-- Head & Face
     |       \___▼___/     |
     |     /           \   |
     |  Wing   [Body]  Wing|  <-- Wings on sides
     |         W   W       |  <-- Feet at bottom
     -----------------------
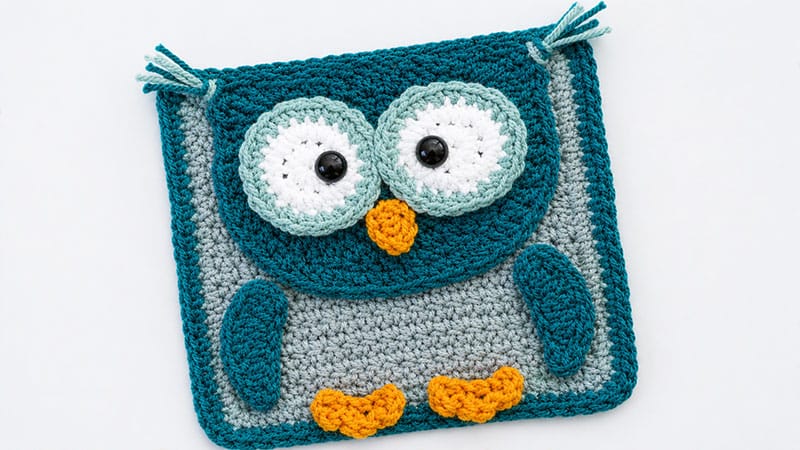
- Attach the Head: Position the completed owl head onto the upper-middle section of your beige backdrop square. Use the long brown yarn tail to sew it down flat.
- Attach the Wings: Place the left and right wings just below the head on their respective sides, angling them slightly outward, and stitch them in place.
- Attach the Feet: Position the two gold feet at the very bottom of the owl’s body area, sewing them down securely.
- Final Polish: Weave in any remaining loose yarn tails on the back of your square. Block your finished square if necessary to achieve crisp, straight edges!
