
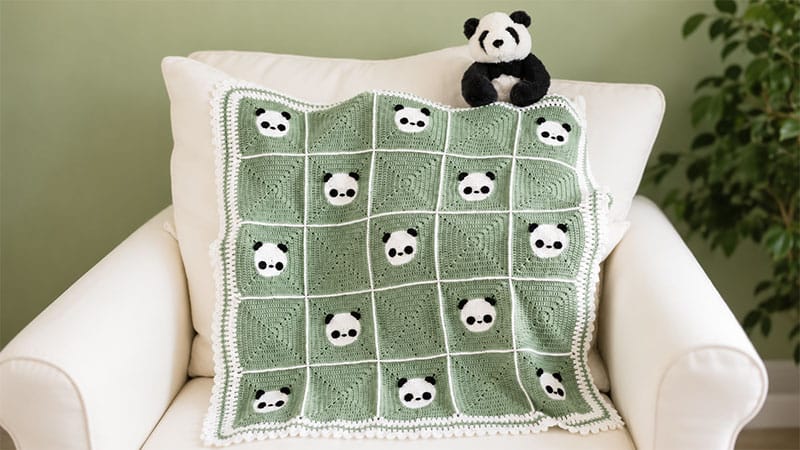
Bring a touch of whimsical wildlife to your next project with this adorable Panda Granny Square. This design begins as a seamless, circular panda face worked in continuous spirals to prevent any visible seams.
It then cleverly transforms into a crisp, neat square by utilizing varying stitch heights like extended double crochets and trebles. Perfect for baby blankets, accent pillows, or nursery decor, this square is as fun to make as it is delightful to look at.
Project Materials & Tools
- Yarn: Category 3 (DK / 8-ply) lightweight cotton or bamboo-blend yarn. You will need three colors: White (Base face & backing), Blue (Squaring borders), and Black (Ears, eyes, and nose details).
- Crochet Hooks: A 3.0mm hook for the main square, and an optional 3.5mm hook if you prefer a looser tension for joining later.
- Notions: A reliable stitch marker (essential for spiral rounds), a tapestry needle for embroidery and weaving, and sharp scissors.
Key Stitch Guide
- Extended Double Crochet (EXdc): Yarn over, insert hook and pull up a loop (3 loops on hook). Yarn over and pull through the first loop only (3 loops remain). Yarn over and pull through two loops, then yarn over and pull through the final two loops.
- Continuous Rounds: Do not slip stitch to join at the end of these rounds. Instead, carry directly on into the first stitch of the next round, moving your stitch marker up as you go.
Step-by-Step Square Instructions
Part 1: The Panda Face Base
Using White Yarn.
- Round 1: Create a magic ring and place 6 sc into it. Do not join the round; place your marker in the very first stitch.
[6 sts](Alternative: Ch 2, then work 6 sc into the second chain from your hook). - Round 2: Work 2 sc into every stitch around.
[12 sts] - Round 3: Work 2 sc in the next stitch, followed by 1 sc in the following stitch. Repeat this sequence 6 times total.
[18 sts] - Round 4: Work 1 sc, then 2 sc in the next stitch. Work 1 sc in each of the next 2 stitches, then 2 sc in the next. Repeat from * 5 times. Finish with 1 sc in the last stitch.
[24 sts] - Round 5: Work 2 sc in the next stitch, then 1 sc in each of the next 3 stitches. Repeat this pattern 6 times total.
[30 sts] - Round 6: Work 1 sc in the first 2 stitches, 2 sc in the next. Work 1 sc in each of the next 4 stitches, 2 sc in the next. Repeat from * 5 times. Finish with 1 sc in the last 2 stitches.
[36 sts] - Round 7: Work 2 sc in the next stitch, then 1 sc in each of the next 5 stitches. Repeat this pattern 6 times total.
[42 sts] - Round 8: Work 1 sc in the first 3 stitches, 2 sc in the next. Work 1 sc in each of the next 6 stitches, 2 sc in the next. Repeat from * 5 times. Finish with 1 sc in the last 3 stitches. Securely slip stitch to the first stitch of the round to finish the circle. Fasten off and secure your yarn ends.
[48 sts]
Part 2: Squaring it Off
Switch to Blue Yarn. All stitches in Round 9 are worked into the Back Loops Only (BLO).
- Round 9: Join your yarn to the BLO of the last stitch. Ch 3 (counts as a dc). 1 dc in the next 2 sts, 1 EXdc in the next 2 sts, then work your first corner:
(2 tr, ch 2, 2 tr)all in the next stitch.- Side Repeat: *1 EXdc in the next 2 sts, 1 dc in the next 7 sts, 1 EXdc in the next 2 sts, then work a corner stitch
(2 tr, ch 2, 2 tr)in the next stitch.* Repeat this side configuration twice more. - To Finish: 1 EXdc in the next 2 sts, 1 dc in the final 4 sts. Slip stitch to the top of your starting ch-3 to close.
[15 stitches per side, 4 corner spaces]
- Side Repeat: *1 EXdc in the next 2 sts, 1 dc in the next 7 sts, 1 EXdc in the next 2 sts, then work a corner stitch
- Round 10: Ch 3, 1 dc in the next 6 sts. *Work
(2 dc, ch 2, 2 dc)In the corner chain space, then 1 dc in the next 15 sts.* Repeat from * twice more. In the final corner space, work(2 dc, ch 2, 2 dc), then 1 dc in the remaining 8 sts. Slip stitch to join.[19 stitches per side] - Round 11: Ch 3, 1 dc in the next 8 sts. *Work
(2 dc, ch 2, 2 dc)in the corner space, then 1 dc in the next 19 sts.* Repeat from * twice more. In the final corner, work(2 dc, ch 2, 2 dc), then 1 dc in the remaining 10 sts. Slip stitch to join.[23 stitches per side] - Round 12: Ch 3, 1 dc in the next 10 sts. *Work
(2 dc, ch 2, 2 dc)In the corner space, then 1 dc in the next 23 sts.* Repeat from * twice more. In the final corner, work(2 dc, ch 2, 2 dc), then 1 dc in the remaining 12 sts. Fasten off with a clean invisible join.[27 stitches per side]
Adding the Facial Features
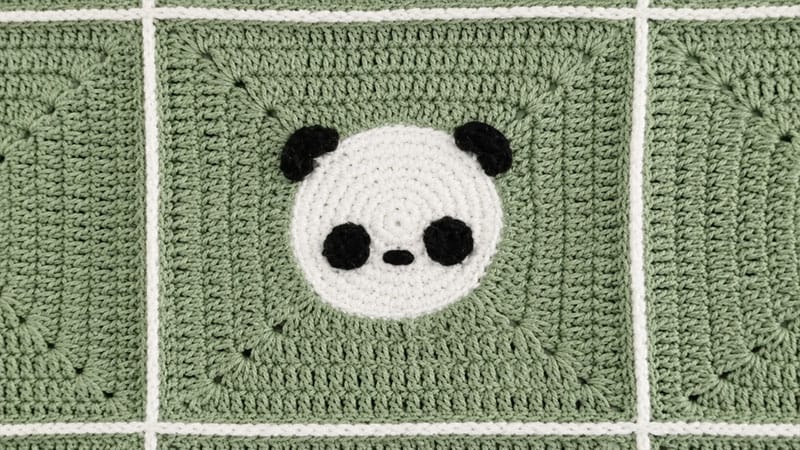
The Ears (Make 2)
Using Black Yarn. You will be attaching these to the unworked front loops left behind from Round 9, aligning them symmetrically with the top corners.
- Row 1: Join yarn to the designated front loop. Ch 1, work 3 sc in that same loop. In the very next front loop, work
(3 sc, sl st). Turn your work. - Row 2: Ch 1, skip two chains, work 1 sc into each of the next 6 stitches, then slip stitch back down into the base of Row 1. Cut your yarn, leaving an 8-inch tail to weave through to the back of the square.
The Eyes (Make 2)
Using Black Yarn.
- Form a magic ring. Work 10 sc inside the ring, then slip stitch to the first sc to close the circle. Fasten off, leaving a generous tail for sewing.
Assembly & Finishing
- Nose Embroidery: Before attaching the eyes, use a strand of black yarn to embroider a small triangular nose over two stitches, positioned between Rounds 3 and 4 from the center of the face. Tie off securely on the back.
- Attaching Eyes: Position an eye patch on either side of the nose and sew it firmly in place using your yarn tails.
- Optional Clean-Finish Backing: To completely hide the messy yarn tails on the back of your panda face, crochet a separate white circle by repeating Rounds 1–8 of the face pattern. Place it over the back of the panda face (wrong sides facing together) and whipstitch it into place.
