
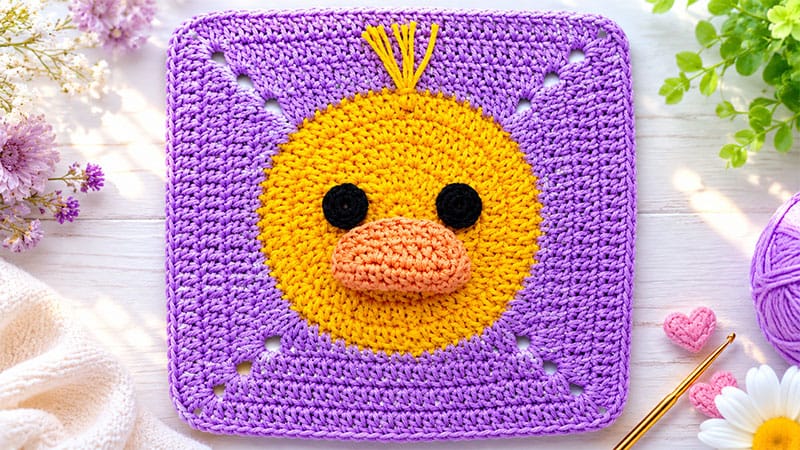
Bring a splash of whimsical charm to your next crochet project with this delightful Duckling Granny Square!
Featuring a bright yellow duckling face nestled inside a crisp, contrasting square frame, this motif boasts a wonderfully silly, anime-inspired expression.
It is the perfect, relaxing project to work on between larger undertakings. Stitch a collection of these to assemble a playful baby blanket, create unique nursery wall art, or design eye-catching throw pillows.
Project Specifications
- Skill Level: Easy
- Finished Size: Approximately 6″ x 6″ (15 cm x 15 cm)
- Gauge: 22 stitches and 12 rounds = 4″ x 4″ (10 cm x 10 cm) utilizing double crochet
- Total Yardage: 60–62 yards (55–58 meters)
Materials Needed
- Yarn: Lightweight cotton yarn (such as DMC Happy Cotton, 20g/47yd per skein). You will need 1 skein of Yellow, 1 skein of Blue, and small scraps of Peach and Black.
- Crochet Hook: Size D/3 (3.00 mm)
- Notions: Tapestry needle for assembly and weaving in ends
Abbreviations (US Terms)
- ch: chain
- st(s): stitch(es)
- sl st: slip stitch
- sc: single crochet
- hdc: half double crochet
- dc: double crochet
- tr: treble crochet
Step-by-Step Instructions
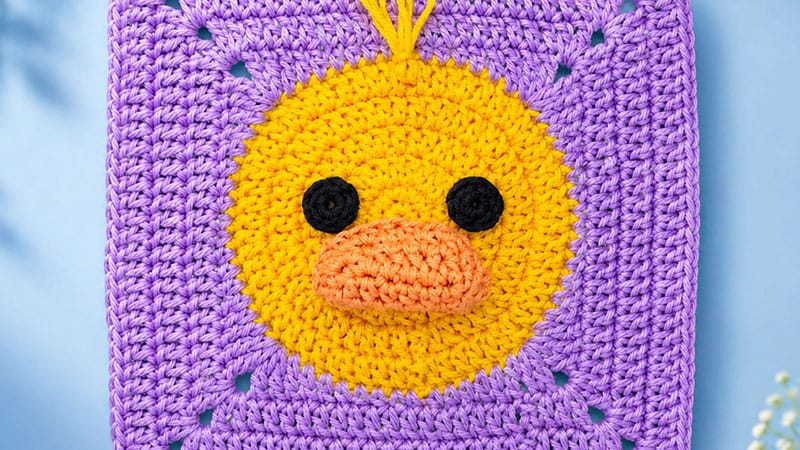
1. The Yellow Center (Duckling Head)
Note: The initial ch-1 counts as a single crochet, and an initial ch-3 counts as a double crochet throughout this section.
- Round 1: Create a magic ring. Chain 1, then work 7 sc into the ring. Join with a sl st to the first chain. (8 sts)
- Round 2: Ch 1, work 1 sc in the same base stitch. Work 2 sc into every remaining stitch around. Join with a sl st to the first chain. (16 sts)
- Round 3: Ch 3, work 1 dc into that same base stitch. Work 1 dc in the next stitch, then 2 dc in the following stitch. Repeat from * to * all the way around, finishing with 1 dc in the last stitch. Sl st into the top of your starting ch-3. (24 sts)
- Round 4: Ch 3, work 1 dc into that same base stitch. Work 1 dc in the next stitch, then 2 dc in the following stitch. Repeat from * to * around. Sl st into the top of your starting ch-3. (36 sts)
- Round 5: Ch 3, work 1 dc into that same base stitch. Work 1 dc in each of the next 2 stitches. Work 2 dc in the next stitch, then 1 dc in each of the next 2 stitches. Repeat from * to * around. Sl st into the top of your starting ch-3. (48 sts)
- Round 6: Ch 3, work 1 dc into that same base stitch. Work 1 dc in each of the next 3 stitches. Work 2 dc in the next stitch, then 1 dc in each of the next 3 stitches. Repeat from * to * around. Sl st into the top of your starting ch-3. (60 sts)
Fasten off the yellow yarn and secure your ends.
2. Squaring the Circle (Blue Frame)
Attach your blue yarn with a slip knot. Count 8 stitches past where you fastened off your yellow round, and join your blue yarn in that 8th stitch.
- Round 7 (Squaring Round):
- First Corner: (Ch 4 [counts as tr], 1 tr, ch 2, 2 tr) all in the very first stitch.
- Side 1: 1 tr in next st, 1 dc in each of the next 2 sts, 1 hdc in each of the next 3 sts, 1 sc in each of the next 2 sts, 1 hdc in each of the next 3 sts, 1 dc in each of the next 2 sts, 1 tr in next st.
- Next Corner: (2 tr, ch 2, 2 tr) in the next stitch.
- Repeat the Side and Corner sequence 3 more times around. On the final repeat, work the side sequence to the end of the round, then sl st into the 4th chain of your starting ch-4.
- Round 8: Ch 3, 1 dc in the next stitch. (1 dc, 1 tr, ch 2, 1 tr, 1 dc) into the corner ch-2 space. Work 1 dc in every stitch across the side to the next corner. Repeat from * around. Sl st into the top of your starting ch-3.
- Rounds 9 & 10: Ch 3, work 1 dc in each stitch across to the first corner space. (2 dc, ch 2, 2 dc) inside the ch-2 corner space, then 1 dc in each stitch across the side to the next corner. Repeat from * around. Sl st into the top of your starting ch-3.
Fasten off the blue yarn and weave in the loose ends.
3. Face Features
Eyes (Make 2)
Using Black yarn, start with a magic loop. Ch 1 and place 6 sc inside the loop. Join with a sl st to the first chain. Fasten off, leaving a long yarn tail for sewing.
Beak
Using Peach yarn, chain 7.
- Round 1: Ch 1. Working into the second chain from your hook, hdc across the next 5 chains. In the very last chain stitch, work 3 hdc to turn the corner. Now, rotate your piece to work along the opposite side of your initial foundation chain: hdc in each of the next 4 chains, and work 2 hdc into the final chain. Sl st to join to the first chain.
- Round 2: Ch 1. Work 1 hdc in each of the first 6 stitches. Place 3 hdc into the next stitch to make a corner. Work 1 hdc in each of the next 6 stitches, then place 3 hdc into the final stitch. Sl st to join to the first chain.
- Round 3: Ch 1. Work 1 hdc in each of the first 7 stitches, then 3 hdc in the next stitch. Work 1 hdc in each of the next 8 stitches, followed by 3 hdc in the next stitch. Finish with 1 hdc in the last stitch. Sl st to join.
Fasten off, leaving a 6-inch (15 cm) tail for assembly.
Assembly & Finishing
- Position the Beak: Centered on the lower half of the yellow circle, stitch the peach beak securely in place using your yarn tail and a tapestry needle.
- Attach the Eyes: Place the two black eyes slightly above and to the sides of the beak, securing them firmly with their yarn tails.
- Add the Hair Tuft: Cut four separate strands of yellow yarn, each roughly 3 inches (7.5 cm) long. Gather them together, fold the bundle in half, and loop or sew them directly into the top center of the duckling’s head to create a cute, unruly tuft of feathers.
- Final Polish: Weave in any remaining yarn tails on the back of the square, and block your finished project to achieve clean, crisp edges.
