
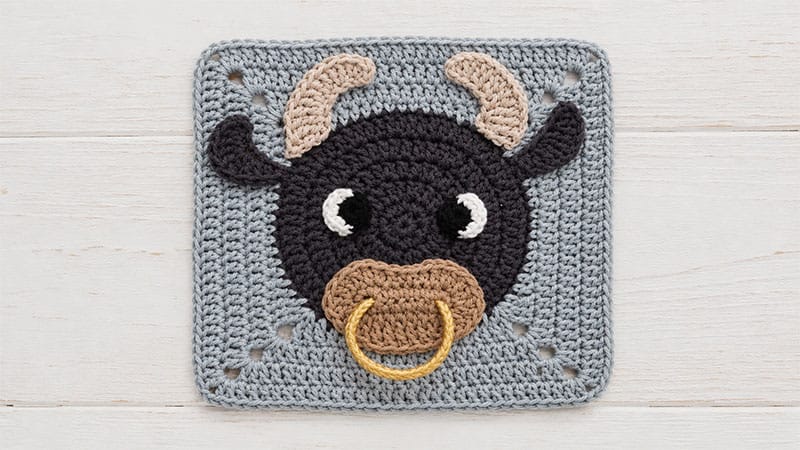
Celebrate the Year of the Ox with this adorable, intermediate-level textured granny square! This design strikes the perfect balance between capturing distinct animal features—like horns, floppy ears, and a classic nose ring—and keeping the assembly straightforward.
It makes a wonderful standalone motif for a festive baby blanket or a fun addition to an animal-themed patchwork project.
You can even swap the brown shades for black and white to easily transform this ox into a sweet pasture cow.
Skill Level: Intermediate
Finished Size: Approx. 6″ x 6″ (15 cm15)
Materials & Tools
- Yarn: Fine-weight cotton yarn (e.g., DMC Happy Cotton, 20g/47 yds per skein)
- Dark Brown (1 skein)
- Light Brown (1 skein)
- Yellow (1 skein)
- Black & White (approx. 1 yard/meter each for details)
- Hook Size: US D / 3.00 mm
- Notions: Tapestry needle for assembly and weaving in ends
Stitch Abbreviations (US Terms)
- ch: chain
- st(s): stitch(es)
- sl st: slip stitch
- sc: single crochet
- hdc: half double crochet
- dc: double crochet
- tr: treble crochet
- hdc2tog: half double crochet 2 together
- dc2tog: double crochet 2 together
- tr2tog / tr3tog: treble crochet 2 / 3 together
Step-by-Step Instructions
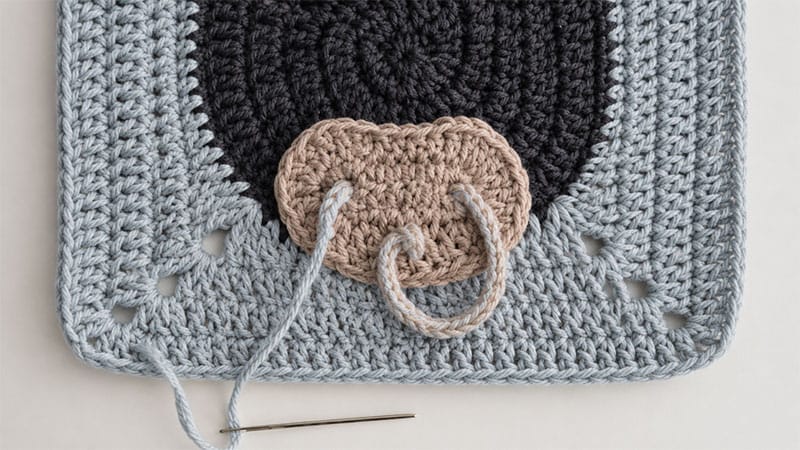
1. Main Base Square (Expanding the Border)
(Note: Start with your preferred granny square base. Below is the final framing row to square off the ox’s facial background.
- Round 8: Chain 3 (counts as your first double crochet), dc into the very next stitch. *Work your corner sequence into the chain-2 space: (1 dc, 1 tr, ch 2, 1 tr, 1 dc). Double crochet evenly across into each stitch until you reach the next chain-2 corner space.* Repeat from * to * 3 more times. Into the final corner space, work (1 dc, 1 tr, ch 2, 1 tr, 1 dc). Double crochet into the remaining stitches until you reach the start of the round. Join with a slip stitch to the top of your initial chain-3. Fasten off.
2. Facial Features & Appliqués
The Snout (Nostrils)
Using Light Brown yarn, chain 7.
- Round 1: Work 5 sc into the second chain from your hook. Single crochet into each of the next 4 chains. In the very last chain, work 5 sc to turn the corner. Working down the opposite side of the foundation chain, sc into each remaining loop to the end. Sl st to the first sc to join.
- Round 2: Ch 3 (counts as dc) and work 1 dc into that same first stitch. Work 2 dc into each of the next 4 stitches. Dc in the next stitch, then hdc into each of the next 3 stitches. Dc in the following stitch, then work 2 dc into each of the next 5 stitches. Treble crochet (tr) into the final 5 stitches. Join with a sl st to the third chain of your starting ch-3. Fasten off, leaving an 8″ (20 cm) tail for sewing.
The Horns
- Right Horn: Using Light Brown, chain 15. Hdc2tog over the second and third chains from your hook. Work a dc2tog across the next stitches a total of 3 times. Finish the horn by working a tr2tog across the remaining stitches 3 times. Fasten off, leaving a 4″ (10 cm) tail.
- Left Horn: Using Dark Brown, chain 7. Work 2 hdc into the second chain from your hook. Work 2 dc into each of the next 3 stitches. Work 2 tr into each of the final 2 stitches. Fasten off, leaving a 4″ (10 cm) tail.
The Ears
- Right Ear: Using Dark Brown, chain 12. Hdc into the third chain from your hook. Work 1 dc2tog, followed by 1 tr3tog. Work another dc2tog, and finish with 1 hdc2tog. Fasten off, leaving a 4″ (10 cm) tail.
- Left Ear: Using Dark Brown, chain 7. Hdc into the third chain from your hook. Work 2 dc into the next stitch, 3 tr into the following stitch, 2 dc into the next stitch, and 2 hdc into the final stitch. Fasten off, leaving a 4″ (10 cm) tail.
Cartoon Eyes (Make 2)
- Round 1 (Pupil): Using Black, create a magic circle. Work 7 sc into the ring, pull tight, and join with a sl st to the first sc. Fasten off, leaving a 4″ (10 cm) tail.
- Round 2 (Eye Highlight): Join White yarn into any stitch from Round 1. Ch 1, then work 2 sc into each of the next 3 stitches. Sl st into the following stitch to create a half-moon crescent effect. Fasten off and weave in the white ends securely.
The Nose Ring
Using Yellow yarn, crochet a standard 5″ (13 cm) I-cord. Cut your yarn, leaving a 4″ (10 cm) tail to assemble the loop later.
Assembly & Finishing
- Placement: Center the light brown snout on the lower half of your granny square base. Arrange the eyes just above the snout. Position the horns at the top corners of the face, placing the ears right beneath them.
- Sewing: Using a tapestry needle and the yarn tails left on your pieces, neatly whipstitch the snout, eyes, horns, and ears securely onto the background square.
- The Ring: Thread the yellow I-cord through the top of the snout piece to mimic a real bull ring. Bring the two ends together to form a circle, sew them together securely with the yarn tail, and hide the seam inside the snout.
- Final Details: Secure all yarn tails on the back of the square, weave them in cleanly, and block your finished square to its final 6″ x 6″ dimensions.
