
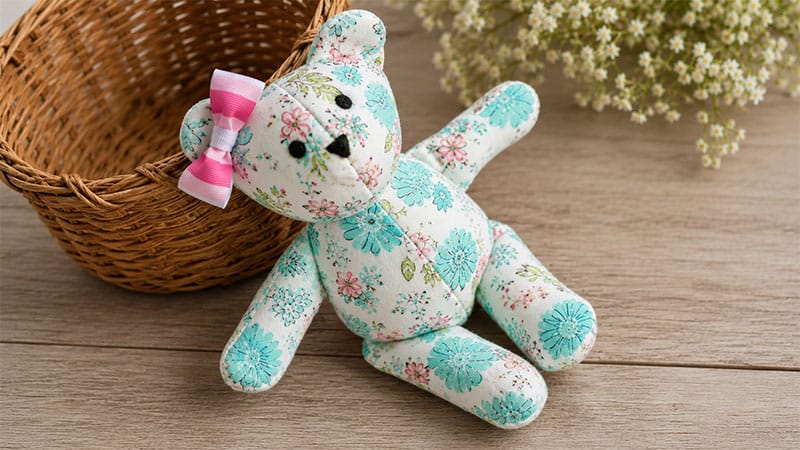
A memory bear is a beautiful way to transform outgrown baby clothes—like a newborn take-home outfit or a favorite onesie—into a cherished keepsake.
This project works best with clothing sizes from 0–3 months and up. Because baby clothing is typically made of stretchy knit fabric, this tutorial includes steps to stabilize the material, ensuring your completed bear holds its shape perfectly.
Crucial Tip Before You Start
Always make a practice bear! Before cutting into a highly sentimental piece of clothing, test your pattern on scrap fabric or an unneeded clothing item. This ensures you understand the sizing, shaping, and construction before making final cuts.
Project Overview
- Finished Size: Approximately 8 inches tall (chubby, cuddly proportions).
- Seam Allowance: Use a strict 1/4-inch seam allowance throughout the project unless otherwise noted.
Tools and Materials Needed
| Category | Items Required |
|---|---|
| Fabric | 1–2 items of baby clothing (onesies, footies, or rompers) |
| Stabilizer | Lightweight, fusible (iron-on) interfacing |
| Tools | Sewing machine, hand-sewing needle, fabric scissors, paper scissors, pinking shears (optional) |
| Notions | Coordinating sewing thread, black embroidery floss |
| Filling & Flair | High-quality polyester fiberfill (stuffing), ribbon (optional) |
| Pattern | A standard 8-inch plush bear sewing pattern |
Step-by-Step Instructions
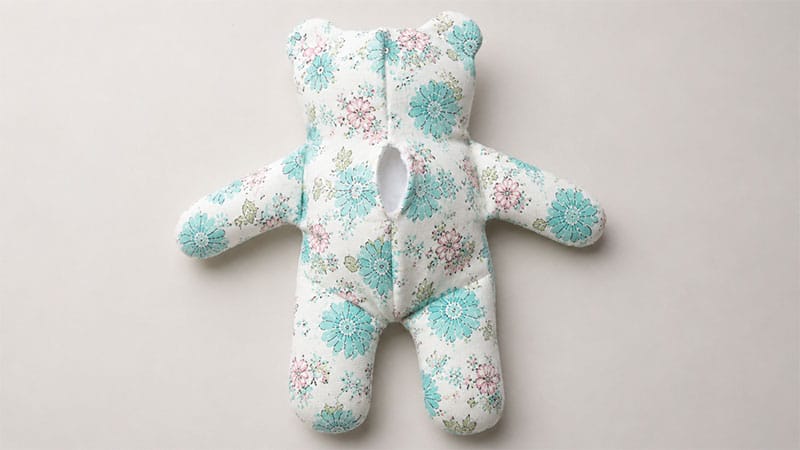
Step 1: Prepping and Cutting the Pieces
- Assess the Clothing: Lay your baby’s clothing flat. If you are using a smaller size (like newborn), you may need to utilize the fabric from the sleeves and legs to fit all your pattern pieces. For larger sizes (6–9 months), the main body panels are usually large enough.
- Handle Directional Prints: If your fabric has a specific pattern direction (like upright animals or text), make sure your pattern pieces are facing the right way before cutting.
- Modify for Separate Arms (If Needed): If your fabric is too small to cut the body and arms as one solid piece, modify your pattern. Add a 1/2-inch length to the arm pieces and cut them separately from the body, leaving a 1/4-inch seam allowance to sew them back on.
- Fuse the Interfacing: Knit fabrics stretch easily, which can distort your bear during stuffing. Iron a lightweight, fusible interfacing onto the wrong side (back) of your fabric pieces before cutting. This stabilizes the fabric and makes it behave like sturdy woven cotton.
- Cut the Pattern: Use your paper scissors for the printed pattern and your fabric scissors to cut out the stabilized fabric pieces.
Step 2: Initial Assembly & Facial Details
- Attach Separate Arms: If you cut the arms separately in Step 1, sew them onto the body panels now using a 1/4-inch seam.
- Sew the Front Seams: Place the two front body pieces right sides together. Stitch from the top of the forehead down to the bottom of the belly.
- Sew the Back Seams: Place the two back body pieces right sides together. Stitch from the back of the head down to the lower back, leaving a 2- to 3-inch opening in the middle of the back for turning and stuffing.
- Embroider the Eyes: Before joining the front and back together, embroider the eyes onto the face. Using black embroidery floss, create satin-stitched eyes. (Note: Embroidered eyes are much safer than plastic safety buttons or loose elements, though this keepsake should still be handled with care.
Step 3: Joining the Bear & Shaping the Ears
- Combine Front and Back: Place your completed front and back panels right sides together, aligning the outer edges. Sew completely around the perimeter of the bear.
- Trim the Seams: To help the curves lie flat when turned, trim the seam allowances. You can clip small notches into the curves, or simply trim around the entire perimeter with pinking shears.
- Turn Right-Side Out: Carefully pull the bear fabric through the open gap you left in the back seam. Use a blunt tool (like a chopstick) to gently push out the curves of the ears, arms, and legs.
- Define the Ears: Flatten the ear areas. Using your sewing machine, sew a straight line directly across the base of each ear from the outer edge inward. Do not try to curve this line; a straight line naturally gives the ears a rounded appearance once the head is stuffed.
Step 4: Stuffing and Hand-Sewing
- Stuff the Extremities: Take small clumps of fiberfill and firmly stuff the paws and feet.
- Stitch the Limbs: To give the bear distinct joints, sew a straight line across the top of the legs and the base of the arms as indicated by your pattern. This keeps the stuffing locked in the limbs and allows them to bend.
- Stuff the Body and Head: Fill the rest of the head and body through the back opening. Pack the stuffing evenly until the bear is plump and holds its shape well.
- Close the Back: Thread a hand-sewing needle and use an invisible ladder stitch (blind stitch) to neatly close the opening on the back of the bear.
Step 5: Finishing Touches
- Define the Neck: To transform your project from a flat shape into a distinct bear, wrap a strand of heavy-duty thread or embroidery floss tightly around the neck area. Pull it taut to indent the neck, knot it securely, and bury the thread tails inside the body. This is the secret to giving your bear a cute, chubby facial structure!
- Embroider the Nose: Satin-stitch a small triangle on the snout using black embroidery floss. Stitching the nose after stuffing allows you to place it perfectly based on the bear’s final shape.
- Accessorize: If desired, stitch a decorative ribbon bow around the bear’s neck or securely sew a small bow onto one of the ears.
Your beautiful, custom memory bear is complete! If you have leftover fabric scraps, you can even stitch together a tiny patchwork blanket to keep in the bear’s arms.
