
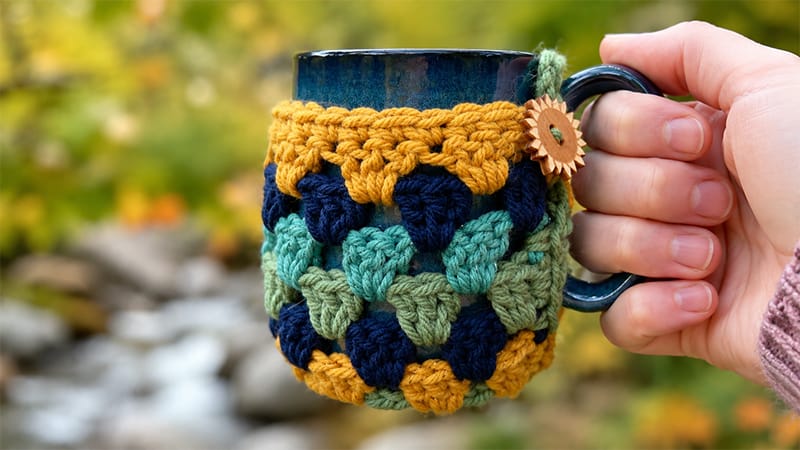
The Retro Granny Stitch Mug Cozy is an advanced-beginner crochet project that blends nostalgia with modern utility.
This design features a fully covered base to protect your surfaces, an open slot for the mug handle, and a simple button attachment.
It is an excellent, quick scrap-busting project that looks wonderful whether worked in a single color or vibrant, alternating stripes.
Gathering Your Materials
- Yarn: Worsted weight yarn (Medium #4) in your choice of colors.
- Hook: 5.5 mm (Size I-9) crochet hook.
- Notions: Yarn needle, sharp scissors, and a 3/4″ to 1″ button.
- Optional: A 2-inch decorative patch or applique to sew onto the front.
Abbreviations & Stitch Guide (US Terms)
- CH: Chain
- SP: Space
- SLST: Slip Stitch
- SK: Skip
- SC: Single Crochet
- DC: Double Crochet
- Granny Cluster: A group of 3 Double Crochets worked into the same space.
Essential Pattern Notes
- Sizing: After finishing Round 2, your circle should measure roughly 3.75 to 4 inches across.
- Adjusting Width: If your mug is wider, simply add a CH 1 or CH 2 between your 3-DC clusters to give the cozy more stretch.
- Turning Chains: The CH 3 at the start of a row/round counts as your first DC throughout.
- Color Changes: If switching colors every row, you can either fasten off your yarn at the end of each row or carry the yarn up the sides. Carrying the yarn is highly recommended because the final border row will completely hide the carried strands!
Step-by-Step Crochet Instructions
Part 1: The Base (Worked in Joined Rounds)
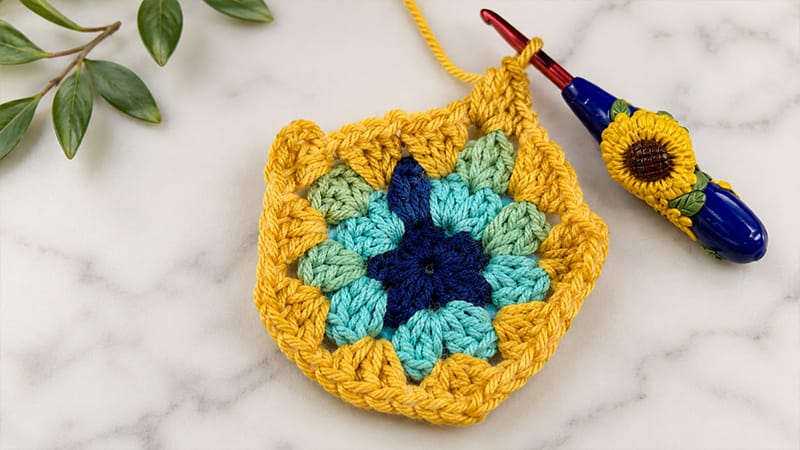
Instead of a magic ring, this project uses a chain foundation to support the dense stitches.
Round 1: CH 4, then SLST into the first chain to create a center ring. CH 3 (counts as 1 DC), work 2 DC into the ring, CH 1. Work 3 DC into the ring, CH 1. Repeat from * to * 3 more times. Join with an SLST to the top of your initial CH 3. (Total: 5 granny clusters and 5 CH-1 spaces).
Round 2: SLST across the next 2 DC stitches and into the first CH-1 space. CH 3, work (2 DC, CH 1, 3 DC) all into that same space. In the next CH-1 space, work (3 DC, CH 1, 3 DC). Repeat from * to * in each remaining space around. Join with an SLST to the top of the starting CH 3. (Total: 10 granny clusters).
Part 2: The Body (Worked in Rows)
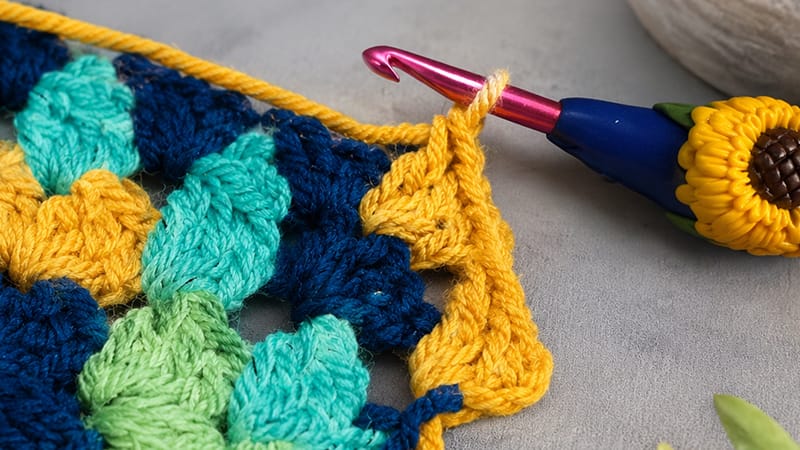
We now switch to rows to leave an open gap for the mug handle.
Row 3: SLST across the next 2 DC and into the first CH-1 space. CH 3, work 2 DC into this first space. Work a 3-DC cluster into each of the next 8 spaces (this includes both the CH-1 spaces and the gaps between the clusters from the previous round). Leave the final space unworked—this creates the handle opening. CH 3, turn. (Total: 9 granny clusters).
Row 4: Work 3 DC into each space across the row. Finish by placing 1 DC into the top of the turning CH 3 from the previous row. CH 3, turn. (Total: 8 clusters + 2 edge DC).
Row 5: Work 2 DC into the very first space. Work 3 DC into every remaining space across the row. CH 3, turn. (Total: 9 clusters).
Rows 6–8: Alternate repeating Row 4 and Row 5, ending on a Row 4 repetition.
Note: If you are using a taller mug, continue alternating rows until the cozy reaches your desired height. At the end of your final row, CH 1 and turn.
Part 3: The Border & Finishing Touches
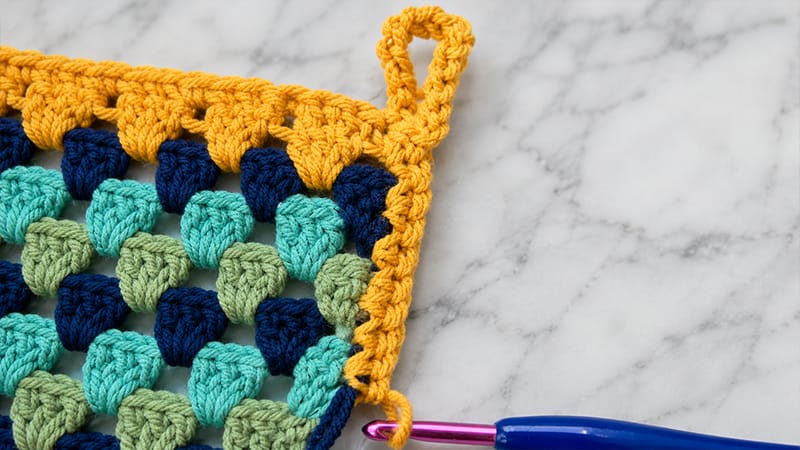
This final round creates a clean edge around the handle opening and builds the button loop.
Final Round:
- SC into each stitch across the top edge.
- Make the Loop: CH 14, then SLST back into the middle of the last SC you just made to create your button loop.
- Handle Opening Border: Work SC stitches evenly down the rough side edge of the cozy (aim for 2 SC in the CH-3 loop spaces and 1 SC into the sides of the DC stitches).
- When you reach the bottom handle gap, SC across the 4 unworked stitches from the base.
- Work SC stitches evenly up the opposite side edge to complete the border.
- Join with an SLST to your very first SC. Fasten off, leaving a long yarn tail.
Assembly
- Attach the Button: Sew your button onto the side opposite your chain loop, aligning it so that the cozy pulls securely together around the mug handle.
- Add a Patch (Optional): Flatten your cozy out. If adding an applique or patch, sew it centered directly opposite the handle opening, or offset on the side for a trendy look.
Weave in any remaining loose ends, slide it onto your favorite mug, and enjoy your cozy aesthetic!
