
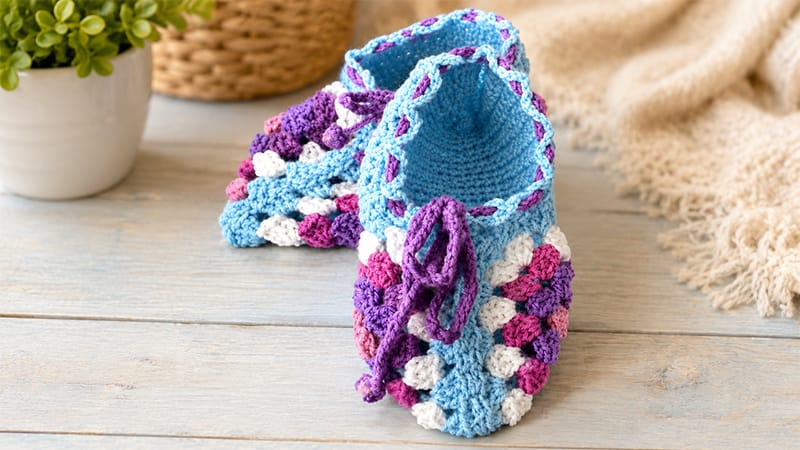
These charming slippers blend the vintage appeal of a classic granny stitch with a modern, cozy footwear design. Crafted by joining structural crochet triangles together and building a textured heel, they are perfect for using up scrap yarn.
Skill Level
- Advanced Beginner: Ideal for those who know basic stitches and are ready to practice shaping and color transitions.
Sizing, Gauge, and Materials
- Measurements: A standard 5-round triangle measures approximately 13 cm (5.1”) per side. The finished slipper length outlined below is roughly 23.6 cm (9.3”).
- Gauge: 16 single crochet (sc) stitches by 19 rows = 10 cm x 10 cm (4″ x 4″).
- Adjusting the Fit: For a smaller or child-sized slipper, simply stop after 3 or 4 rounds. If the fabric feels too loose or holy, drop down a hook size to create a denser, warmer toe box.
- Yarn Requirements: Approximately 140 meters (153 yards) total of classic DK weight yarn (light worsted) split across 5 coordinating colors. Cotton, bamboo, or wool blends work beautifully.
- Tools: US Size 7 (4.5 mm) crochet hook, tapestry needle, scissors, and optional decorative beads.
Key Abbreviations
- ch: Chain
- sc: Single crochet
- dc: Double crochet
- sl st: Slip stitch
- mc: Magic circle/magic ring
- st(s): Stitch(es)
- sp: Space
- sk: Skip
- fo: Fasten off
Step-by-Step Instructions
You will create two identical slippers. Each slipper requires two granny triangles.
Part I: The Toe Box (Make 4 Triangles Total)
Round 1 (Color A)
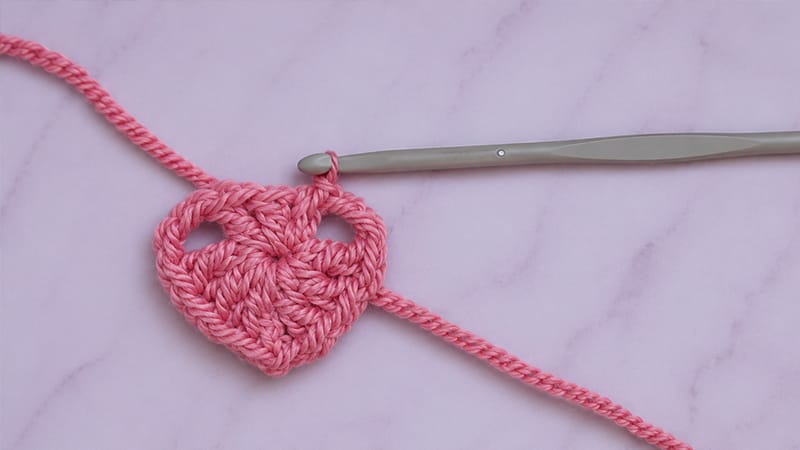
- Form a magic circle, OR ch 4 and join with a sl st to the first ch to create a ring.
- Ch 2 (counts as your first dc here and throughout).
- Work 2 dc into the center of the ring, then ch 2 (first corner made).
- *Work 3 dc into the ring, ch 2.* Repeat from * to * one more time.
- Sl st to the top of the initial ch-2 to close. Fasten off Color A, leaving a 4″ tail. You now have 3 distinct clusters separated by 3 corner spaces.
Round 2 (Color B)
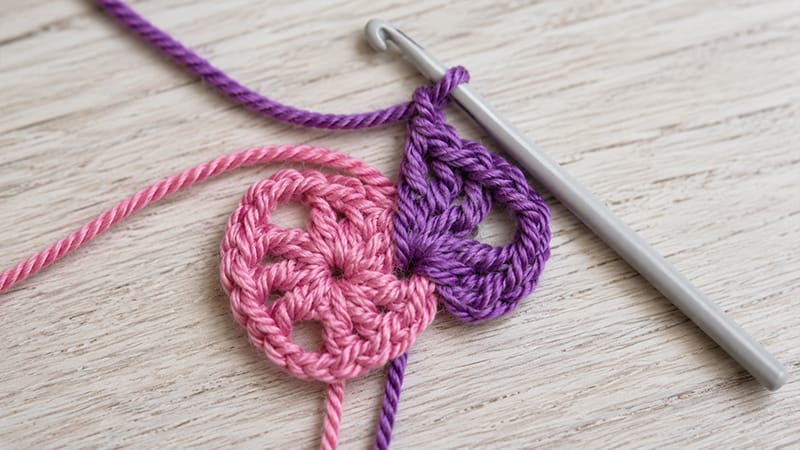
- Secure Color B with a sl st into any ch-2 corner space from the previous round.
- Ch 2, work 2 dc into the same corner space, ch 2, then work 3 more dc into that same space. Ch 1. (This completes your first corner cluster).
- *Jump to the next corner space. Work [3 dc, ch 2, 3 dc], then ch 1.* Repeat from * to * in the final corner.
- Sl st to the top of the starting ch-2 to close. Fasten off, leaving a 4″ tail. (Total: 18 dc stitches across 3 corners).
Round 3 (Color C)
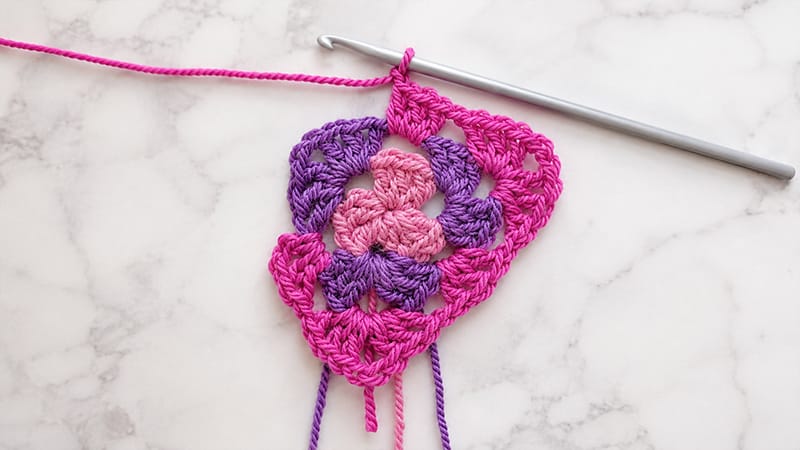
- Join Color C with a sl st into any side ch-1 space.
- Ch 2, 2 dc in the same space, ch 1.
- *In the next corner space, work [3 dc, ch 2, 3 dc], then ch 1. In the next side ch-1 space, work 3 dc, ch 1.*
- Repeat from * to * around, ending with your final corner sequence and a ch 1.
- Sl st to the initial ch-2 to close. Fasten off. (You now have 2 clusters in each corner and 1 side cluster per edge).
Round 4 (Color D)
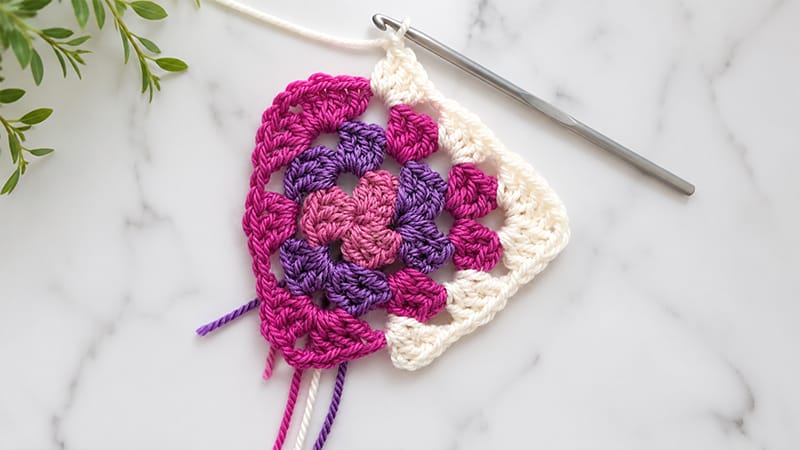
- Join Color D with a sl st into any side ch-1 space.
- Ch 2, 2 dc in the same space, ch 1. Work 3 dc, ch 1 in the next side space if applicable.
- *In each corner space, work [3 dc, ch 2, 3 dc], ch 1. Work 3 dc, ch 1 in every side ch-1 space across to the next corner.*
- Repeat this sequence around the triangle. Sl st to the initial ch-2 to close. Fasten off. (You now have 2 side clusters per edge).
Round 5 (Color E)
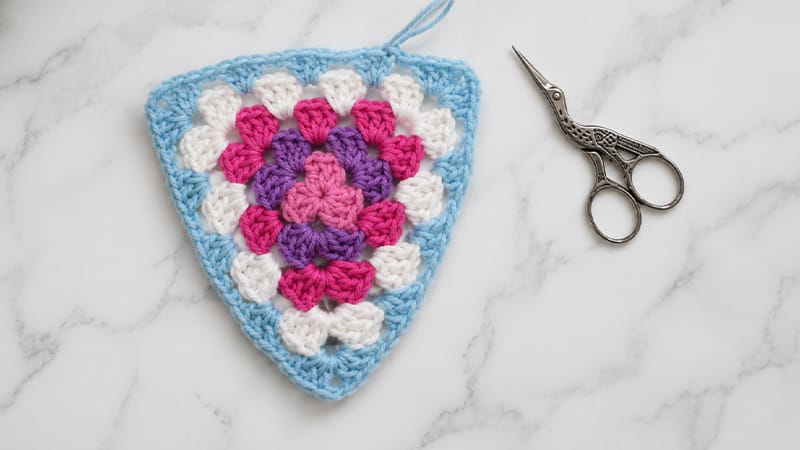
- Join Color E with a sl st into a side ch-1 space.
- Follow the established granny stitch pattern: work 3 dc in every side ch-1 space (separated by ch-1), and work [3 dc, ch 2, 3 dc] into the three main corners (separated from side clusters by a ch-1).
- Sl st to the starting ch-2 to close. Fasten off and leave a tail. (You now have 3 side clusters per edge).
Part II: Joining the Triangles
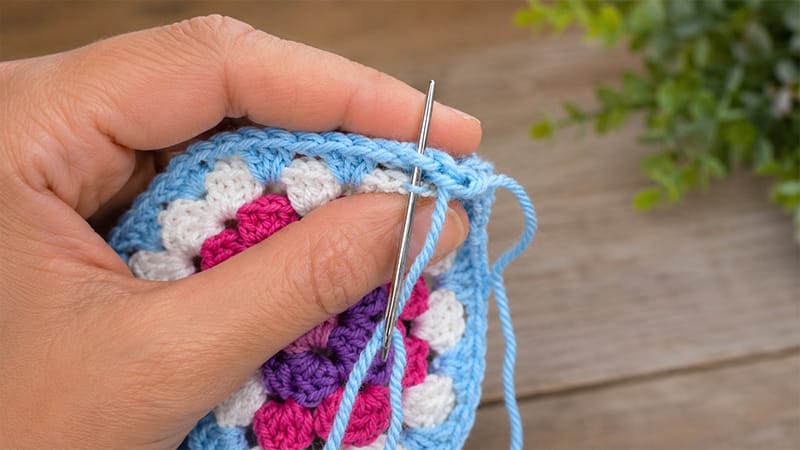
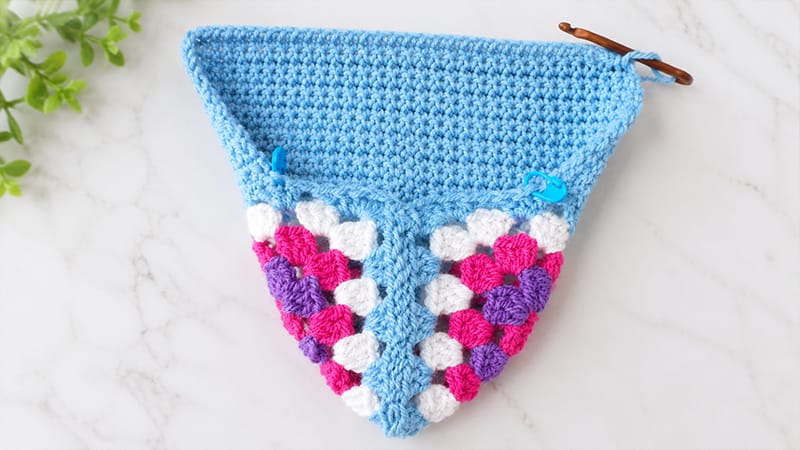
- Align two finished triangles with the wrong sides together (back-to-back).
- Cut a 50 cm (20″) length of Color E yarn and thread it onto your tapestry needle. Anchor it securely to one of the inside corners.
- Using an “S-stitch” (or mattress stitch), sew the two triangles together along two matching sides. This creates a pocket shape that wraps over the toes. Leave the remaining side open for your foot.
- Place a stitch marker at the midpoint cluster of the top-right triangle edge, and another at the midpoint cluster of the top-left triangle edge to mark where the heel body begins.
Part III: Crafting the Heel Body
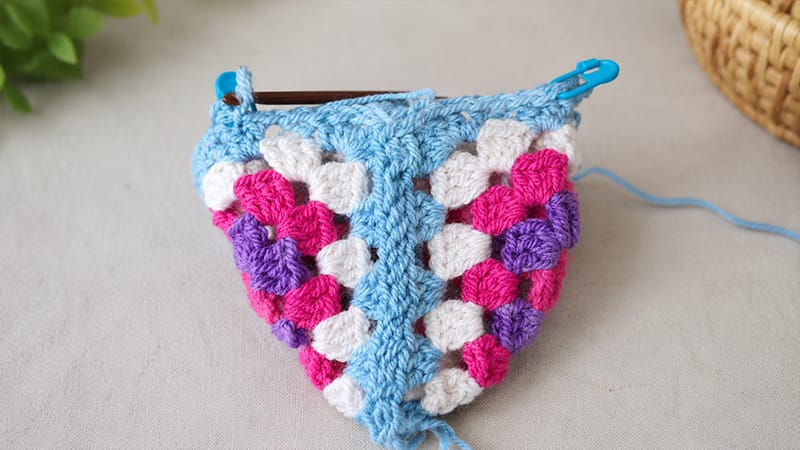
- With the right side facing you, join Color E with a sl st at the left stitch marker.
- Work single crochet (sc) stitches evenly around the open back edge of the triangles until you reach the right stitch marker (Target count: 30 sts). Ch 1, turn.
- Rows 2–18: Sc into every stitch across, ch 1, and turn (30 sts per row).Note: Slide your foot into the slipper to test the length before stopping. Add or remove rows here to customize the fit.
- On your final row, finish the 30th sc, cut the yarn leaving a 10″ tail, and fasten off (do not ch 1).
- Turn the slipper inside out, fold the heel fabric in half so the back edges meet, and use your tapestry needle to whip stitch the heel seam shut. Turn right-side out.
Part IV: Finishing & Decorative Border
The Ankle Trim
- Attach Color E with a sl st at the top back of the heel seam.
- Round 1: Sc evenly all the way around the ankle opening, placing 1 sc into the edge of each row and along the front triangle dip. Sl st to join.
- Round 2: *Ch 4 (or ch 3 if your tension is loose), skip 1st, sl st into the next st.* Repeat from * to * around the entire opening to create a delicate arched border. Sl st to close and fasten off.
The Tie Strap & Accents
- Using any coordinating contrast color, crochet a simple chain approximately 50 cm (20″) long to act as a ribbon tie.
- Weave this chain in and out of the arched border around, starting at the center front.
- Pull the ties to a comfortable snugness, knot them into a neat bow, and embellish the ends with craft beads if desired.
- Weave in all loose ends securely on the inside of the slipper.
Pro-Tip: Making Your Slippers Slip-Proof
Crocheted footwear can be slippery on hardwood or tile floors. To make your new slippers safe and non-slip, apply one of the following treatments to the soles:
- Puffy Paint or Hot Glue: Dot or swirl fabric puffy paint or hot glue across the soles and allow it to dry completely.
- Silicone Sealant: Spread thin, textured lines of clear silicone caulk across the heel and ball-of-foot areas.
- Suede or Gripper Patches: Cut out small ovals of suede, leather, or commercial anti-skid gripper fabric and hand-sew them onto the bottom of the slippers.
