
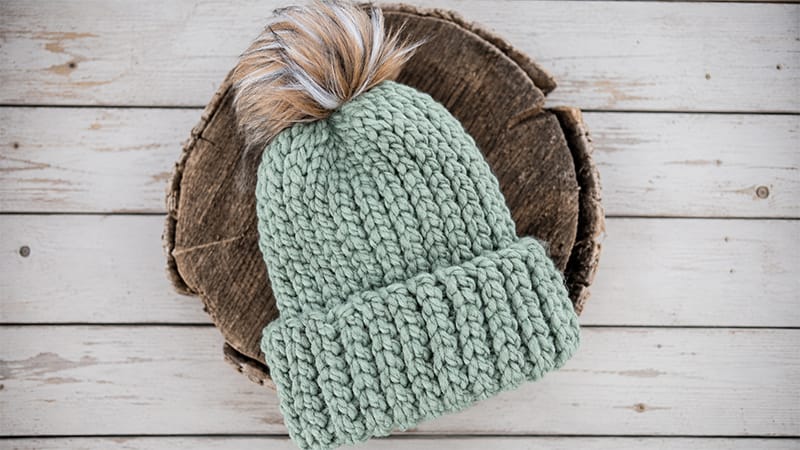
If you love the classic, ribbed texture of a knitted hat but prefer using a crochet hook, this pattern is exactly what you need.
By using a specific slip-stitch technique combined with super bulky yarn, you can quickly create a thick, incredibly stretchy, and cozy winter hat. It has the perfect drape, mimics traditional knit/purl rows, and looks amazing topped with a fluffy faux-fur pom-pom.
Why This Design Works
The secret to achieving that authentic knit look is working slip stitches exclusively into the back loops.
Pro-Tip for Success: Slip stitches can sometimes tighten up. To keep your stitching smooth and frustration-free, maintain a very loose tension.
Because you are using a large hook and thick yarn, navigating the loops is much easier than it would be with thinner yarn! If you naturally crochet tightly, simply swap to a larger hook.
Pattern Overview
Skill Level
- Easy (Great for advanced beginners comfortable with basic stitching and tension control).
Materials Needed
- Yarn: 1 skein of Super Bulky (Weight #6) yarn (Approx. 106 yards for solid colors. Note: If using variegated or metallic prints, which often have less yardage per skein, grab 2 skeins to ensure you don’t run out.)
- Hook: Size N/13 (9.00 mm) crochet hook (or size needed to match gauge)
- Notions: Tapestry needle, scissors, and a pom-pom of your choice.
Gauge & Dimensions
- Gauge: 2 slip stitches $\times$ 4 rows = 1 inch
- Finished Flat Size: Approximately 12.5 inches long by 14.5 inches wide before assembly.
Abbreviations (US Terms)
- ch: Chain
- st / sts: Stitch / Stitches
- sl st: Slip stitch
- sl st blo: Slip stitch in the back loop only
Step-by-Step Instructions
Project Notes
- The turning chain (ch 1) at the start of each row is a turning mechanism only and never counts as a stitch.
- Count your stitches frequently to ensure you maintain exactly 30 stitches per row.
Crochet Pattern
Base Chain: Create a loose foundation chain of 31.
- Row 1: Insert your hook into the second chain from it. Work 1 slip stitch into that chain and into every remaining chain across. Chain 1 and turn your work. (30 stitches)
- Row 2: Work 1 sl st blo into the very first stitch and into every stitch across the row. Chain 1 and turn. (30 stitches)
- Row 3 and consecutive rows: Keep repeating Row 2 until your fabric measures approximately 15.5 inches in total width.
Once reached, fasten off your yarn, leaving a long tail (around 18–20 inches) for assembling the hat.
Assembly & Finishing
1. Seaming the Tube
Lay your rectangular fabric flat so that the ribbed rows run vertically. Fold the rectangle in half, matching up the two short ends to create a tube.
Thread your yarn tail onto a tapestry needle. Pass the needle through both layers of stitches, whipstitching securely from one end to the other.
2. Cinching the Top
Turn your project inside out so the seam you just created is hidden on the inside. Take your tapestry needle (still attached to the yarn tail) and weave it in and out of the stitches around the top opening of the tube.
Once you have gone all the way around, pull the yarn tail firmly to draw the fabric together and close the hole.
3. Securing the Crown
To ensure the top stays perfectly closed, sew an “X” or cross-shape directly over the cinched center by stitching across from top to bottom, then left to right. Tie a secure knot.
4. Final Flourishes
Securely attach your favorite faux-fur or yarn pom-pom to the top of the crown. Weave in any remaining loose yarn ends with your tapestry needle. Flip the hat right-side out, fold up the bottom edge to create a cozy brim, and your new beanie is ready to wear!
