
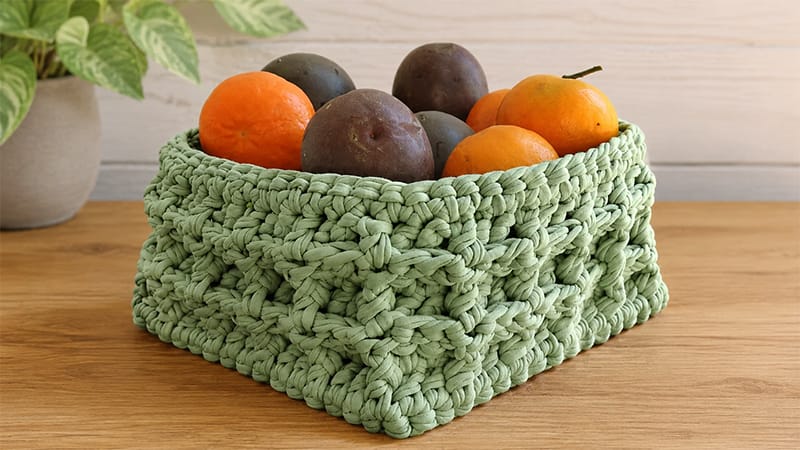
This project combines the rustic appeal of a pre-drilled wooden base with the thick, sturdy texture of the classic waffle stitch.
Ideal for holding fruits, keys, or craft supplies, this basket utilizes t-shirt yarn to create firm, upright walls. Because it is worked from a wooden base, you skip the process of crocheting the bottom entirely, making this a quick and satisfying afternoon project.
Materials & Tools
- Yarn: Approximately 100 yards of Super Bulky T-Shirt Yarn (Weight #6)
- Base: One 8-inch (20 cm) square wooden basket bottom with pre-drilled holes
- Hooks:
- 6.5 mm (US K-10) — used only for anchoring the yarn to the base holes
- 8.0 mm (US L-11) — used for the main body of the basket
- Notions: Tapestry needle with a wide eye, scissors
Pattern Notes & Key Techniques
Stitch Explanations
- Front Post Double Crochet (fpdc): Yarn over, insert your hook from the front to the back, and back to the front around the vertical post of the designated stitch from the row below. Complete the stitch like a standard double crochet. This pulls the stitch forward, creating the raised grid pattern.
- Double Crochet 2 Together (dc2tog): A basic decrease stitch used here to adjust the total stitch count so it matches the pattern’s required stitch math.
Tips for Success
- Keep Tension Firm: Basket walls need to be stiff so they do not sag. If your crochet style runs loose, consider dropping down to a smaller hook size for the main body.
- Turning Your Work: To achieve the waffle texture in a round project, you must turn your work at the end of every single round after joining with a slip stitch.
Detailed Step-by-Step Instructions
Note: The initial chain stitches at the start of each round do not count as active stitches.
Step 1: Attaching to the Wooden Base
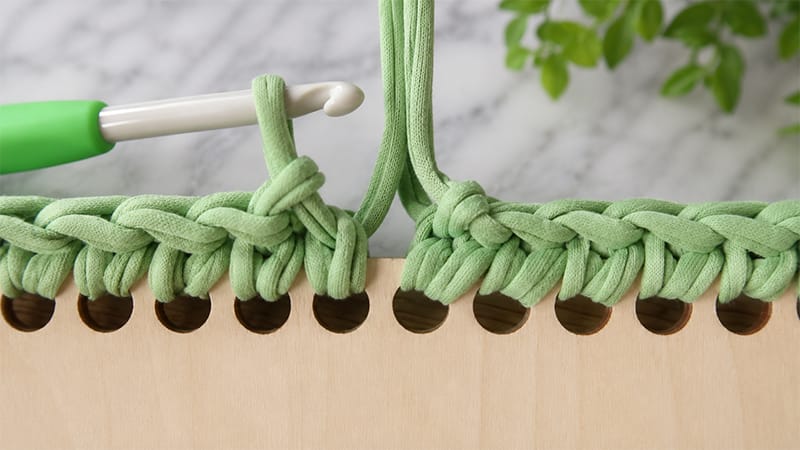
Round 1: Grab your 6.5 mm hook and create a slip knot with your yarn. Start along the center hole of any straight side. Insert your hook through the hole, pull up a loop, and pull through the slip knot to anchor your yarn.
- Place 1 single crochet (sc) into every standard hole along the straight edges.
- Place exactly 3 single crochets (sc) into each of the 4 corner holes to help navigate the turn smoothly.
- Slip stitch to the first stitch to close the round, and turn your work. (Total: 64 stitches)
Step 2: Building the Foundation Row
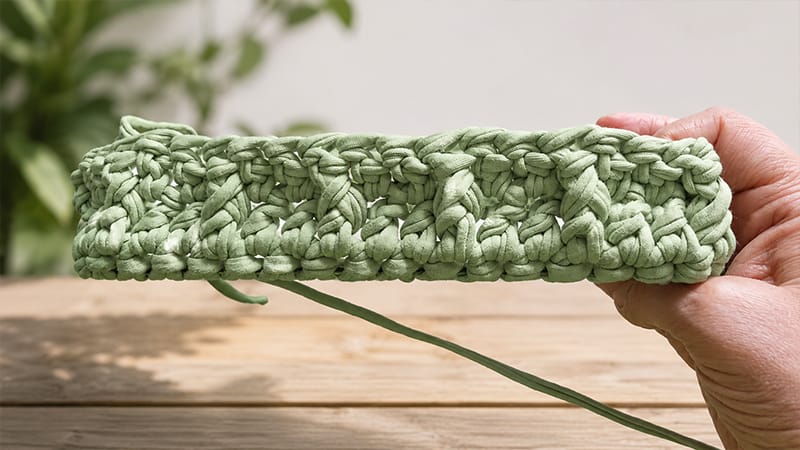
Round 2: Switch to your 8.0 mm hook. Chain 2. Work a dc2tog decrease over the first two stitches (this brings your total stitch count to 63, which is a perfect multiple of 3 needed for the waffle pattern).
Double crochet (dc) into every remaining stitch around. Slip stitch to the top of the first actual stitch to join, and turn your work. (Total: 63 stitches)
Phase 3: Growing the Waffle Walls
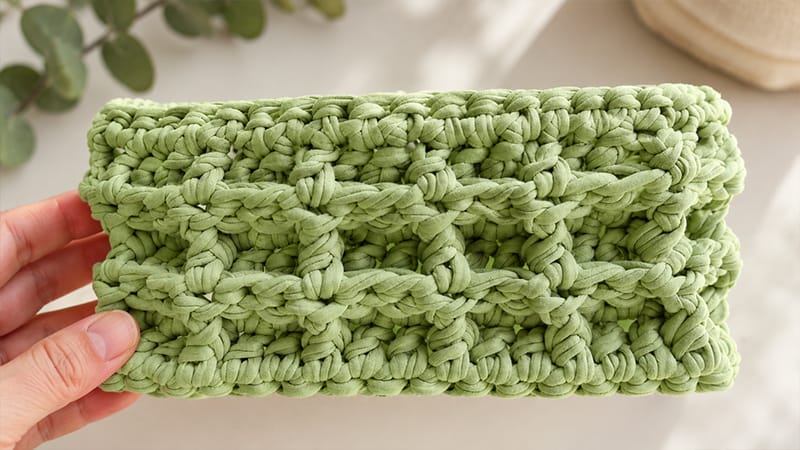
Round 3: Chain 2. Double crochet (dc) into the very first stitch.
[Front post double crochet (fpdc) around the next stitch, then work 1 regular double crochet (dc) into each of the next 2 stitches.]- Repeat the sequence inside the brackets until you have 2 stitches left in the round.
- Work 1 fpdc, followed by 1 dc in the final stitch. Slip stitch to join, and turn your work.
Round 4: Chain 2. Front post double crochet (fpdc) around the first stitch.
[Work 1 regular double crochet (dc) into the next stitch, followed by 1 front post double crochet (fpdc) around each of the next 2 stitches.]- Repeat the sequence inside the brackets until you have 2 stitches left in the round.
- Work 1 dc, followed by 1 fpdc in the final stitch. Slip stitch to join, and turn your work.
Rounds 5 & 6: Repeat the exact steps for Round 3 and Round 4 to build the height of the basket walls.
Phase 4: Finishing the Border
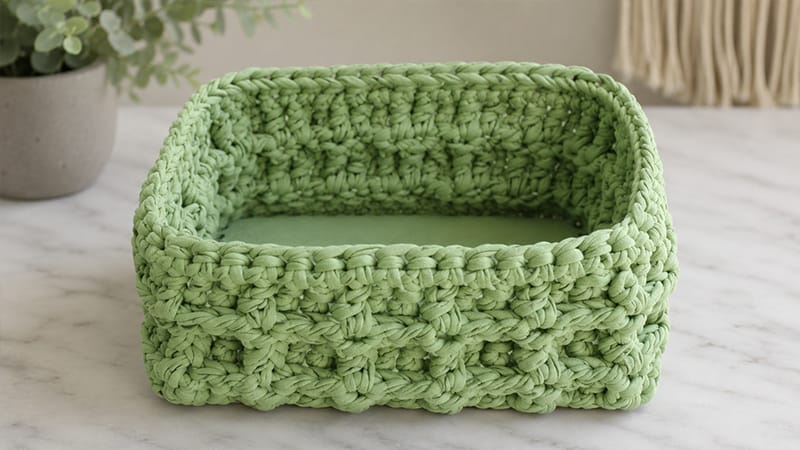
Round 7: Chain 1. Work 1 single crochet (sc) into every stitch around the entire perimeter to create a clean, sturdy top lip. Slip stitch to the first single crochet to finish.
Finishing Up
Cut your yarn, leaving a 6-inch tail. Pull the tail completely through the last loop to secure it. Using your large tapestry needle, carefully weave the yarn tail through the inside stitches of the basket to hide it securely.
Repeat for your starting yarn tail at the wooden base. Shape your basket walls with your hands, and your storage piece is ready to use!
