
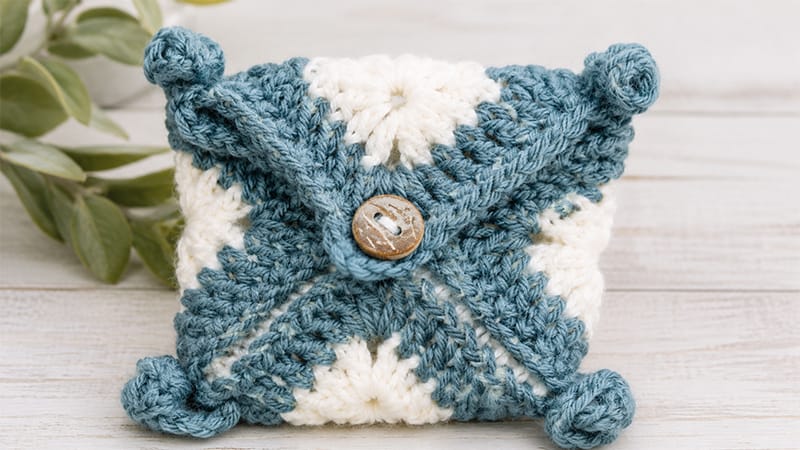
Keep your wireless earbuds safe, scratch-free, and stylish with this quick, scrap-friendly crochet project.
Shaped like a classic envelope pouch, this design features a stunning central textured leaf detail created using drop stitches. It is a perfect afternoon project for gift-giving, stocking stuffers, or adding a charming product to your handmade shop!
Project Overview
- Skill Level: Easy / Advanced Beginner
- Finished Size: Approximately 3” x 3” (7.5 cm x 7.5 cm)
- Terminology: US Crochet Terms
Materials & Supplies
- Yarn: Any Light Worsted / DK weight (#3) yarn.
- Color A (Base/Center): Approx. 10 yards (e.g., White)
- Color B (Border/Leaf): Approx. 20 yards (e.g., Mustard Yellow)
- Hook Size: 4.5 mm (US 7)
- Notions: Tapestry needle, scissors, and 1 small button (approx. 0.5 inches).
- Gauge: 16 half double crochet (hdc) x 10 rows = 4” x 4” (before blocking). Note: Matching the gauge exactly isn’t critical, as long as the fabric is dense enough to hold the earbuds securely.
Abbreviations & Special Stitches
- ch(s): Chain(s)
- st(s): Stitch(es)
- sl st: Slip stitch
- sc: Single crochet
- dc: Double crochet
- sp: Space
- Leaf Stalk: Chain 6. Work 2 sc in the 2nd ch from your hook. Then, work 3 dc into each remaining chain across to create a twisted leaf structure. (14 sts total).
Pattern Notes:
The starting chains at the beginning of each round do not count as an official stitch.
This pattern is worked as a flat, decorative square granny panel that is later folded and seamed into a secure pouch.
Step-by-Step Crochet Instructions
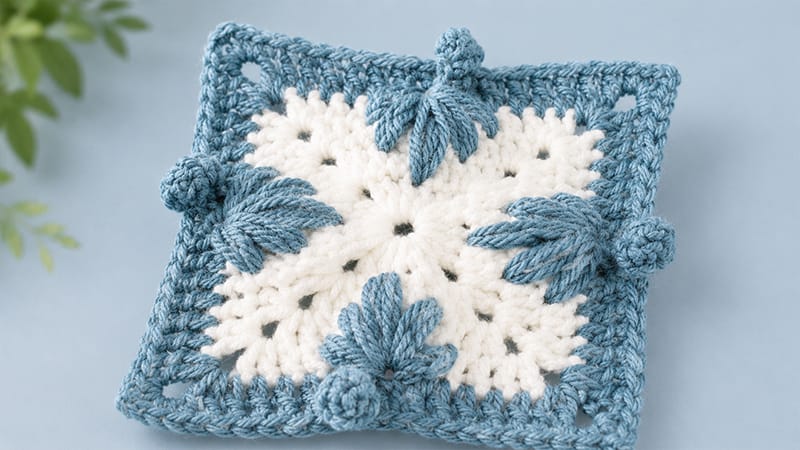
Step 1: The Inner Grid (Color A)
Start with your White yarn.
Round 1: Form a magic ring. Ch 3 (counts as your first dc here and throughout). Into the ring, work 4 dc. *Ch 2, work 5 dc; repeat from * 2 more times. Ch 2, then join with a sl st to the top of your starting ch-3. (Total: 20 dc, 4 corner spaces)
Round 2: Ch 3, work 1 dc into the same corner space. *Dc in the next 2 sts, ch 1, skip 1 st, dc in the next 2 sts. Work a corner grouping of (2 dc, ch 2, 2 dc) into the next ch-2 corner space. Repeat from * 2 more times. Dc in the next 2 sts, ch 1, skip 1 st, dc in the next 2 sts. Finish the final corner with (2 dc, ch 2) into the starting space, then sl st to the top of the ch-3 to join. (Total: 32 dc, 4 corner spaces, 4 ch-1 spaces)
Round 3: Ch 3, work 1 dc into the same corner space. *Dc in the next 2 sts, ch 1, skip 1 st, dc in the next st, ch 1, skip the ch-1 space, dc in the next st, ch 1, skip 1 st, dc in the next 2 sts. Work (2 dc, ch 2, 2 dc) in the next corner space. Repeat from * 2 more times. Complete the sequence along the last side, finishing the final corner with (2 dc, ch 2) into the starting space. Join with a sl st to the top of the ch-3. (Total: 40 dc, 4 corner spaces, 12 ch-1 spaces)
Round 4: Ch 3, work 1 dc into the same corner space. *Dc in the next 2 sts, ch 1, skip 1 st, dc in the next st. [Ch 1, skip the next ch-1 space, dc in the next st] repeat the brackets 2 more times. Ch 1, skip 1st, dc in the next 2 sts. Work (2 dc, ch 2, 2 dc) in the corner space. Repeat from * 2 more times. Complete the final side sequence, finishing the last corner with (2 dc, ch 2). Join with a sl st to the top of the ch-3. Fasten off Color A. (Total: 40 dc, 4 corner spaces, 20 ch-1 spaces)
Step 2: The Leaf Detail & Border (Color B)
Attach your Mustard Yellow yarn with a slip stitch into any corner ch-2 space.
Round 5: Ch 3, work 1 dc into the same corner. *Dc in the next 3 sts, 2 dc in the next st.
- Creating the Leaf: Work a long drop stitch pulling through all 5 stacked ch-1 spaces from the previous rounds below. Ch 1 to secure, sl st into that same space, then create your Leaf Stalk (see instructions above). Sc into the ch-1 space created right after the leaf.
- Resume side: 2 dc in the next st, dc in the next 3 sts. Work (2 dc, ch 2, 2 dc) in the corner space. Repeat from * around to create a leaf on each side. Secure the final corner with (2 dc, ch 2) and sl st to the starting ch-3 to join. (Total: 56 dc, 4 corner spaces, 4 decorative leaves)
Round 6: Ch 1, sc into the same corner space. *Sc in the next 7 sts. To anchor the leaf, work the next single crochet through both the next stitch of the row and the 3rd stitch of your leaf stalk simultaneously. Sc into the next 2 stitches of the stalk, then sc in the remaining 7 sts of the side row. Work (2 sc, ch 2, 2 sc) into the corner space. Repeat from * around all sides. Join with a sl st to the beginning sc. Fasten off and weave in all loose ends. (Total: 84 sc, 4 corner spaces)
Assembly & Finishing
       /\  <-- Top Corner (Buttonhole Flap)
      /  \
Left /    \ Right
Flap \    / Flap
      \  /
       \/  <-- Bottom Corner (Folded Up)
- Lay your finished square flat with the right side facing up. Rotate it so it looks like a diamond, with one corner pointing directly upward. This top corner’s ch-2 space will naturally serve as your buttonhole.
- Fold the bottom corner up toward the center of the square.
- Fold the right-hand corner inward so it meets the bottom flap. Using a tapestry needle and matching yarn, neatly sew the touching edges together from the outer edge toward the center point.
- Fold the left-hand corner inward to meet the center. Sew this side down securely in the same manner. You should now have an open envelope shape.
- Flip the pouch over. Position your button on the front of the pouch where all three folded corners meet, and sew it firmly into place.
Slip your AirPods inside, fold the top flap down, loop the corner space over the button, and your cozy new case is ready for use!
