
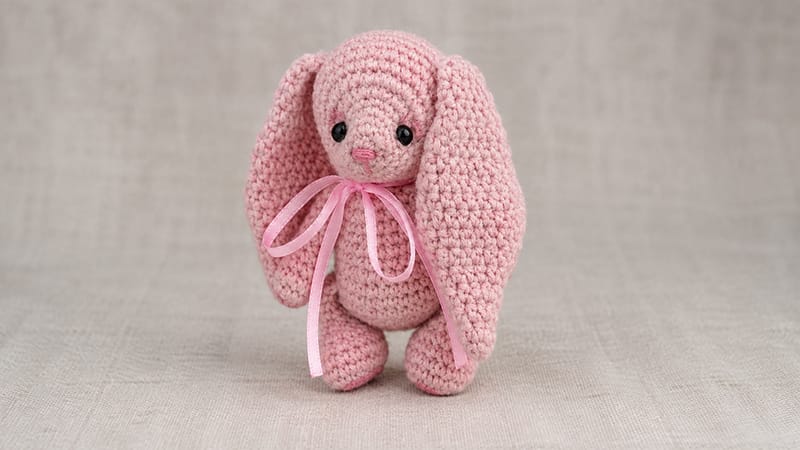
Crafting your own handmade toys brings immense joy, especially when creating soft, whimsical forest companions.
This free crochet pattern guides you step-by-step through making an adorable little bunny amigurumi, featuring unique facial shaping and long, floppy ears.
Reaching roughly ten centimeters in height, this pocket-sized bunny makes a wonderful gift, key chain charm, or quick project for crafters of all experience levels.
Grab your fine yarn, small hook, fiberfill, and beads as we walk through shaping the body, attaching the limbs directly, and adding sweet finishing touches to bring this gentle creature to life.
Materials & Tools
- Yarn: Fine weight yarn (approx. 100g / 390m)
- Hook: 1.75 mm or 2.0 mm crochet hook
- Safety Eyes/Beads: 5 mm black beads or safety eyes
- Stuffing: Polyester fiberfill / holofiber
- Notions: Tapestry needle, scissors, cotton swab
- Tinting: Dry pastel or soft fabric paint (for cheeks and feet)
Pattern Abbreviations
- MR: Magic Ring
- st / sts: Stitch / Stitches
- ch: Chain
- sc: Single Crochet
- hdc: Half Double Crochet
- inc: Increase (2 sc in the same stitch)
- dec: Decrease (sc 2 together)
- slst: Slip Stitch
Step-by-Step Instructions
Arms (Make 2)
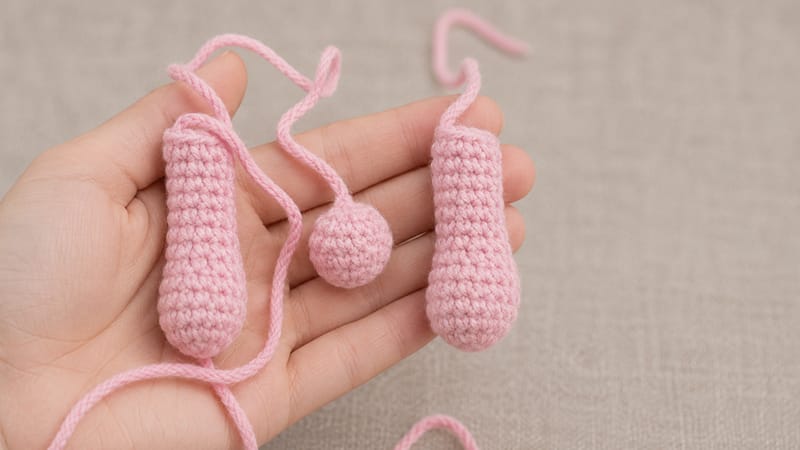
Note: Stuff only the lower portion of each arm.
- R1: 6 sc into MR (6)
- R2: 6 inc (12)
- R3–R4: 12 sc (2 rounds)
- R5: 3 sc, 3 dec, 3 sc (9)
- R6–R11: 9 sc (6 rounds)
Flatten the top opening. Work 2 sc to line up the edges, then fold flat and crochet 4 sc across both layers to close. Fasten off and hide the yarn end.
Legs (Make 2)
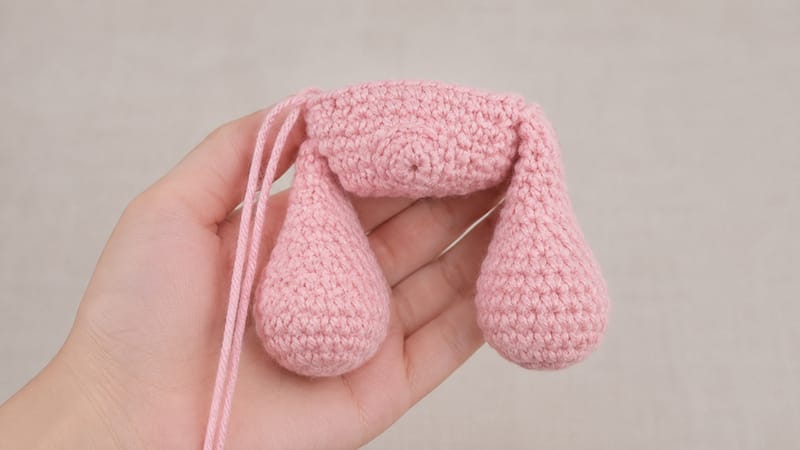
Note: Stuff only the foot area.
- R1: Ch 6. Starting in 2nd ch from hook: inc, 3 sc, 3 sc in last chain st. Continue along opposite side of foundation chain: 4 sc (12)
- R2: 2 inc, 1 sc, 1 inc, 1 sc, 3 inc, 1 sc, 1 inc, 1 sc, 1 inc (20)
- R3–R5: 20 sc (3 rounds)
- R6: 6 sc, 6 dec, 2 sc (14)
- R7: 5 sc, 4 dec, 1 sc (10)
- R8–R11: 10 sc (4 rounds)
Work 3 extra sc to position the fold correctly. Press top edges together and crochet 5 sc through both layers to seal. Fasten off and hide the tail.
Tail
- R1: 6 sc into MR (6)
- R2: 6 inc (12)
- R3: 12 sc (12)
- R4: (1 sc, dec) × 4 (8)
Fasten off. Do not add fiberfill.
Body
The tail, legs, and arms are crocheted directly into the body.
- R1: Ch 8. Starting in 2nd ch from hook: (inc, 2 sc) × 2, 3 sc in last ch st. Opposite side: 2 sc, inc, 3 sc (18)
- R2: 2 inc, 6 sc, 3 inc, 6 sc, 1 inc (24)
- R3: (3 sc, inc) × 6 (30)
- R4 (Attaching Tail): 23 sc, 4 sc through both body and bottom of tail, 3 sc (30)
- R5 (Attaching Legs): 5 sc through left leg and body, 10 sc, 5 sc through right leg and body, 3 sc, 4 sc across unworked top loops of tail, 3 sc (30)
- R6: 30 sc (30)
- R7: 5 sc, (1 sc, dec) × 3, 16 sc (27)
- R8: 5 sc, (1 sc, dec) × 2, 16 sc (25)
- R9: 25 sc (25)
- R10: (3 sc, dec) × 5 (20)
- R11: 20 sc (20)
- R12: (8 sc, dec) × 2 (18)
- R13 (Attaching Arms): 1 sc, 4 sc through left arm and body, 5 sc, 4 sc through right arm and body, 4 sc (18)
- R14: (1 sc, dec) × 6 (12)
Firmly stuff the body with fiberfill.
- R15: 6 dec (6)
Pull the remaining opening tight. Leave a long tail for sewing the head.
Ears (Make 2)
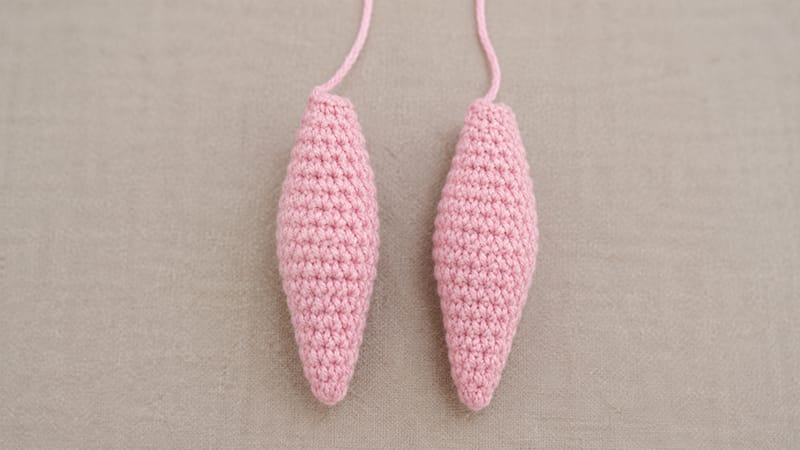
Note: Worked primarily in half double crochet (hdc).
- R1: 4 sc into MR (4)
- R2: (1 hdc, 1 hdc-inc) × 2 (6)
- R3: (2 hdc, 1 hdc-inc) × 2 (8)
- R4: (3 hdc, 1 hdc-inc) × 2 (10)
- R5: (4 hdc, 1 hdc-inc) × 2 (12)
- R6: 12 hdc (12)
- R7: (3 hdc, 1 hdc-inc) × 3 (15)
- R8: (4 hdc, 1 hdc-inc) × 3 (18)
- R9–R11: 18 hdc (3 rounds)
- R12: (4 hdc, hdc-dec) × 3 (15)
- R13: 15 hdc (15)
- R14: (3 hdc, hdc-dec) × 3 (12)
- R15: 12 hdc (12)
- R16: (4 hdc, hdc-dec) × 2 (10)
- R17: (3 hdc, hdc-dec) × 2 (8)
- R18: Switch to single crochet: 8 sc (8)
Fold the ear flat and join the bottom opening with 4 sc across both sides. Fasten off.
Head
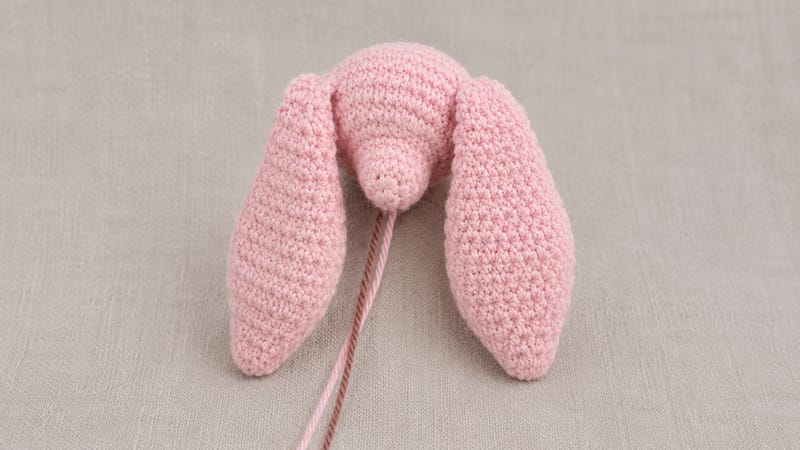
- R1: 6 sc into MR (6)
- R2: 6 inc (12)
- R3: 12 sc (12)
- R4: (1 sc, inc) × 6 (18)
- R5: 18 sc (18)
- R6: 6 sc, 6 inc, 6 sc (24)
- R7: 6 sc, (1 sc, inc) × 6, 6 sc (30)
- R8: 30 sc (30)
- R9: (4 sc, inc) × 6 (36)
- R10–R13 (Integrating Ears): Secure the ears into the sides of the head as you work these rounds, aligning the inner edges of the ear stitches into the head rounds.
- R10: 13 sc, 1 sc into 4th st of 1st ear, 10 sc, 1 sc into 1st st of 2nd ear, 11 sc (36)
- R11: 13 sc, 1 sc into 3rd st of 1st ear, 10 sc, 1 sc into 2nd st of 2nd ear, 11 sc (36)
- R12: 13 sc, 1 sc into 2nd st of 1st ear, 10 sc, 1 sc into 3rd st of 2nd ear, 11 sc (36)
- R13: 13 sc, 1 sc into 1st st of 1st ear, 10 sc, 1 sc into 4th st of 2nd ear, 11 sc (36)
- R14: (4 sc, dec) × 6 (30)
(If using safety eyes, attach them between R5 and R6, spacing them roughly 6 increases apart).
- R15: (3 sc, dec) × 6 (24)
- R16: (2 sc, dec) × 6 (18)
- R17: (1 sc, dec) × 6 (12)
Stuff the head firmly.
- R18: 6 dec (6)
Close the ring, weave in the thread, and secure the end.
Assembly & Finishing Details
- Facial Sculpting: Use strong thread to sculpt eye sockets toward the lower muzzle area.
- Embroidering: Attach 5 mm beads for eyes (if safety eyes were not used), and embroider a delicate ‘Y’ shaped nose and mouth.
- Tinting: Apply dry pastel or blush using a cotton swab to shade the inner ears, cheeks, and feet.
- Final Assembly: Securely sew the head onto the neck using the long thread left from the body.
