
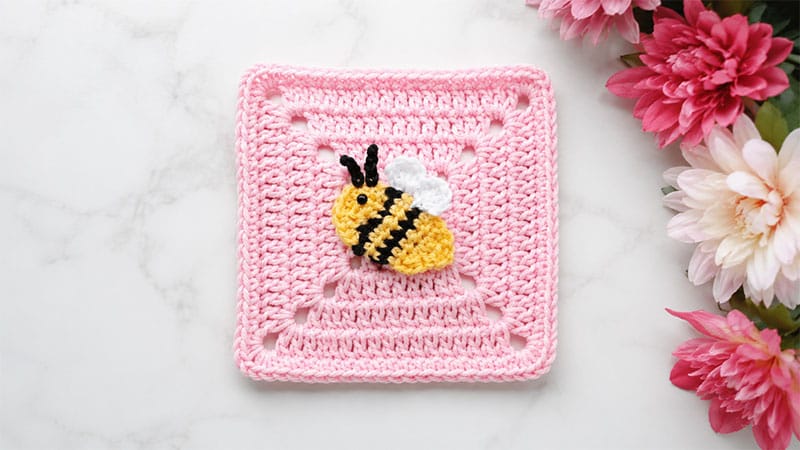
Bring a touch of springtime to your next blanket, pillow, or tote bag project with this cheerful textured block. This design pairs a sturdy, solid geometric background with a charming three-dimensional bumblebee appliqué.
It is an excellent project for mastering basic shaping, working with color changes, and assembling multi-piece crochet motifs.
Project Supplies
- Yarn: Medium worsted-weight yarn in Gold/Yellow, Onyx/Black, and Bright White
- Crochet Hooks:
- Size J (6.00 mm) for the background block
- Size F (3.75 mm) for the insect applique
- Notions: One pair of 6mm safety eyes, a blunt tapestry needle, sharp scissors, and optional clear sewing thread
Step 1: The Base Square
Use the larger J (6.00 mm) hook.
Round 1: Form a magic loop and chain 2. Work 12 double crochets directly into the loop. Slip stitch to the top of your initial double crochet to complete the circle. (12 stitches)
Round 2: Chain 2. Work 2 double crochets into every single stitch around. Join with a slip stitch to the first double crochet. (24 stitches)
Round 3 (Shaping the Corners): Chain 3 (counts as your first stitch). In the very same space, work 1 double crochet, chain 2, and 2 double crochets to build your first corner.
- Side sequence: Double crochet in the next stitch, half double crochet in the next, single crochet in the next, half double crochet in the next, and double crochet in the following stitch.
- Next corner: In the next stitch, work (2 double crochets, chain 2, 2 double crochets).
- Repeat this alternating pattern of sides and corners all the way around. Join to the top of your starting chain-3.
Round 4: Slip stitch over to the first chain-2 corner space. Chain 3 (counts as a stitch), then work (1 double crochet, chain 2, 2 double crochets) inside that corner space. Double crochet in every stitch along the flat side until you reach the next corner. Repeat this pattern around each corner and side. Join to the initial chain-3.
Round 5: Replicate the exact instructions from Round 4 to expand the square. Cut your yarn, fasten off, and weave in all loose yarn tails.
Step 2: The Bumblebee Applique
Use the smaller F (3.75 mm) hook. Note: Turning chains do not count as active stitches.
Bee Body
Begin with Yellow yarn.
- Row 1: Create a magic ring, chain 1, and work 5 half double crochets into the ring. Pull the yarn tail firmly to close it into a semi-circle. Turn.
- Row 2: Chain 1. Work 2 half double crochets into every stitch across the curve. Turn. (10 stitches)
- Switch to Black yarn. You will now work straight across the flat edge of your semi-circle.
- Row 3: Chain 1. Space out 6 single crochets evenly across the flat side. Turn. (6 stitches)
- Switch to Yellow yarn.
- Row 4: Chain 1. Work 1 half double crochet into each stitch across. Turn. (6 stitches)
- Switch to Black yarn.
- Row 5: Chain 1. Work 1 single crochet into each stitch across. Turn. (6 stitches)
- Switch to Yellow yarn.
- Row 6: Chain 1. Work 1 half double crochet into each stitch across. Turn. (6 stitches)
- Row 7 (Tapering): Chain 1. Half double crochet the first two stitches together, work 1 half double crochet into the next 2 stitches, then half double crochet the final two stitches together. Turn. (3 stitches)
- Row 8: Chain 1. Half double crochet all remaining 3 stitches together into a single point. Fasten off.
Wings (Make 2)
Use White yarn.
- Form a magic loop. Chain 2, work 4 double crochets inside the ring, chain 2, and finish with a slip stitch inside the ring. Pull the yarn tail tight to secure the wing shape and fasten off.
Antennae
Use Black yarn.
- Join your yarn directly to the top of the bee’s head, positioning it one stitch away from your first black stripe. Chain 5 and fasten off.
- Join your yarn just to the left of the antenna you just created. Chain 5 and fasten off.
Step 3: Assembly & Finishing
Secure the Eye: Push the post of the 6mm safety eye through the yellow head section of the bee body. Fasten the washer securely on the back.
Safety Tip: If this square is intended for a baby blanket, skip the plastic eye entirely. Instead, use a scrap of black yarn and your tapestry needle to embroider a small French knot or satin stitch eye.
Attach the Wings: Using a yarn needle and the white yarn tails, stitch the two wings onto the upper middle section of the bee’s back.
Mount onto the Square: Position your completed bumblebee in the center of the granny square.
Sewing Options:
Invisible Method: Use clear nylon sewing thread and a running stitch to sew the bee down.
Whip Stitch Method: Use matching yarn colors and a tapestry needle to stitch into the top loops of the background square, keeping the back of the blanket looking completely seamless.
