
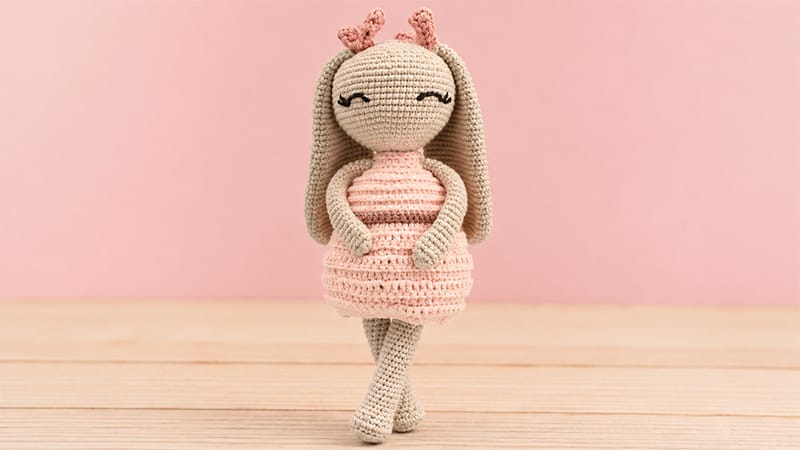
Crafting your very own handmade bunny companion is a deeply satisfying creative journey that transforms basic yarn into a treasured keepsake.
In this clear, rewritten step-by-step tutorial, we break down every technique required to bring your charming long-eared rabbit to life—from shaping the seamless limbs to sculpting the cozy custom outfit.
Gather up your favorite soft cotton skeins, grab your hook, and follow these detailed structural instructions to construct a truly delightful, durable stuffed friend effortlessly today.
Crafting the Bunny Components
Materials Required
- Hook: 2.0 mm crochet hook
- Yarn: Fine/Sport weight cotton yarn (Shades: Gray, Light Gray, Soft Yellow, Olive Green)
- Extras: Polyester fiberfill stuffing, dark thread for features, tapestry needle, stitch markers
Key Abbreviations
- MR: Magic Ring
- st: Stitch
- ch: Chain
- sc: Single Crochet
- dc: Double Crochet
- inc: Increase (2 sc in same st)
- dec: Decrease (sc 2 together)
- BLO: Back Loop Only
Step-by-Step Instructions
1. Long Rabbit Ears (Make 2)
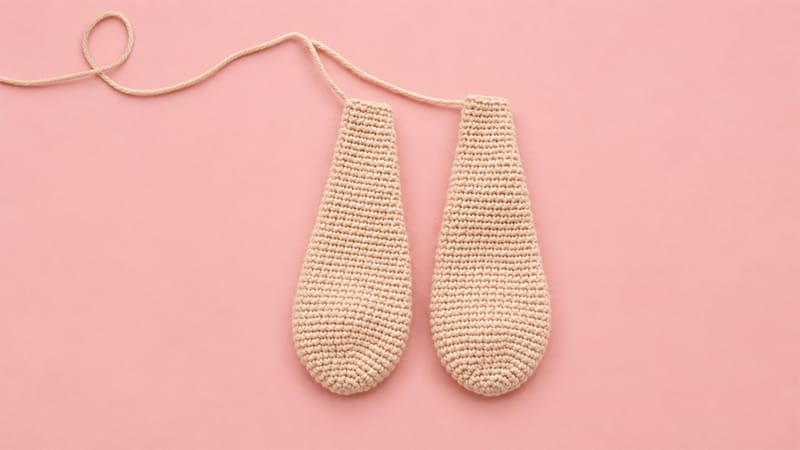
Use Gray Yarn; do not stuff.
- Rnd 1: Work 4 sc into a MR. (4)
- Rnd 2: Inc in every st around. (8)
- Rnd 3: [1 sc, 1 inc] × 4. (12)
- Rnd 4: [2 sc, 1 inc] × 4. (16)
- Rnd 5: [3 sc, 1 inc] × 4. (20)
- Rnd 6: [4 sc, 1 inc] × 4. (24)
- Rnd 7: [5 sc, 1 inc] × 4. (28)
- Rnd 8: [6 sc, 1 inc] × 4. (32)
- Rnds 9–15: Sc in each st. (32)
- Rnd 16: [1 dec, 14 sc] × 2. (30)
- Rnds 17–19: Sc in each st. (30)
- Rnd 20: [1 dec, 13 sc] × 2. (28)
- Rnds 21–23: Sc in each st. (28)
- Rnd 24: [1 dec, 12 sc] × 2. (26)
- Rnds 25–26: Sc in each st. (26)
- Rnd 27: [1 dec, 11 sc] × 2. (24)
- Rnds 28–29: Sc in each st. (24)
- Rnd 30: [1 dec, 10 sc] × 2. (22)
- Rnds 31–32: Sc in each st. (22)
- Rnd 33: [1 dec, 9 sc] × 2. (20)
- Rnds 34–35: Sc in each st. (20)
- Rnd 36: [1 dec, 8 sc] × 2. (18)
- Rnds 37–38: Sc in each st. (18)
- Rnd 39: [1 dec, 7 sc] × 2. (16)
- Rnds 40–42: Sc in each st. (16)
- Rnd 43: [1 dec, 6 sc] × 2. (14)
- Rnds 44–45: Sc in each st. (14)
Fasten off, leaving a long tail for attachment.
2. Slender Arms (Make 2)
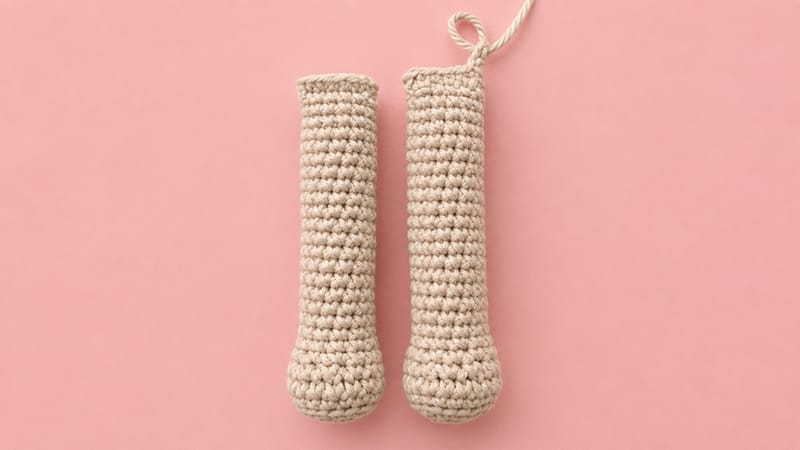
Use Light Gray Yarn; do not stuff.
- Rnd 1: Work 6 sc into a MR. (6)
- Rnd 2: [1 sc, 1 inc] × 3. (9)
- Rnds 3–25: Sc in each st across. (9)
Fasten off, leaving yarn to sew onto Round 57.
3. Legs & Body Construction
Use Light Gray Yarn; stuff legs as you progress.
Legs (Make 2)
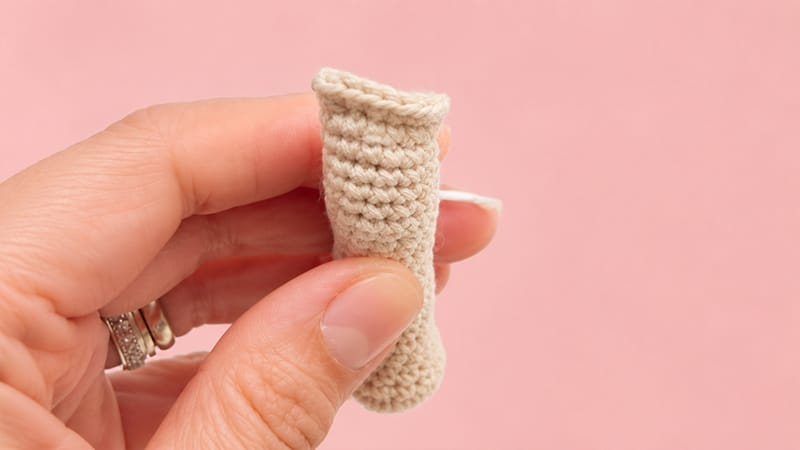
- Rnd 1: Work 6 sc into a MR. (6)
- Rnd 2: 6 increases. (12)
- Rnd 3: [1 sc, 1 inc] × 6. (18)
- Rnd 4: In BLO, sc in each st around. (18)
- Rnd 5: Sc in each st around. (18)
- Rnd 6: [1 sc, 1 dec] × 6. (12)
- Rnds 7–30: Sc in each st around. (12)
First Leg: Press the opening flat and seal with 6 sc. Fasten off.
Second Leg: Repeat Rnds 1–30 and seal flat with 6 sc, but do not cut yarn.
Continuous Body
Chain 3 to bridge the two legs together.
- Rnd 31: Sc 12 along the first leg, sc 3 across the chain, sc 12 across the second leg, sc 3 along the opposite side of the chain. (30)
- Rnd 32: 2 sc, 1 inc, [4 sc, 1 inc] × 5, 2 sc. (36)
- Rnd 33: [5 sc, 1 inc] × 6. (42)
- Rnd 34: 3 sc, 1 inc, [6 sc, 1 inc] × 5, 3 sc. (48)
- Rnds 35–38: Sc in each st. (48)
- Rnd 39: 3 sc, 1 dec, [6 sc, 1 dec] × 5, 3 sc. (42)
- Rnds 40–44: Sc in each st. (42)
- Rnd 45: [5 sc, 1 dec] × 6. (36)
- Rnds 46–48: Sc in each st. (36)
- Rnd 49: 2 sc, 1 dec, [4 sc, 1 dec] × 5, 2 sc. (30)
- Rnds 50–52: Sc in each st. (30)
- Rnd 53: [3 sc, 1 dec] × 6. (24)
- Rnd 54: Sc in each st. (24)
- Rnd 55: [2 sc, 1 dec] × 6. (18)
- Rnds 56–57: Sc in each st. (18)
- Rnd 58: [1 sc, 1 dec] × 6. (12)
Keep yarn intact to transition straight into the head.
4. Integrated Head
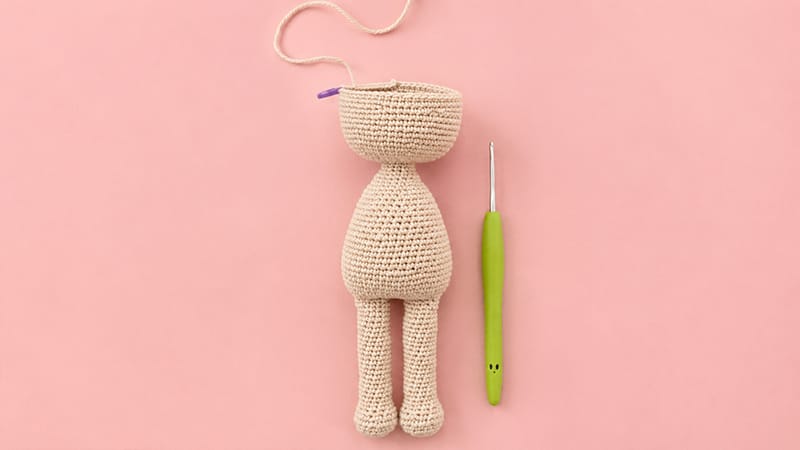
Stuff firmly throughout shaping.
- Rnd 59: Sc in each st around. (12)
- Rnd 60: [1 sc, 1 inc] × 6. (18)
- Rnd 61: 1 sc, 1 inc, [2 sc, 1 inc] × 5, 1 sc. (24)
- Rnd 62: [3 sc, 1 inc] × 6. (30)
- Rnd 63: 2 sc, 1 inc, [4 sc, 1 inc] × 5, 2 sc. (36)
- Rnd 64: [5 sc, 1 inc] × 6. (42)
- Rnd 65: 3 sc, 1 inc, [6 sc, 1 inc] × 5, 3 sc. (48)
- Rnd 66: [7 sc, 1 inc] × 6. (54)
- Rnd 67: 4 sc, 1 inc, [8 sc, 1 inc] × 5, 4 sc. (60)
- Rnds 68–77: Sc in each st around. (60)
Note: Insert safety eyes or embroider facial features between Rounds 70 and 71, spaced 8 stitches apart.
- Rnd 78: [8 sc, 1 dec] × 6. (54)
- Rnd 79: [7 sc, 1 dec] × 6. (48)
- Rnd 80: [6 sc, 1 dec] × 6. (42)
- Rnd 81: [5 sc, 1 dec] × 6. (36)
- Rnd 82: [4 sc, 1 dec] × 6. (30)
- Rnd 83: [3 sc, 1 dec] × 6. (24)
- Rnd 84: [2 sc, 1 dec] × 6. (18)
- Rnd 85: [1 sc, 1 dec] × 6. (12)
- Rnd 86: 6 decreases. (6)
Draw opening closed, fasten off, and weave in loose ends.
5. Custom Dress & Accessories
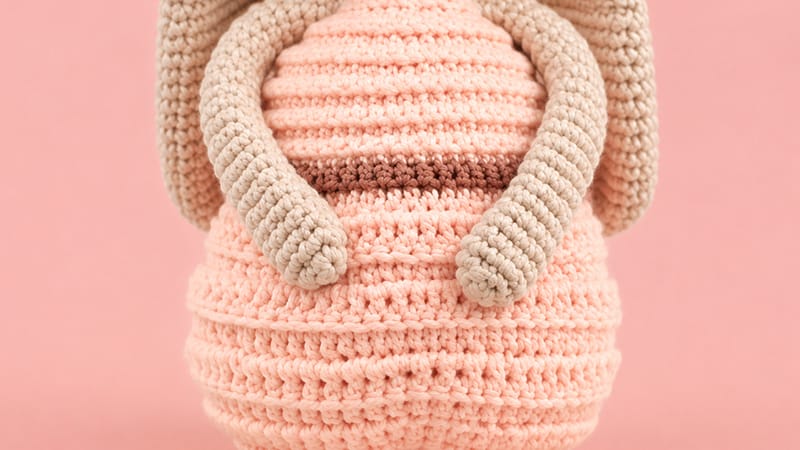
Textured Dress
Start with Yellow Yarn; turn work at the end of each round.
- Base Chain: Ch 19. Start in second ch from hook.
- Rnd 1: 18 sc. (18)
- Rnd 2 (BLO): [1 inc, 7 sc, 1 inc] × 2. (22)
- Rnd 3: 1 sc, 1 inc, ch 5 (skip 5 st for armhole), 1 inc, 6 sc, ch 5 (skip 5 st for armhole), 1 inc, 1 sc. (26)
- Rnd 4 (BLO): 1 sc, [3 sc, 1 inc] × 6, 1 sc. (32)
- Rnd 5: [3 sc, 1 inc] × 8. (40)
- Rnd 6 (BLO): [4 sc, 1 inc] × 8. (48)
- Rnd 7: [11 sc, 1 inc] × 4. (52)
- Rnd 8 (BLO): [12 sc, 1 inc] × 4. (56)
- Rnd 9: Sc around. (56)
- Rnd 10 (BLO): Sc around. (56)
- Rnd 11: Sc around. (56)
- Rnd 12 (BLO): Sc around. (56)
- Rnd 13: Sc around. (56)
- Rnd 14 (BLO): Sc around. (56)
- Rnd 15: Switch to Olive Green Yarn; sc around. (56)
- Rnds 16–20: Switch back to Yellow Yarn; work in DC stitches with alternating BLO rounds to build the flared skirt shape.
- Rnds 21–25: Work decreasing rows to complete the lower border, switching to single crochet for the final edging.
Slip dress onto the bunny and secure the back seam with yarn and needle.
Accent Bows (Make 2)
Use Olive Green Yarn.
- Chain 22. Starting in the 3rd chain from the hook, work 20 dc across.
- Fold the strip into a loop and join ends with 3 sc to create a cinched center bow shape.
- Fasten off with a long tail and attach securely to the dress or head as desired.
