
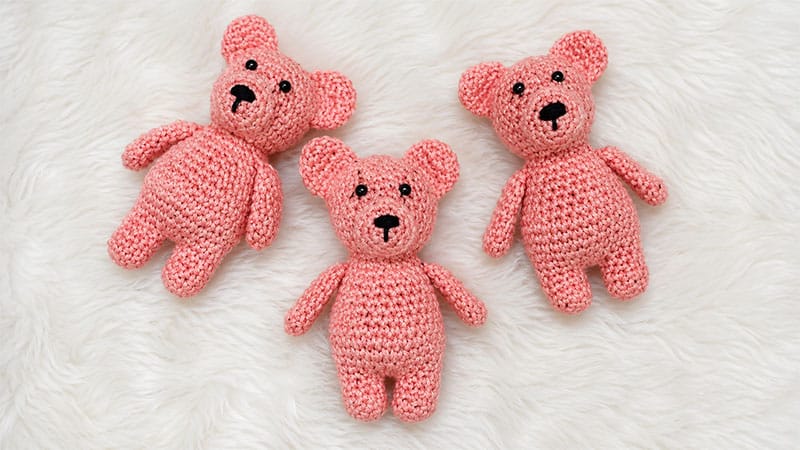
Meet Charlie the Chunky Bear, an adorable, low-sew amigurumi project designed to help you clear out your yarn stash. By utilizing a continuous, bottom-up construction method, this pattern minimizes tedious assembly.
The legs, body, and head are crocheted as a single fluid piece, and the arms are joined directly into the stitches as you go.
Only the snout and ears require traditional sewing at the very end, making it an excellent, fast-paced project for crocheters who dislike sewing pieces together.
Project Specifications
Finished Dimensions
- Height: Approximately 10.5 inches tall when using the recommended materials.
Materials & Tools
- Yarn: Super Bulky weight (Category 6). The original design uses Lion Brand Hometown (approximately 90 yards).
- Accent Yarn: A small length of black yarn or embroidery floss for facial features.
- Crochet Hook: 6.5 mm (Size K). Note: Choosing a hook slightly smaller than what the yarn label recommends ensures tight stitches so your stuffing won’t peek through.
- Notions: Polyester fiberfill stuffing, one pair of 12mm safety eyes, stitch markers, scissors, and a blunt tapestry needle.
Stitch Key (US Terms)
- st(s): Stitch(es)
- sl st: Slip stitch
- ch: Chain
- sc: Single crochet
- sc2tog: Single crochet two stitches together. For the neatest look, use the invisible decrease: Insert your hook into the front loop only of the first stitch, then immediately insert it into the front loop only of the next stitch. Yarn over, draw through the first two loops, yarn over again, and draw through the remaining two loops.
Step-by-Step Instructions
1. The Arms (Make 2)
Do not stuff the arms. They are designed to lie flat.
- Round 1: Start with 6 sc into a magic ring. (6 sts)
- Round 2: Work 2 sc in the next st, then 1 sc in the following st. Repeat this sequence around. (9 sts)
- Rounds 3–8: Work 1 sc into every stitch around. (9 sts)
- Round 9 (Closing): Flatten the top of the arm. Disregard one unworked stitch on each side of the fold line to keep it neat. Insert your hook through both matching loops across the flattened edge and work 1 sc through both layers to seal it shut. (4 sts total across the flat top). Fasten off.
2. The Lower Body & Leg Integration
First Leg
- Round 1: Start with 6 sc into a magic ring. (6 sts)
- Round 2: Work 2 sc in the next st, then 1 sc in the following st. Repeat around. (9 sts)
- Rounds 3–5: Work 1 sc into every stitch around. (9 sts)
- Fasten off and set aside.
Second Leg & Joining
- Rounds 1–5: Repeat the exact steps used for the first leg, but do not cut the yarn at the end of Round 5.
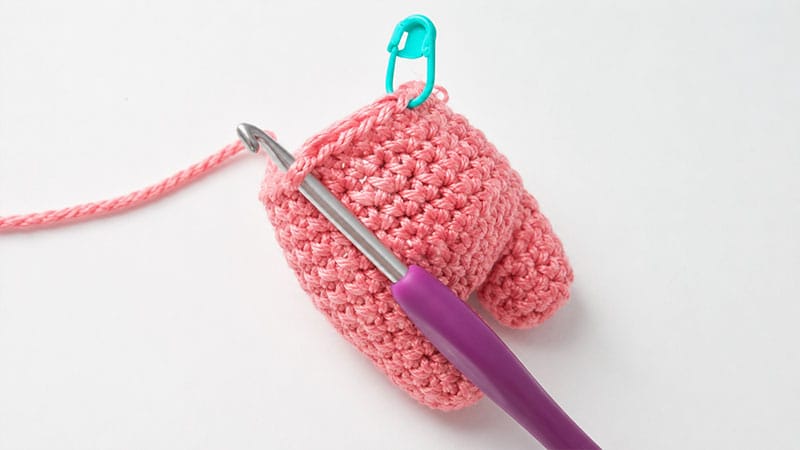
- Round 6 (The Join): Ch 2. Pick up your first leg and work 1 sc into its first stitch to link them together. Place your main stitch marker in this specific sc. Continue working 1 sc into each of the remaining 8 stitches around the first leg. Next, work 1 sc into each of the 2 chain loops. Move to the second leg and work 1 sc into all 9 of its stitches. Finally, work 1 sc into the opposite side of the 2 chain loops. (22 sts total around the united base).
3. The Torso
Stuff the legs firmly now, and continue stuffing the body firmly as you build upwards.
- Round 7: Work 1 sc into every stitch around. (22 sts)
- Round 8: Work 2 sc in the next st, then 1 sc into each of the next 10 sts. Repeat around. (24 sts)
- Round 9: Work 2 sc in the next st, then 1 sc into each of the next 3 sts. Repeat around. (30 sts)
- Rounds 10–13: Work 1 sc into every stitch around. (30 sts)
- Round 14: Work an sc2tog decrease, then 1 sc into each of the next 3 sts. Repeat around. (24 sts)
- Rounds 15–17: Work 1 sc into every stitch around. (24 sts)
- Round 18 (Arm Attachment): Work 1 sc into the next 6 sts of the body. Pick up your first finished arm; aligning the flat edge with the torso, work 1 sc through both the arm layers and the body stitches for the next 4 sts. Work 1 sc along the next 9 body sts. Pick up the second arm and attach it the same way by working 1 sc through both the arm and body layers for the next 4 sts. Work 1 sc in the final remaining stitch of the round. (24 sts)
- Round 19: Work an sc2tog decrease, then 1 sc into each of the next 2 sts. Repeat around. (18 sts)
- Round 20: Work an sc2tog decrease, then 1 sc into the next st. Repeat around. (12 sts)
- Pack the remainder of the torso firmly with fiberfill.
4. The Head
- Round 21: Work 2 sc into every stitch around to expand for the neck line. (24 sts)
- Round 22: Work 2 sc in the next st, then 1 sc into each of the next 3 sts. Repeat around. (30 sts)
- Rounds 23–28: Work 1 sc into every stitch around. (30 sts)
- Round 29: Work an sc2tog decrease, then 1 sc into each of the next 3 sts. Repeat around. (24 sts)
- Round 30: Work an sc2tog decrease, then 1 sc into each of the next 2 sts. Repeat around. (18 sts)
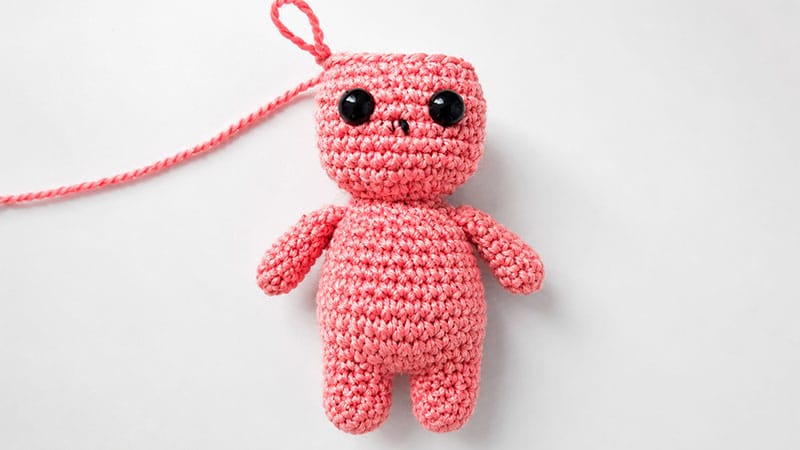
Face Assembly Tip: If you are using plastic safety eyes, pause here. Press them securely into place between Rounds 27 and 28, leaving an unworked gap of roughly 5 stitches between them. Once locked in, stuff the head generously with fiberfill.
- Round 31: Work an sc2tog decrease, then 1 sc into the next st. Repeat around. (12 sts)
- Round 32: Work an sc2tog decrease across all stitches around. (6 sts)
- Cut your yarn leaving a short tail. Use your tapestry needle to weave the tail through the remaining front loops, pull tightly to draw the circle closed, knot, and hide the end inside the head.
5. Add-On Features (Ears & Snout)
Ears (Make 2)
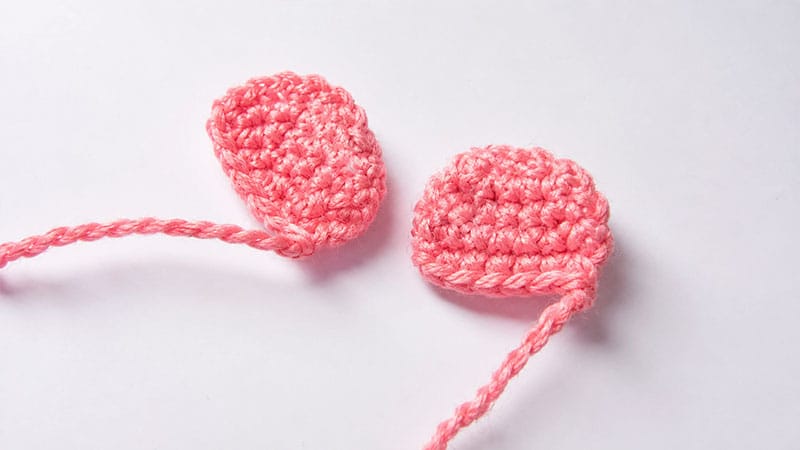
- Round 1: Start with 6 sc into a magic ring. (6 sts)
- Round 2: Work 2 sc into every stitch around. (12 sts)
- Rounds 3–4: Work 1 sc into every stitch around. (12 sts)
- Round 5: Press the opening of the ear flat. Working through both layer loops across the top, sc the edge closed. (5 sts total). Fasten off, leaving a long yarn tail for sewing.
Snout
- Round 1: Start with 6 sc into a magic ring. (6 sts)
- Round 2: Work 2 sc into every stitch around. (12 sts)
- Round 3: Work 2 sc in the next st, then 1 sc into each of the next 3 sts. Repeat around. (15 sts)
- Round 4: Work 1 sc into every stitch around. (15 sts)
- Fasten off, leaving a long yarn tail for assembly.
Final Assembly & Details
          /\___/\   <-- Sew Ears between R27-31
         (  o o  )  <-- Insert 12mm Eyes between R27-28
          (  =  )   <-- Sew stuffed Snout over R22-26
         /       \
        / |     | \ <-- Arms crocheted directly into R18
       (_/       \_)
        |    |    |
        (___/___)   <-- Legs joined at R6
- Ears: Position the flat bottom of the ears on top of the head between Rounds 27 and 31 on either side. Secure them symmetrically using your tapestry needle.
- Snout: Pack a small ball of fiberfill stuffing inside the muzzle. Center it on the face directly underneath the eyes (covering roughly Rounds 22 to 26) and sew it cleanly to the head.
- Embroidery: Thread your tapestry needle with black accent yarn. Stitch a horizontal triangle nose near the upper center of the snout (across Rounds 2 and 3). From the base of that nose, bring a vertical line straight down to the center of the original magic ring to give Charlie his classic bear smile. Wrap up by weaving in any remaining loose yarn ends securely into the body.
