
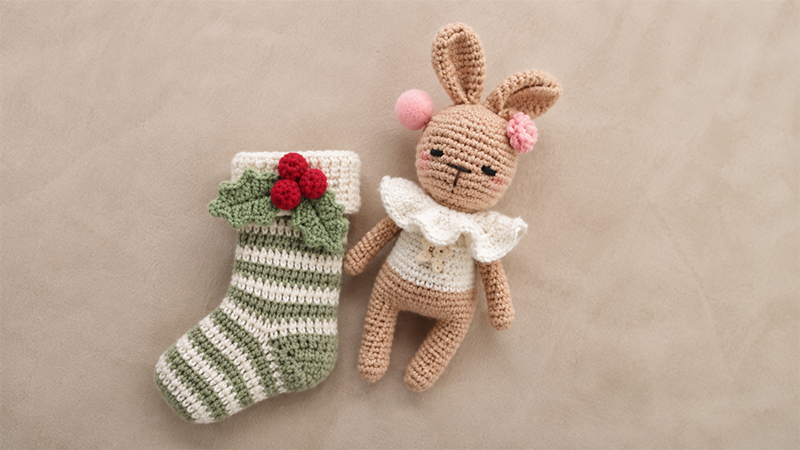
Get into the holiday spirit by crafting this adorable Christmas bunny complete with festive accessories!
This charming project combines a soft, huggable bunny with a decorative holiday stocking, cute little holly leaves, and berries.
It is a wonderful handmade piece to add warmth to your seasonal home decor or to gift to someone special.
Designed to be beginner-friendly, this pattern features clear instructions to guide you smoothly through every single part, from the cozy socks to the sweet little ears.
Grab your crochet hook, choose your favorite yarn colors, and let’s bring this delightful holiday bunny to life!
Abbreviations & Materials
Abbreviations
- ch: Chain
- sc: Single Crochet
- inc: Increase
- dec: Decrease
- Sl st: Slip Stitch
- hdc: Half Double Crochet
- dc: Double Crochet
- tr: Triple Crochet
- st/sts: Stitch/stitches
- DC-inc: Double crochet increase
- BLO: Back Loops Only
- FLO: Front Loops Only
- ( ) / […] x: Repeat instructions between parentheses x times
Materials
- Sport weight cotton or cotton blend yarn (White, Red, Brown, Green)
- Black embroidery thread for facial details
- 6 mm Safety Eyes (Black)
- Stitch markers and sewing pins
- 2.0 mm crochet hook (or size matching your yarn)
- Scissors
- 1 wooden button
- Polyester fiberfill for stuffing
1. Christmas Sock
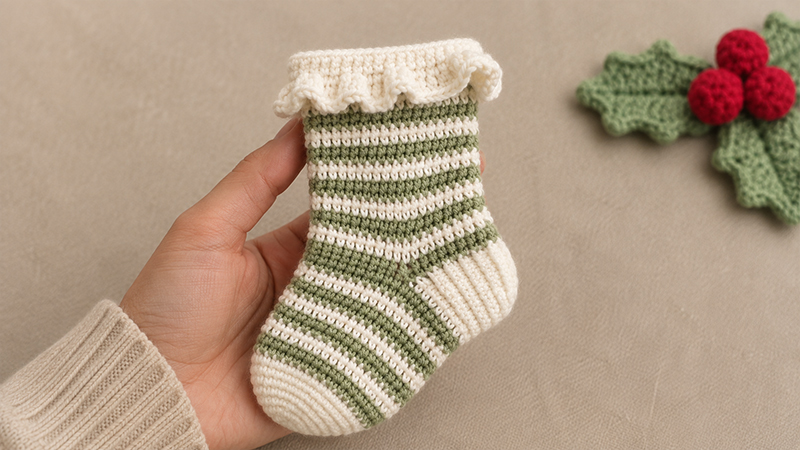
Start with white yarn.
- Rnd 1: Work 6 sc into a magic ring, join with a white slip stitch. (6)
- Rnd 2: [inc] 6 times. (12)
- Rnd 3: [1 sc, inc] 6 times. (18)
- Rnd 4: [2 sc, inc] 6 times. (24)
- Rnd 5: [3 sc, inc] 6 times. (30)
- Rnd 6: [4 sc, inc] 6 times. (36)
- Rnd 7: [5 sc, inc] 6 times. (42)
- Rnd 8-12 (5 rounds): Sc around. (42)
Switch to red yarn and alternate colors every round. Slip stitch into the first stitch at the end of each round and chain 2 to begin the next.
- Rnd 13-19 (7 rounds): Ch 2, dc in all stitches. (42)
Sock Heel
Using white yarn:
- Rnd 1: Ch 1, sc in the next 20 stitches.
- Rnd 2-11 (10 rounds): Ch 1, turn, sc in all 20 stitches. (20)
- Note: Fold the heel piece and sew the top edges together. Using red yarn, single crochet around the heel perimeter while decreasing at the corners until you have 42 stitches total.
- Sock Continuation (Rounds 1-2): Sc in all 42 sts; then ch 2, dc in all 42 sts.
- Rnd 3-12: Alternate white and red every round, working dc in all 42 sts.
- Rnd 13: With white, ch 1, sc in all 42 sts.
- Rnd 14: Working in BLO, ch 2, dc in all 42 sts. (42)
- Rnd 15: Ch 1, sc in all 42 sts. (42)
Sock Ruffles & Border
- Ruffles: Join yarn into the first stitch of Round 14 with a slip stitch. Ch 2, work a double crochet increase in every stitch around (84 total).
- Lace Border: Yarn over, insert hook into the second stitch from the hook, make 1 dc, then make 5 more dc into the same stitch. Repeat this shell pattern around the top edge to create 21 decorative scallops.
2. Holly Leaves & Berries
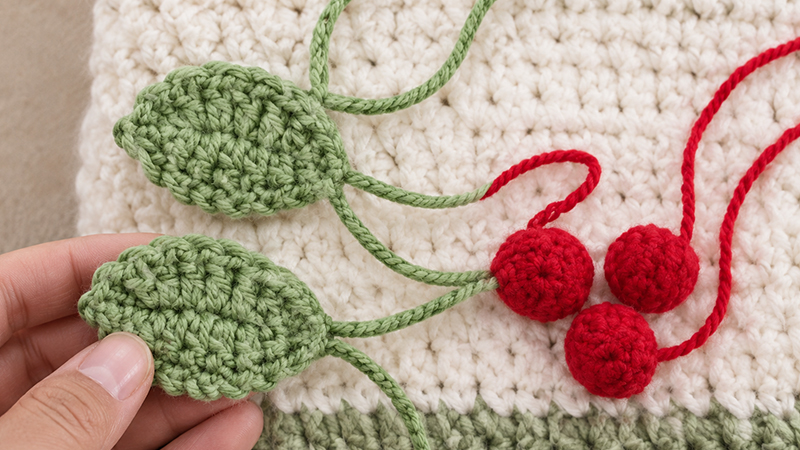
Leaves (Make 2 with Green)
- Rnd 1: Ch 6.
- Rnd 2: Starting in the second chain from the hook: 1 sc, 1 hdc, 1 dc, 1 tr, then 6 dc all into the final chain stitch. Working along the opposite side of the chain: 1 tr, 1 dc, 1 hdc, 1 sc.
- Rnd 3: [1 sc, ch 2] repeated 14 times around the leaf edge. Fasten off.
Little Ball / Berries (Make 3 with Red)
- Rnd 1: 6 sc in a magic ring, join with a slip stitch. (6)
- Rnd 2: [inc] 6 times. (12)
- Rnd 3-4 (2 rounds): Sc in all 12 sts. (12)
- Rnd 5: [dec] 6 times. (6)
- Note: Stuff lightly with fiberfill, close securely, and sew the leaves and berries onto the upper cuff of the Christmas sock.
3. Bunny Legs & Body
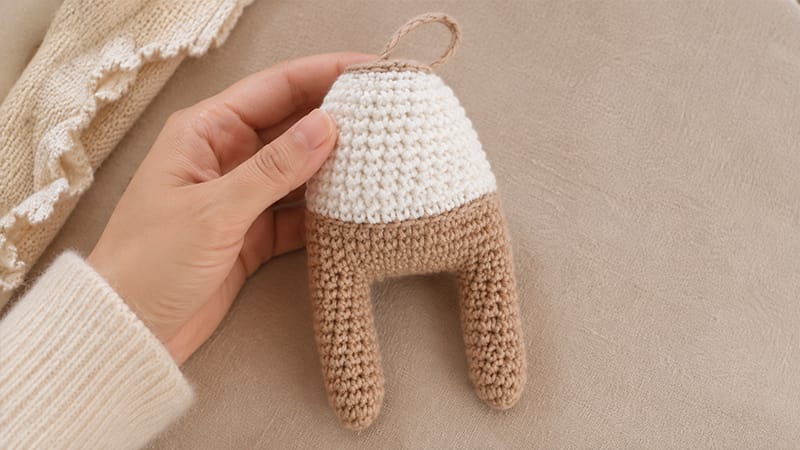
Legs (Make 2 with Brown)
- Rnd 1: 5 sc in a magic ring, join with a white slip stitch. (5)
- Rnd 2: [inc] 5 times. (10)
- Rnd 3-12 (10 rounds): Sc in all 10 stitches. (10)
- Note: Stuff the first leg firmly and fasten off. Crochet the second leg identically, but do not cut the yarn—we will join them to begin the body.
Body
- Rnd 13: From the second leg, chain 8 and join with a slip stitch to the middle stitch of the first leg. Sc in the next 10 sts of the first leg, work 8 sc into the front loops of the chain stitches, sc in the next 10 sts of the second leg, and work 8 sc into the remaining loops of the chain. (36)
- Rnd 14-18 (5 rounds): Sc in all 36 sts. (36)
- Rnd 19: Working in BLO, sc in all 36 sts. (36)
- Rnd 20: Sc in all 36 sts. (36)
- Rnd 21: [4 sc, dec] 6 times. (30)
- Rnd 22-25 (4 rounds): Sc in all 30 sts. (30)
- Rnd 26: [3 sc, dec] 6 times. (24)
- Rnd 27-28 (2 rounds): Sc in all 24 sts. (24)
- Rnd 29: [2 sc, dec] 6 times. (18)
- Rnd 30: Working in BLO, sc in all 18 sts. (18)
- Rnd 31: [1 sc, dec] 6 times. (12)
- Rnd 32: Sc in all 12 sts. (12)
Note: Do not cut yarn; continue straight into the head construction.
4. Head & Face Details
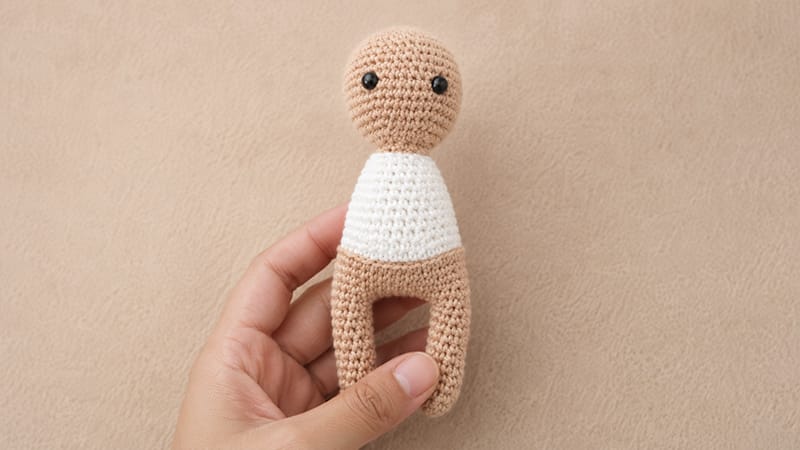
Continuing with brown yarn from the top of the body:
- Rnd 33: [inc] 12 times. (24)
- Rnd 34: [3 sc, inc] 6 times. (30)
- Rnd 35: [4 sc, inc] 6 times. (36)
- Rnd 36: [5 sc, inc] 6 times. (42)
- Rnd 37-44 (8 rounds): Sc in all 42 sts. (42)
- Rnd 45: [5 sc, dec] 6 times. (36)
- Rnd 46: [4 sc, dec] 6 times. (30)
- Rnd 47: [3 sc, dec] 6 times. (24)
- Rnd 48: [2 sc, dec] 6 times. (18)
- Rnd 49: [1 sc, dec] 6 times. (12)
- Rnd 50: [dec] 6 times, then weave shut. (6)
Facial Assembly
- Insert the 6 mm safety eyes securely between Rounds 39 and 40, leaving approximately 8 stitches of space between them.
- Using red yarn, embroider small horizontal accent lines directly underneath each eye.
- Use black embroidery thread to stitch a sweet little nose, mouth, and soft eyebrows.
5. Collar, Ears & Arms
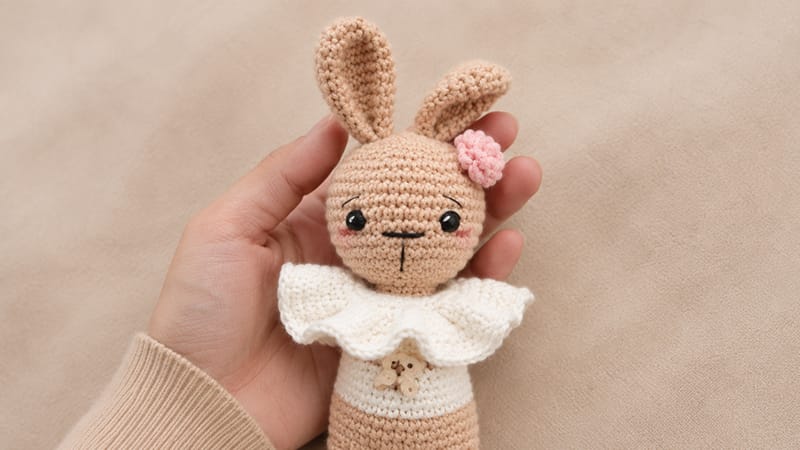
Collar (With White Yarn)
- Join your white yarn into Round 30 of the body with a slip stitch.
- Rnd 1: Ch 2, work [DC-inc] 18 times. (36)
- Rnd 2: Ch 2, work [DC-inc] 36 times. (72)
- Rnd 3: Ch 2, dc in all 72 stitches. (72)
- Border: Add the same decorative shell border used on the sock (6 dc into every second stitch) all the way around the collar edge.
Ears (Make 2 with Brown)
- Rnd 1: 6 sc in a magic ring, join with a white slip stitch. (6)
- Rnd 2: [inc] 6 times. (12)
- Rnd 3: [1 sc, inc] 6 times. (18)
- Rnd 4-8 (5 rounds): Sc in all 18 sts. (18)
- Rnd 9: [1 sc, dec] 6 times. (12)
- Rnd 10-11 (2 rounds): Sc in all 12 sts. (12)
- Rnd 12: [4 sc, dec] 2 times. (10)
Fasten off, leaving a long tail to sew the ears neatly onto the top of the head.
Arms (Make 2 with Brown)
- Rnd 1: 5 sc in a magic ring, join with a white slip stitch. (5)
- Rnd 2: [inc] 5 times. (10)
- Rnd 3-17 (15 rounds): Sc in all 10 stitches. (10)
- Rnd 18: Flatten the opening closed and work 5 sc across both layers to seal it shut.
Note: Do not stuff the arms. Sew them firmly to each side of the upper body just beneath the white collar.
