
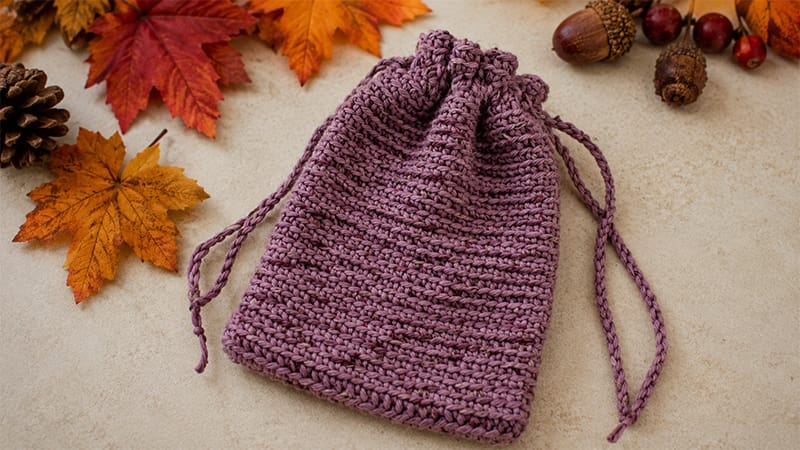
This versatile crochet pouch is a fantastic, quick-stash-busting project perfect for beginners and experienced makers alike.
Featuring a gorgeous, ribbed texture created by working in the back loops only, it yields a seamless and durable finish.
It is ideal for storing everyday essentials like makeup, tech accessories, and toiletries, or for gifting and charitable donations.
Project Overview & Specs
- Skill Level: Beginner
- Finished Size: Approximately 4.5″ wide by 7″ tall (easily adjustable by changing your starting chain length).
- Gauge: Not critical. Ensure your stitches are firm enough so contents won’t slip out.
Materials Needed
- Yarn: Medium-weight (Category 4 / Aran) yarn. Highly recommend 100% cotton or a cotton blend for durability and washability. You will need roughly 70 yards.
- Hook: 4.00 mm (US G/6)
- Tools: Scissors, tapestry needle, and an optional stitch marker.
Abbreviations (US Terms)
- Ch: Chain
- St(s): Stitch(es)
- Sc: Single crochet
- Dc: Double crochet
- BLO: Back loop only
- Sl st: Slip stitch
- FO: Fasten off
Helpful Design Notes
- No Stitch Count Required: There is no strict stitch multiple. To make the pouch wider or narrower, simply add or subtract chains at the very beginning.
- Seamless Construction: The main body is worked in a continuous spiral. Do not join with a slip stitch or turn your work unless specifically instructed. Use a stitch marker to track the first stitch of your rounds.
Step-by-Step Pattern Instructions
Phase 1: The Base & Body
- Round 1: Chain 26. Work 2 sc into the second chain from your hook. Work 1 sc into each chain across until you reach the final chain. Work 2 sc into that last chain. Do not turn. Rotate your piece 180 degrees so you can work along the unmade underside of the foundation chain. Work 1 sc into the bottom of each chain across. Sl st to the first sc to join, then ch 1.
- Round 2: Sc into the BLO of every stitch around. Note: Do not slip stitch to join at the end of this round. Move directly into the next stitch to begin working in a continuous spiral.
- Continuous Rounds: Repeat Round 2 (Sc BLO in each stitch around) continuously. Keep spiraling upward until the bag measures roughly 6 inches from the base. To finish this section cleanly, make sure your last stitch lands on one of the outer edges/sides of the pouch, then sl st to join.
Phase 2: The Eyelet Top
- Round 4 (Casing): Ch 3 (this counts as your first dc). Work 1 dc into every stitch around. Sl st to the top of the beginning ch-3 to close the round.
- Round 5: Ch 1, work 1 sc into every stitch around. Sl st to the first sc to join.
- Round 6: Ch 1, work 1 sc into the BLO of every stitch around. Sl st to join.
- Finish: Cut your yarn, fasten off, and weave in all loose ends securely with your tapestry needle.
Phase 3: The Drawstring Ties (Make 2)
- Chain 85 (or create a chain long enough to wrap completely around the perimeter of the bag with a few inches of overhang).
- Fasten off and trim excess yarn. Repeat to create your second cord.
Assembly & Threading Guide
To ensure your pouch opens and closes smoothly, follow this dual-sided weaving technique:
         [=======================]  <- Round 4 (Double Crochets)
Tie 1 -> (Weave Left to Right) -> Loops all the way around, ends exit LEFT.
Tie 2 -> (Weave Right to Left) -> Loops all the way around, ends exit RIGHT.
- Threading Tie 1: Lay the pouch flat. Start on the left side of the bag at Round 4 (the double crochet row). Weave the chain over the first dc stitch, then under the next. Repeat this over-and-under pattern all the way around the bag. Both ends of Tie 1 should exit on the left side.
- Threading Tie 2: Start on the right side of the bag. Follow the same path as the first tie (going over and under the same dc stitches). Both ends of Tie 2 should exit on the right side.
Tie a secure knot at the open ends of both cords to prevent them from slipping back into the stitches. Gently pull both sides simultaneously to draw your new pouch closed!
