
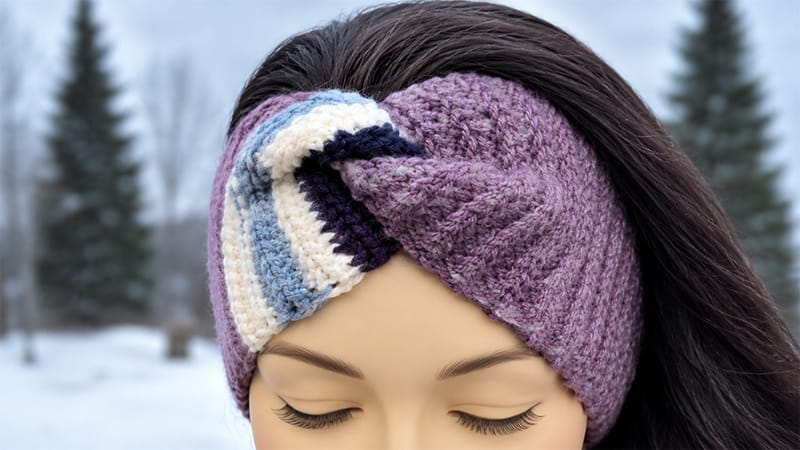
Get the clean, solid look of a knitted dynamic ribbing using nothing but basic crochet skills. This beginner-friendly winter ear warmer is crafted entirely from a clever variation of the slip stitch, creating an ultra-stretchy, gap-free fabric that blocks out the cold.
It works flat as a simple rectangle and is finished with a stylish center twist, making it the perfect cold-weather accessory for anyone who loves wearing high ponytails or messy buns.
Materials & Tools
- Yarn: Medium worsted weight yarn (Category 4)
- Hook Size: 5.50 mm (US I-9) is recommended for most crocheters, or 5.00 mm (US H-8) if you naturally stitch very loosely.
- Notions: Tapestry needle for assembly, sharp scissors, and a measuring tape.
Pattern Specifications
- Skill Level: Advanced Beginner
- Gauge: Approximately 18 stitches and 24 rows = 4″ x 4″ ($10 \text{ cm} \times 10 \text{ cm}$) in slip stitch back-loop-only pattern.
- Finished Dimensions: Approximately 15.5 inches long (unstretched) and 4 to 5 inches wide. This fabric expands significantly to fit average adult heads (21–23 inches).
CRITICAL TENSION NOTE: Slip stitches naturally pull tightly. To keep your fabric flexible and your stitches accessible, you must maintain an intentionally loose tension throughout this project. If your hook is difficult to insert, change to a larger hook size immediately.
Abbreviations (US Terms)
- ch: chain
- st / sts: stitch/stitches
- sl st: slip stitch
- sl st blo: slip stitch in the back loop only
Special Technique: Slip Stitch Back Loop Only (sl st blo)
Instead of diving your hook under both top loops of the stitch from the previous row, look at the top “V” of the stitch.
Insert your hook down through the center of the “V” so you are only picking up the back loop (the loop furthest away from you). Yarn over and pull through both loops on your hook in one smooth motion.
Note: To keep the edges clean and durable, the very first and very last stitches of every row are worked through both loops as normal slip stitches.
Step-by-Step Crochet Instructions
The Ear Warmer Base
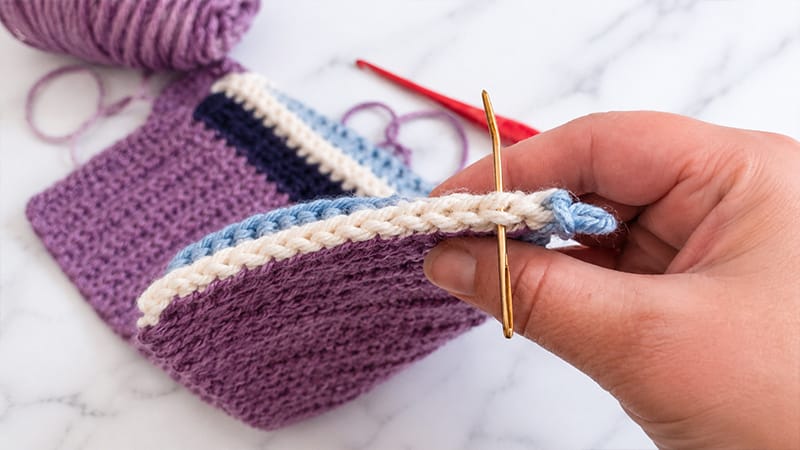
Row 1: Chain 21 loosely. (If you want a wider or narrower headband, adjust this starting chain length. Slip stitch into the second chain from your hook. Work 1 sl st blo into each of the next 17 chains. Work 1 regular sl st into the final chain. Chain 1, turn your work. (Total: 20 stitches)
Row 2: Work 1 regular sl st into the very first stitch. Work 1 sl st blo into each of the next 17 stitches. Work 1 regular sl st into the final stitch. Chain 1, turn your work. (Total: 20 stitches)
Remaining Rows: Repeat Row 2 continuously until your band measures roughly 15.5 inches in length without stretching it. Wrapping it around your head is the best way to check the fit—it should fit snugly with the two ends meeting easily.
Fasten off your yarn, leaving a long tail (around 12 to 15 inches) to use for the assembly phase.
Designing the Center Twist (Assembly)
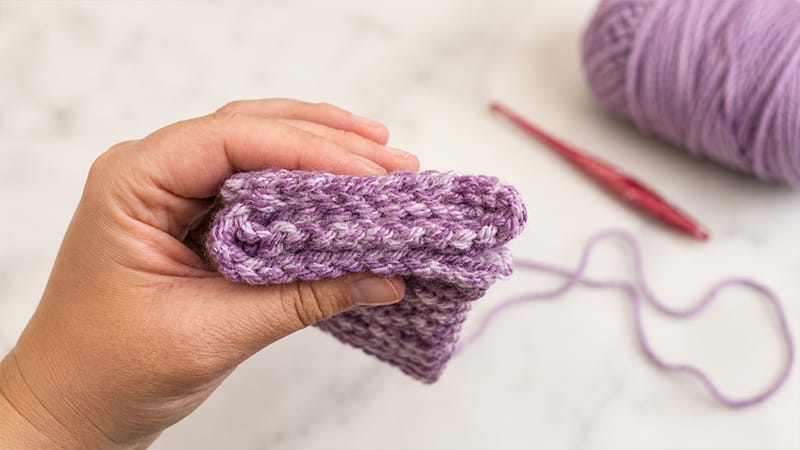
- Lay your finished rectangle out flat on a smooth surface.
- Fold both of the short ends in half lengthwise, creating two “C” or “U” shapes.
- Slide the two folded ends together so that their layers alternate and interlock like a sandwich (you should now be holding four distinct layers of fabric pressed together).
- Thread your long yarn tail onto your tapestry needle.
- Sew straight across the top of all four layers using a whip stitch, ensuring your needle catches every single layer securely so no gaps form.
- Knot your yarn safely, weave in the loose ends, and snip away any excess.
- Flip the entire ear warmer right-side out to reveal your seamless, knitted-style twist!
Bonus Project: Matching Drink Cozy
You can easily use this exact technique to create a matching insulated sleeve for your travel mugs or coffee cups.
- Row 1: Chain 16. Slip stitch into the 2nd chain from your hook, work a sl st blo across the next 13 chains, and place a regular sl st in the last chain. Chain 1, turn. (Total: 15 stitches)
- Row 2: Regular sl st in the first stitch, sl st blo across the next 12 stitches, regular sl st in the last stitch. Chain 1, turn.
- Repeat: Duplicate Row 2 until the piece reaches roughly 9 inches long unstretched. Assemble using the same interlocking twist method outlined above.
- Styling Tip: To create a dual-tone design, simply change your yarn color exactly halfway through the length of your rows.
