
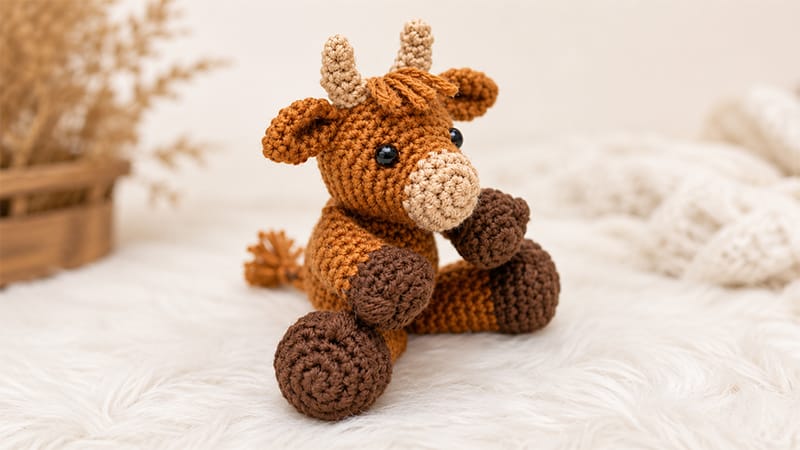
This beginner-friendly amigurumi pattern guides you through creating an adorable, pocket-sized Scottish Highland cow.
Featuring characteristic stubby horns, floppy ears, and a signature shaggy tuft of hair, this little bovine stands approximately 7 inches tall (or 5 inches when sitting).
It is worked in continuous rounds using standard worsted weight yarn, making it a quick and rewarding project for farm animal lovers.
Project Materials & Tools
- Yarn: Medium weight (Category 4 / Worsted) yarn in three shades:
- Color A (Main Body/Brown): ~62 yards
- Color B (Muzzle/Horns/Light Tan): ~7 yards
- Color C (Hooves/Dark Brown): ~20 yards
- Hook Size: 4.0 mm (Size G) crochet hook
- Safety Eyes: One pair of 9mm eyes (Note: If gifting to an infant, embroider the eyes with black yarn instead to eliminate choking hazards).
- Notions: Polyester fiberfill stuffing, tapestry needle, stitch markers, scissors, and straight pins for assembly.
Pattern Abbreviations & Technical Notes
- ch: chain
- st(s): stitch(es)
- sl st: slip stitch
- SC: single crochet
- dec: invisible single crochet decrease (insert hook into front loop of first st, then front loop of second st, yarn over, pull through two loops, yarn over, pull through remaining loops).
Pro-Tip: This toy is crocheted in seamless, continuous spirals. Do not join rounds with a slip stitch unless explicitly directed. Always place a stitch marker in the first stitch of the round to keep track of your progress. Stuff the components firmly as you go.
Step-by-Step Crochet Instructions
1. Main Body
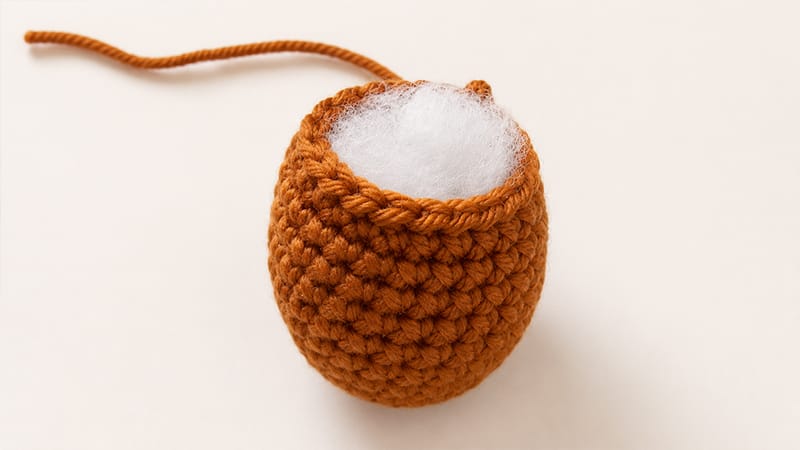
Using Color A
- R1: Form a magic ring and work 6 SC into it. (6 sts)
- R2: 2 SC in every st around. (12 sts)
- R3: *2 SC in next st, 1 SC in next st*; repeat from * around. (18 sts)
- R4: *2 SC in next st, 1 SC in each of the next 2 sts*; repeat from * around. (24 sts)
- R5: *2 SC in next st, 1 SC in each of the next 3 sts*; repeat from * around. (30 sts)
- R6–11: 1 SC in each st around. (30 sts over 6 rounds)
- R12: *dec, 1 SC in each of the next 3 sts*; repeat from * around. (24 sts)
- R13–15: 1 SC in each st around. (24 sts over 3 rounds)
- R16: *dec, 1 SC in each of the next 2 sts*; repeat from * around. (18 sts)
- Cut yarn, leaving a generous length for sewing later. Fasten off and pack firmly with fiberfill stuffing.
2. The Head
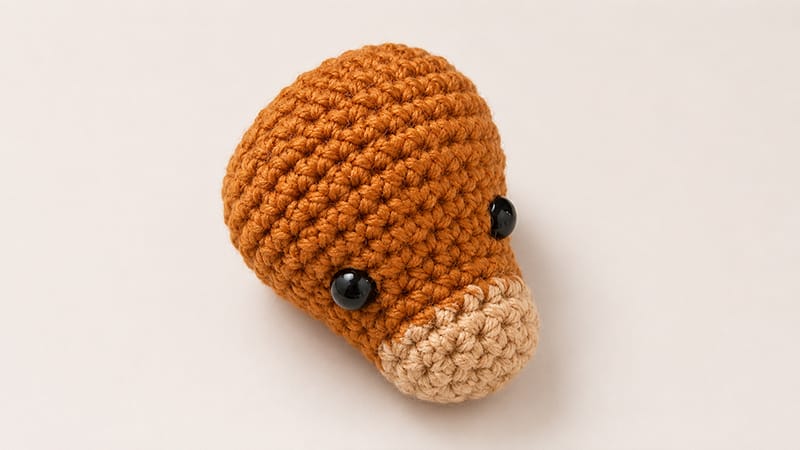
Start with Color B (Muzzle)
- R1: Work 6 SC into a magic ring. (6 sts)
- R2: 2 SC in every st around. (12 sts)
- R3: *2 SC in next st, 1 SC in next st*; repeat from * around. (18 sts)
- R4: 1 SC in each st around. (18 sts)
- Switch to Color A (Face/Head)
- R5–6: 1 SC in each st around. (18 sts over 2 rounds)
- R7: Repeat *2 SC in next st, 1 SC in next 2 sts* a total of 3 times, then SC in the final 9 sts. (21 sts)
- R8: Repeat *2 SC in next st, 1 SC in next 3 sts* a total of 3 times, then SC in the final 9 sts. (24 sts)
- R9: Repeat *2 SC in next st, 1 SC in next 4 sts* a total of 3 times, then SC in the final 9 sts. (27 sts)
- R10: Repeat *2 SC in next st, 1 SC in next 5 sts* a total of 3 times, then SC in the final 9 sts. (30 sts)
- R11: Repeat *2 SC in next st, 1 SC in next 4 sts* a total of 3 times and place a temporary marker in the last worked st. Repeat *2 SC in next st, 1 SC in next 4 sts* another 3 times to finish the round. (36 sts)Placement Note: The temporary markers help isolate the top and bottom of the head. Install the 9mm safety eyes between rounds 8 and 9, spacing them roughly 7 stitches apart on the front of the face.
- R12–14: 1 SC in each st around. (36 sts over 3 rounds)
- R15: *dec, 1 SC in each of the next 4 sts*; repeat from * around. (30 sts)
- R16: *dec, 1 SC in each of the next 3 sts*; repeat from * around. (24 sts)
- R17: 1 SC in each st around. (24 sts)
- R18: *dec, 1 SC in each of the next 2 sts*; repeat from * around. (18 sts)
- R19: *dec, 1 SC in next st*; repeat from * around. (12 sts)
- Stuff the head firmly with fiberfill.
- R20: dec around 6 times. (6 sts)
- Cut yarn, weave the tail through the remaining front loops, pull tightly to close the opening, and hide the end inside the head.
3. Floppy Ears (Make 2)
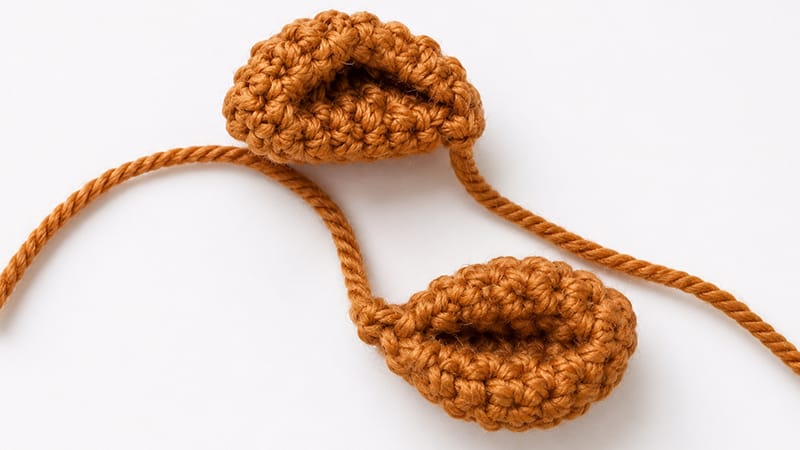
Using Color A. Do not stuff.
- R1: Work 4 SC into a magic ring. (4 sts)
- R2: *2 SC in next st, 1 SC in next st*; repeat from * around. (6 sts)
- R3: *2 SC in next st, 1 SC in next st*; repeat from * around. (9 sts)
- R4: *2 SC in next st, 1 SC in each of the next 2 sts*; repeat from * around. (12 sts)
- R5–6: 1 SC in each st around. (12 sts over 2 rounds)
- R7: *dec, 1 SC in each of the next 2 sts*; repeat from * around. (9 sts)
- R8 (Shaping): Flatten the ear piece. Crochet through both layers across to seal it shut using 3 SC (leave the remaining stitches unworked). Pinch the base of the ear together into a curved shape and secure it closed with 1 final SC through the pinched layers.
- Fasten off, leaving a long thread for attachment.
4. Horns (Make 2)
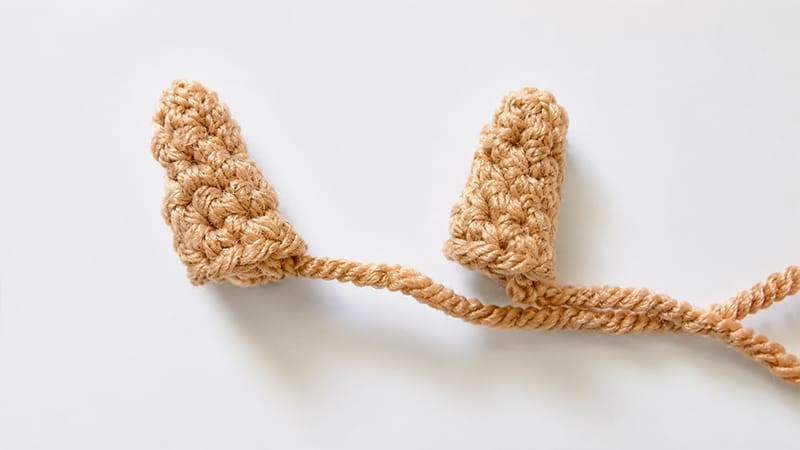
Using Color B
- R1: Work 4 SC into a magic ring. (4 sts)
- R2–3: 1 SC in each st around. (4 sts over 2 rounds)
- R4: *2 SC in next st, 1 SC in next st*; repeat from * around. (6 sts)
- R5–6: 1 SC in each st around. (6 sts over 2 rounds)
- Fasten off, leaving a long thread. Pack lightly with stuffing.
5. Shaggy Hair Fringe
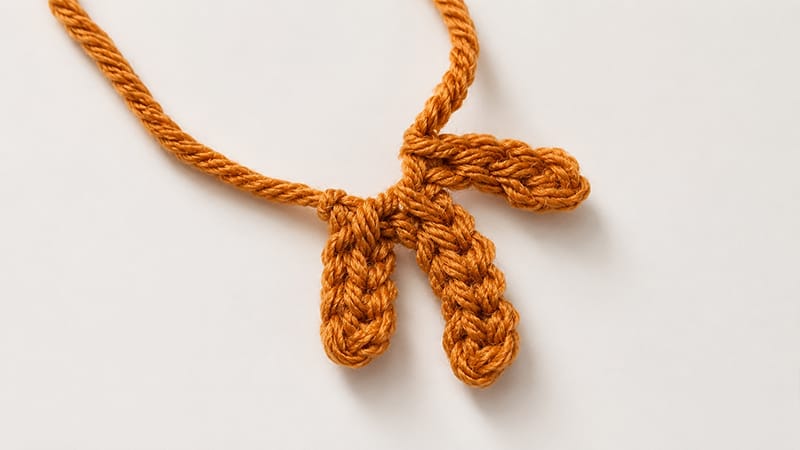
Using Color A. This piece is worked back-and-forth in rows.
- Row 1: Ch 5, turn, sl st into the 2nd chain from the hook and in each remaining chain across. (4 sts)
- Row 2: Ch 7, turn, sl st into the 2nd chain from hook and in each remaining chain across. (6 sts)
- Row 3: Ch 5, turn, sl st into the 2nd chain from hook and in each remaining chain across. (4 sts)
- Fasten off, leaving a tail to sew the hair to the forehead.
6. Chunky Legs (Make 2)
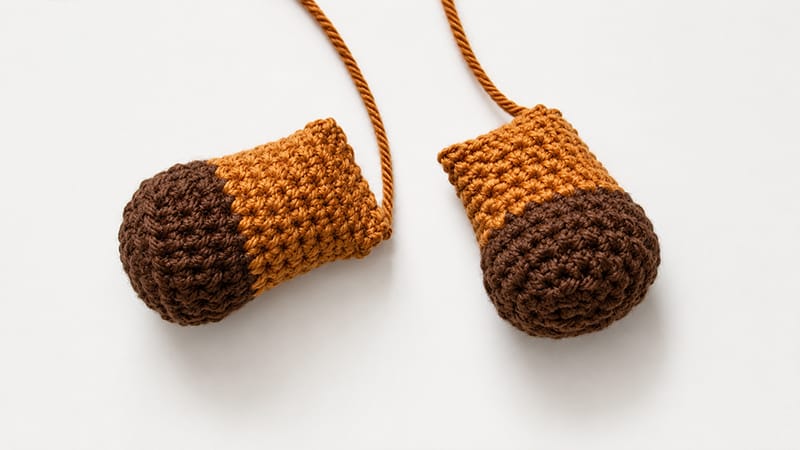
Start with Color C (Hooves)
- R1: Work 6 SC into a magic ring. (6 sts)
- R2: 2 SC in every st around. (12 sts)
- R3: *2 SC in next st, 1 SC in next st*; repeat from * around. (18 sts)
- R4: *2 SC in next st, 1 SC in each of the next 2 sts*; repeat from * around. (24 sts)
- R5: Working in Back Loops Only (BLO), SC in each st around. (24 sts)
- R6: 1 SC in each st around. (24 sts)
- R7: *dec, 1 SC in each of the next 2 sts*; repeat from * around. (18 sts)
- Switch to Color A (Leg)
- R8–9: 1 SC in each st around. (18 sts over 2 rounds)
- R10: *dec, 1 SC in each of the next 7 sts*; repeat from * around. (16 sts)
- R11–15: 1 SC in each st around. (16 sts over 5 rounds)
- Fill the leg firmly with stuffing.
- R16: Flatten the top opening of the leg and work 7 SC straight through both layers to close the edge. Fasten off with a long sewing tail.
7. Arms (Make 2)
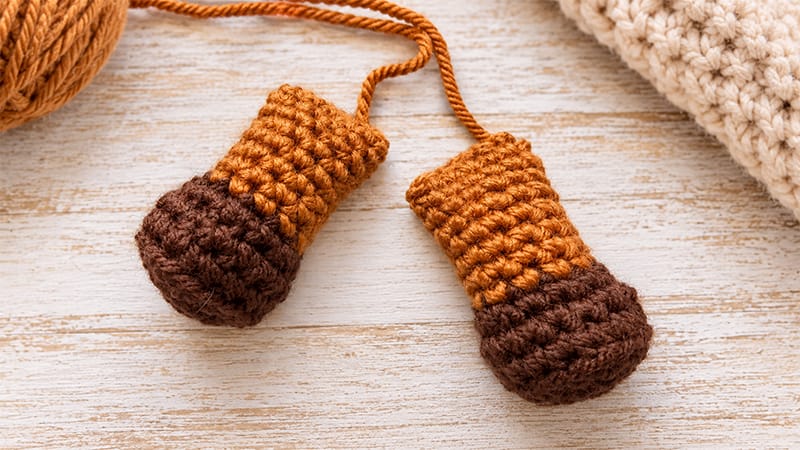
Start with Color C (Hooves)
- R1: Work 6 SC into a magic ring. (6 sts)
- R2: 2 SC in every st around. (12 sts)
- R3: *2 SC in next st, 1 SC in next st*; repeat from * around. (18 sts)
- R4: Working in Back Loops Only (BLO), SC in each st around. (18 sts)
- R5: 1 SC in each st around. (18 sts)
- R6: *dec, 1 SC in next st*; repeat from * around. (12 sts)
- Switch to Color A (Arm)
- R7–13: 1 SC in each st around. (12 sts over 7 rounds)
- Fill the arm with stuffing.
- R14: Flatten the opening and work 5 SC through both layers to close. Fasten off, leaving a long sewing tail.
8. The Tail
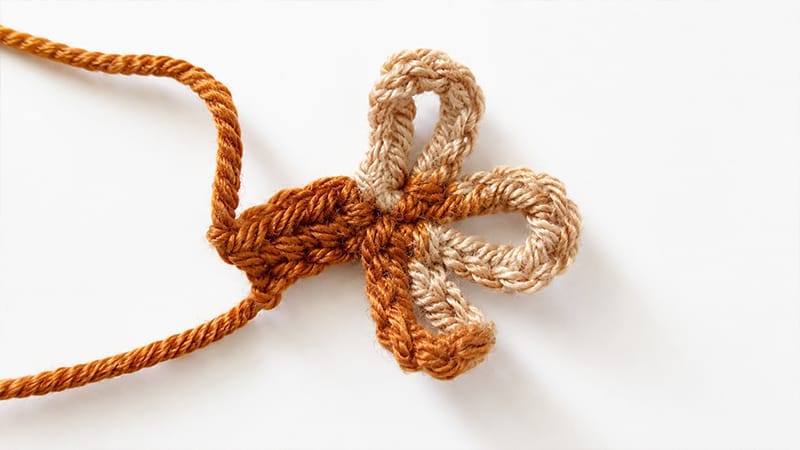
Using Color A
- Row 1: Ch 5, turn, work 1 SC into the 2nd chain from hook and each chain across. (4 sts). Fasten off, leaving a sewing tail.
- Add the Fluffy Tip (Using Color B): Join the light brown yarn to the bottom tip of the tail.
- Loop 1: Ch 10, sl st back into the same base stitch of the tail.
- Loop 2: Ch 10, sl st back into the same base stitch.
- Loop 3: Ch 10, sl st back into the same base stitch. Fasten off and neatly weave in these accent ends.
Assembly & Finishing Touches
Use straight pins to position all pieces securely before stitching them down to ensure everything stays perfectly symmetrical.
- Ears: Attach the floppy ears over Rounds 14–15 on the sides of the head, pointing downward, leaving roughly 10 open stitches between them across the brow.
- Horns: Sew the horns just inside and slightly above the ears over Rounds 14–15, leaving about 4 stitches of separation between the two horns.
- Hair Fringe: Secure the shaggy hair piece right between the horns along Rounds 13–14 so it drapes forward over the forehead.
- Head to Body: Position the stuffed body against the bottom of the head (covering roughly Rounds 10–16 on the underside of the head). Make sure the muzzle points perfectly forward, then stitch securely.
- Legs: Sew the flat closed edges of the legs to Rounds 4–5 at the base of the body. Position them so the inner corners touch in the front, giving the cow a stable sitting posture.
- Arms: Secure the arms vertically along the sides of the body over Rounds 11–15. Angle them slightly so they are closer together at the top (10 stitches apart) and wider at the bottom (15 stitches apart).
- Hoof Details: Take a scrap length of Color C (dark brown) yarn and embroider a vertical line down the center of each hoof to mimic a split hoof look. Wrap the yarn around Rounds 3–5 on the arms and Rounds 3–6 on the legs.
- Tail: Sew the base of the tail to the center back of the body between Rounds 5 and 6.
