
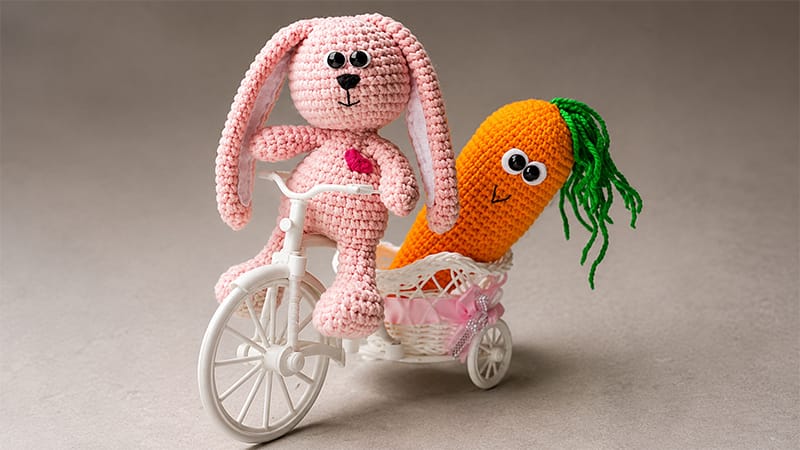
Easter is a wonderful time to gather with family, share delicious meals, and create lasting memories with loved ones.
Adding handmade decorations and gifts makes the celebration feel even more special. This adorable blue Easter bunny amigurumi, complete with soft pink inner ears and a sweet red heart accent, is a charming project for spring.
It can be given as a thoughtful Easter gift or displayed as a cute piece of seasonal home decor.
Made with soft micro polyester yarn, this bunny is a rewarding project for crocheters who enjoy creating cuddly handmade keepsakes.
With clear shaping and simple amigurumi techniques, you can create a lovable bunny that will be treasured for years to come.
Materials & Tools
- Yarn: Yarn Art Dolce Baby (100% Micro Polyester, 50g/85m) in blue for the bunny
- Optional Carrot: Yarn Alize Cotton Gold Plus (55% cotton, 45% acrylic)
- Crochet Hook: 4 mm
- Safety Eyes: 10 mm safety eyes, 2 pairs
- Felt: Small pieces of white, pink, and red felt
- Stuffing: Polyester fiberfill
- Other Supplies: Tapestry needle and stitch markers
Crochet Abbreviations
- Ch: Chain
- Sc: Single crochet
- Dc: Double crochet
- Inc: Increase — work two single crochets into the same stitch
- Dec: Decrease — single crochet two stitches together
- BLO: Back loops only
- Sl st: Slip stitch
Important Crochet Notes
Work in continuous rounds without joining or turning unless the instructions specifically tell you otherwise. Place a stitch marker at the beginning of each round so you can easily keep track of your position.
When stuffing the bunny, add the fiberfill gradually and firmly enough to maintain the shape without stretching the stitches. If you notice gaps between your stitches, try using a smaller crochet hook to prevent the stuffing from showing through.
Step-by-Step Crochet Instructions
1. Crochet the Arms — Make 2
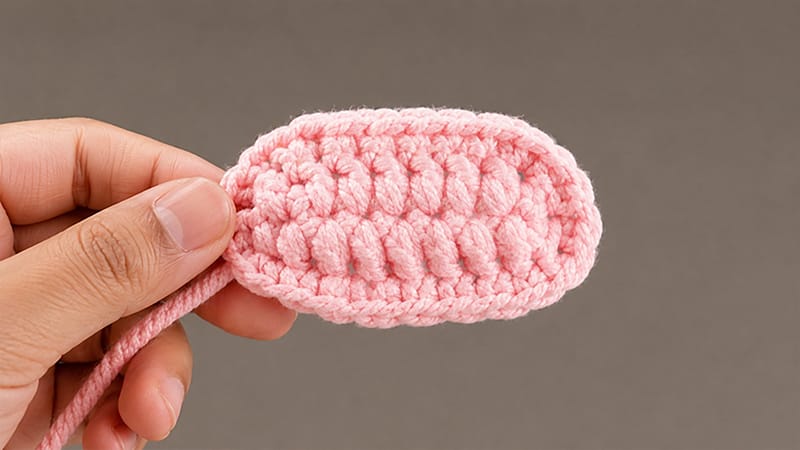
Lightly stuff each arm as you crochet.
- Round 1: Make 5 sc into a magic ring. (5 sts)
- Round 2: Inc in every stitch around. (10 sts)
- Rounds 3–4: Sc in each stitch around. (10 sts)
- Round 5: Repeat [3 sc, dec] twice. (8 sts)
- Round 6: Sc in each stitch around. (8 sts)
- Round 7: Repeat [2 sc, dec] twice. (6 sts)
- Rounds 8–10: Sc in each stitch around. (6 sts)
Fasten off the first arm. Make the second arm in the same way, but leave the yarn attached because it will be joined to the body later.
2. Crochet the Legs and Body
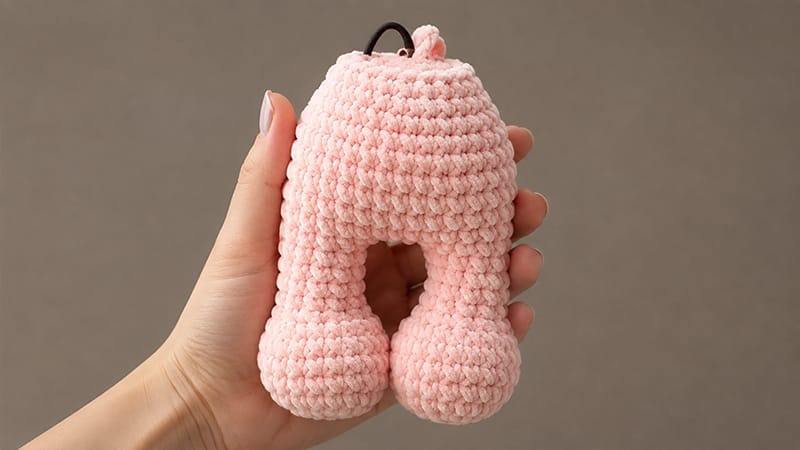
Make 2 Legs
- Round 1: Ch 9. Starting in the fourth chain from the hook, work 2 dc in the same stitch, 4 dc, then 6 dc in the final chain. Continue along the opposite side of the starting chain with 4 dc, followed by 2 dc in the final stitch. Finish with a sl st. (19 sts)
- Round 2: Work 1 sc in the BLO of each stitch around. (19 sts)
- Round 3: Sc in each stitch around. (19 sts)
- Round 4: Work 5 sc, 4 dec, and 6 sc. (15 sts)
- Round 5: Repeat [1 sc, dec] five times. (10 sts)
- Rounds 6–10: Sc in each stitch around. (10 sts)
Fasten off the first leg. Crochet the second leg using the same instructions, but do not fasten off the yarn.
Firmly stuff both legs before joining them together.
Join the Legs and Shape the Body
- Round 11: Ch 2. Work 10 sc around the first leg, 2 sc across the chain bridge, 10 sc around the second leg, then 2 sc along the opposite side of the chain. (24 sts)
- Round 12: Repeat [2 sc, inc] eight times. (32 sts)
- Rounds 13–18: Sc in each stitch around. (32 sts)
- Round 19: Repeat [2 sc, dec] eight times. (24 sts)
- Round 20: Repeat [1 sc, dec] eight times. (16 sts)
Attach the Arms
Position the bunny so that the beginning of the round is centered on the side of the body. If necessary, add or remove a few stitches so your marker sits directly at the side.
- Round 21: Work 3 sc through both the first arm and body at the same time, 4 sc across the front of the body, 3 sc through both the second arm and body, then 6 sc across the back. (16 sts)
- Round 22: Work 3 sc across the exposed stitches of the first arm, 4 sc across the body, 3 sc across the second arm, and 6 sc across the back. (16 sts)
- Round 23: Repeat [2 sc, dec] four times. (12 sts)
- Round 24: Sc in each stitch around. (12 sts)
3. Crochet the Head
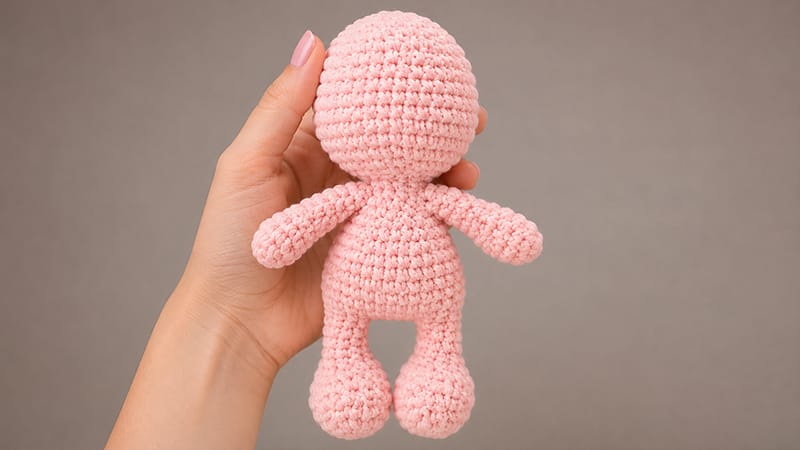
Continue directly from the top of the body into the head.
- Round 25: Inc in every stitch around. (24 sts)
- Round 26: Repeat [1 sc, inc] around. (36 sts)
- Rounds 27–32: Sc in each stitch around. (36 sts)
- Round 33: Repeat [4 sc, dec] around. (30 sts)
- Round 34: Sc in each stitch around. (30 sts)
- Round 35: Repeat [3 sc, dec] around. (24 sts)
- Rounds 36–37: Sc in each stitch around. (24 sts)
- Round 38: Repeat [2 sc, dec] around. (18 sts)
- Round 39: Repeat [1 sc, dec] around. (12 sts)
- Round 40: Dec in every stitch around to close the opening. (6 sts)
Fasten off and weave the yarn tail neatly into the finished piece.
4. Crochet the Ears — Make 2
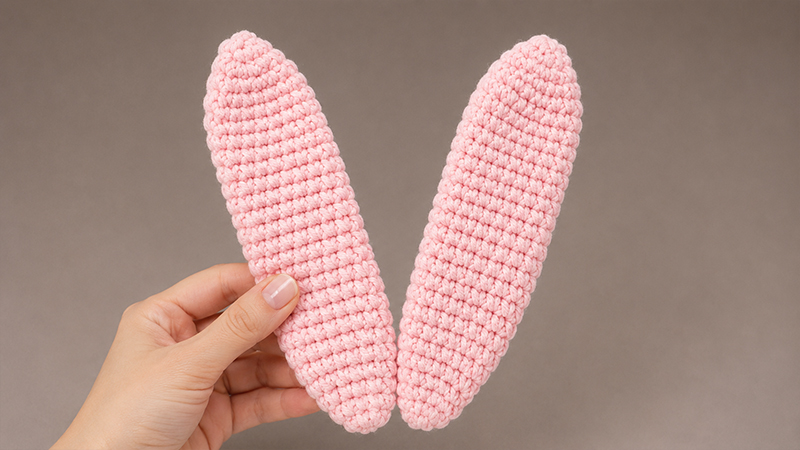
- Round 1: Make 5 sc into a magic ring. (5 sts)
- Round 2: Inc in every stitch around. (10 sts)
- Round 3: Sc in each stitch around. (10 sts)
- Round 4: Repeat [1 sc, inc] five times. (15 sts)
- Round 5: Repeat [2 sc, inc] five times. (20 sts)
- Rounds 6–24: Sc in each stitch around. (20 sts)
- Round 25: Repeat [2 sc, dec] five times. (15 sts)
- Round 26: Repeat [1 sc, dec] five times. (10 sts)
- Round 27: Work 5 consecutive decreases. (5 sts)
Flatten the opening of each ear so the two sides line up. Crochet sc through both layers to close the base. Fasten off and leave a long enough yarn tail for sewing the ear onto the head.
Assembly and Finishing
Add the Face
Insert the 10 mm safety eyes between Rounds 33 and 34 of the head. For extra security and a neat finish, place small pieces of white felt behind the eyes before securing them.
Embroider the Face
Using black yarn, carefully embroider a small nose and a gentle smiling mouth. Center the details between the two eyes to give your bunny its sweet expression.
Add the Inner Ears
Cut two matching inner-ear pieces from pink felt. Secure them to the flat inner surface of each crocheted ear using glue or by sewing them in place.
Once the felt is securely attached, sew both ears to the top of the bunny’s head.
Add the Heart
Finish your Easter bunny by cutting a small heart from red felt. Attach it securely to the center of the bunny’s chest to create its signature festive accent.
Your adorable blue Easter bunny is now complete and ready to brighten up your Easter celebrations, spring decorations, or handmade gift collection!
