
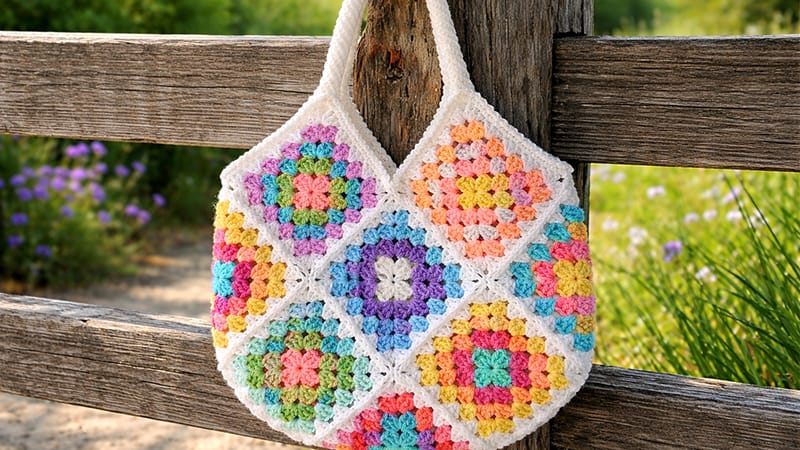
This trendy crochet bag is a fantastic way to utilize leftover yarn from your “stash” or to curate a specific color palette for a stylish accessory.
This method creates a seamless look by completing the final round of each square while simultaneously attaching it to the neighboring pieces. The project is finished with a sophisticated tubular “rope” handle and a decorative top edge.
Pattern Essentials
Skill Level
Intermediate. While the individual squares are beginner-friendly, the assembly requires careful attention to the joining chart and placement.
Finished Size
The body of the completed bag measures approximately 16 inches wide by 16 inches long. Individual squares are roughly 6.5 inches by 6.5 inches. The handles are designed to be 15 inches long.
Materials
Hook: 5.00 mm (H/8) crochet hook.
Yarn: Approximately 260 yards of various colors (8 to 9 different shades recommended) for the centers of the squares, plus 265–300 yards of a Main Color (such as black or white) for the final joining rounds and handles. Use #4 worsted weight yarn.
Tools: Yarn needle for weaving in ends, scissors, a tape measure, and stitch markers.
Abbreviations (US Terminology)
- beg: beginning
- ch: chain
- dc: double crochet
- RS: right side
- sc: single crochet
- sl st: slip stitch
- sp(s): space(s)
- st(s): stitch(es)
- WS: wrong side
- yo: yarn over
Step 1: Crocheting the 13 Squares
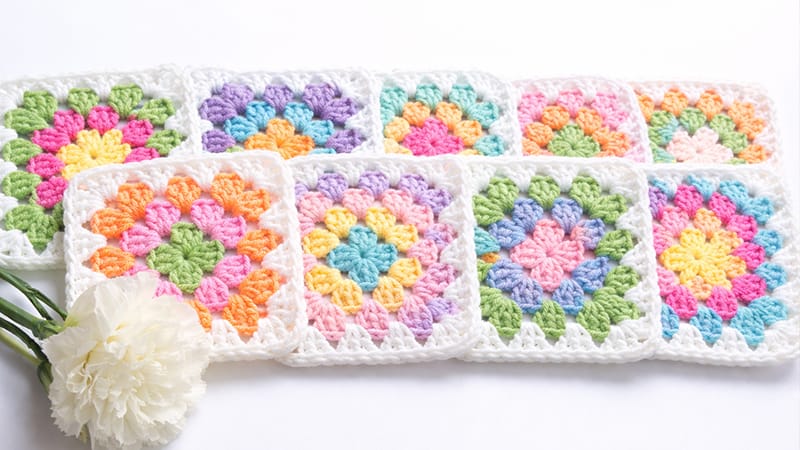
You will need to prepare 13 squares total. Each square is worked through Round 4 in alternating colors. Do not start Round 5 yet; that round is used for assembly.
General Note: Throughout these squares, the beginning ch-3 counts as your first double crochet.
- Foundation: Create a ring by chaining 4 and joining with a slip stitch to the first chain.
- Round 1: Ch 3, then work 2 dc into the center of the ring. Ch 2, then work 3 dc into the ring. Repeat from * to * two more times. End with ch 2 and sl st to the top of the starting ch-3. You should have 12 dc and 4 corner spaces. Fasten off.
- Round 2: Attach a new color with a sl st in any ch-2 corner space. Ch 3, 2 dc in that same space. (3 dc, ch 2, 3 dc) in the next corner space. Repeat from * to * around three times. To finish the first corner, work 3 dc in the starting space, ch 2, and sl st to the top of the ch-3. Fasten off.
- Round 3: Attach a new color in any corner. Ch 3, 2 dc in the same space. 3 dc in the side space (between dc groups), then (3 dc, ch 2, 3 dc) in the next corner. Repeat from * around three times. Finish the starting corner with 3 dc, ch 2, and join with a sl st. Fasten off.
- Round 4: Attach a new color in any corner. Ch 3, 2 dc in the same space. Work 3 dc in each of the next two side spaces, then (3 dc, ch 2, 3 dc) in the next corner. Repeat from * around three times. Finish the starting corner with 3 dc, ch 2, and join with a sl st. Fasten off and weave in your ends.
Step 2: Bag Assembly (The JAYGO Method)

The 13 squares are joined using your Main Color. The Right Side (RS) of your work should always face you. Note that in Round 5, the corners increase to ch-3 to allow for more room during the join.
Layout Logic: You will join the squares in a specific numerical order (1 through 13). After squares 1–6 are connected, you will fold the piece to continue joining the remaining squares into a bag shape.
- Square 1 (Independent): Complete the entire Round 5 without joining. Use the pattern: 3 dc in each side space, (3 dc, ch 3, 3 dc) in corners.
- Square 2 (One Corner Join): Complete Round 5, but when you reach one corner, ch 1, sl st to a corner of Square 1, ch 1, then finish the square.
- One-Sided Joins (Squares 4, 5, 10, 11): To join a full side, work your corner normally, then replace the spaces between dc groups with a sl st into the corresponding space of the adjacent square.
- Two-Sided Joins (Squares 3, 6, 7, 8, 9): Use the sl st joining method along two adjacent sides to connect to two different squares.
- Four-Sided Joins (Squares 12, 13): These squares act as “bridges,” joining on all four sides to pull the bag structure together.
Folding Note: Once squares 1 through 6 are attached, fold the piece so the Right Sides are facing out. Use the remaining squares to “seam” the sides and bottom together by following the numerical order.
Step 3: Top Opening Edge
Once the bag is assembled, finish the top rim using your Main Color.
- Round 1: Start in any stitch and work 1 sc in every stitch around the opening. In the ch-3 corner spaces at the top points, work 3 sc. Where two squares meet at a join, work 1 sc into each square’s corner and skip the join itself.
- Round 2: Work a decorative edge by repeating (ch 1, sl st in the next stitch) all the way around the rim. Fasten off.
Step 4: Crafting the Tubular Handles
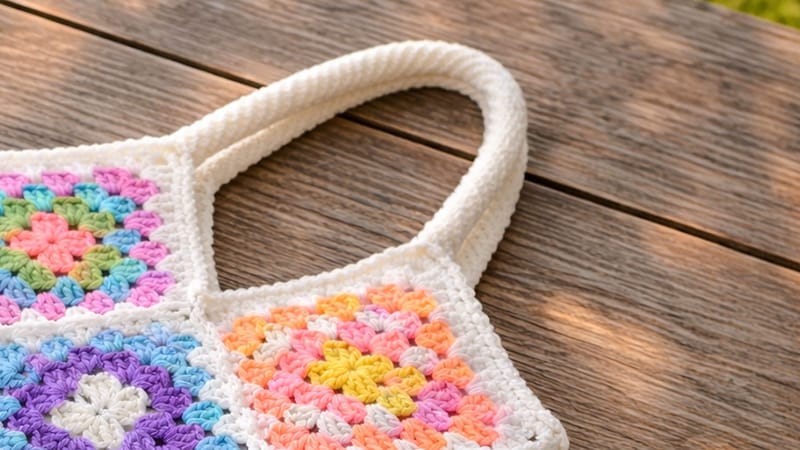
Make two handles. These are worked in continuous rounds to create a sturdy, rope-like tube.
- Foundation: Leave a 12-inch tail of yarn, ch 6, and sl st to the first chain to form a ring.
- Round 1-2: Work 1 sc in each stitch around. Do not join rounds; use a stitch marker to track your progress.
- Round 3+: Work 1 sc into the horizontal loop (the “side leg” on the wrong side of the stitch) for every stitch. This technique forces the tube to form with the “Right Side” of the stitches on the inside.
- Completion: Continue until the handle is 15 inches long. Leave another 12-inch tail and fasten off.
- Attachment: Sew the handles to the inside of the bag, approximately one inch below the top points of the squares. One handle attaches to Squares 1 and 2; the other to Squares 10 and 11.
Helpful Tips for Beginners
- End Management: Weave in your yarn ends after completing each round or each square. This prevents a tedious task at the very end of the project.
- Keep Your Face Forward: Ensure the Right Side (RS) of your squares is always facing you while working Round 5 to keep the joins consistent.
- Marker Magic: Use stitch markers to identify the top corners of Squares 1 and 2 early on; this makes it much easier to find where the handles should be sewn later.
- Scrap Savvy: This pattern is the perfect “stash-buster”. If you have small amounts of yarn left from other projects, use a different color for every round of the first four rounds to create a vibrant, eclectic look.
