
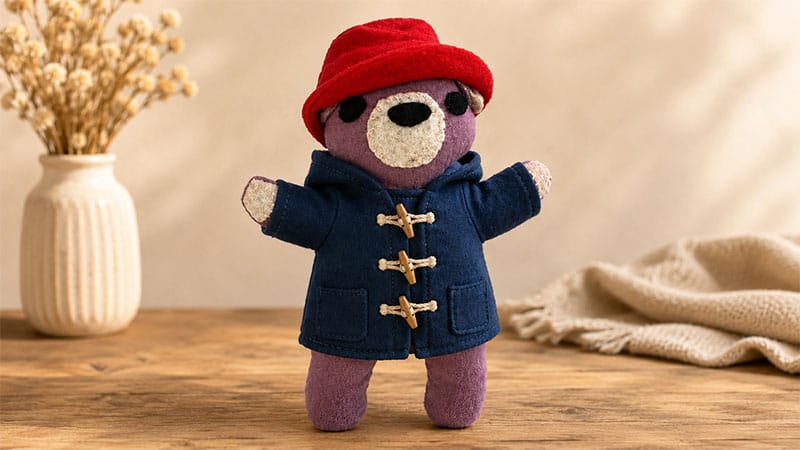
If you want to bring a touch of vintage children’s literature into your sewing room, making a handmade, marmalade-loving British bear plushie is the perfect project.
This timeless toy makes a wonderful heirloom gift for toddlers and storybook fans alike.
By creating a simple base bear and dressing him in his signature rainy-day attire, you can easily customize a look-alike of everyone’s favorite Peruvian traveler.
Materials Checklist
- Bear Body: Tan or brown fleece, minky, or soft faux fur.
- Hat & Coat: Stiff red craft felt (for the hat) and royal blue wool or felt (for the duffle coat).
- Notions: Black embroidery floss, polyester fiberfill stuffing, and small wooden toggle buttons or twine.
Step-by-Step Assembly Instructions
1. The Bear Body Base
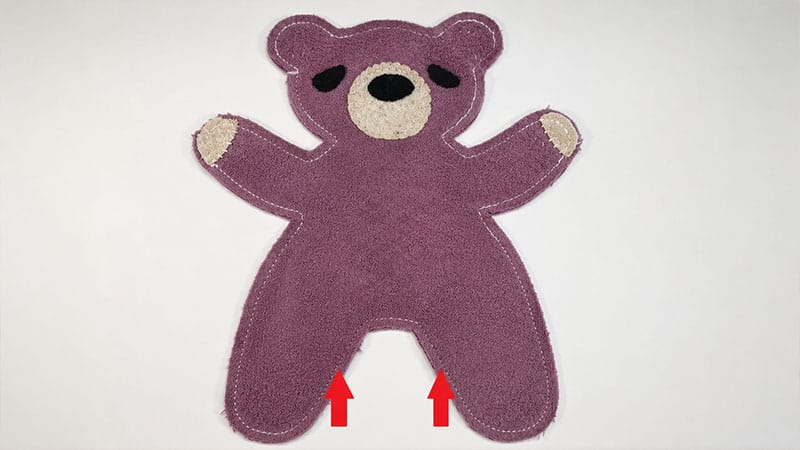
A straightforward, durable plush teddy bear base with simple embroidered features.
- Cut the Pieces: Trace your preferred basic bear pattern onto your brown fabric. You will need front and back body pieces, plus arm and leg segments if your pattern separates them.
- Sew the Outline: Stitch the pieces with right sides facing together. Crucial Step: Leave a 2-inch opening at the lower crotch or lower back.
- Prepare for Turning: Before flipping the fabric, use sharp scissors to carefully clip into the seam allowances along all tight curves (like the neck, armpits, and ears). This prevents the fabric from bunching up.
- Stuff and Finish: Invert the bear through the opening so the right side is facing out. Stuff firmly with high-quality fiberfill. Use a hidden ladder stitch (or whipstitch) to close the opening by hand.
- Embroider the Face: Using black embroidery floss, use a satin stitch to create a triangular nose and a classic inverted “Y” shape for the mouth.
2. The Signature Red Bucket Hat
A structured, wide-brimmed red hat that sits perfectly between the bear’s ears.
- Cut the Felt: Cut out a circular brim piece (with a hole in the center for the head), a rectangular side band, and a small circular top piece from your red craft felt.
- Assemble the Crown: Sew the short ends of the rectangular band together to form a tube. Attach the small felt circle to the top of this tube using a straight stitch.
- Attach the Brim: Sew the bottom of the tube to the hat brim’s inner circle. Because felt does not fray, you do not need to hem the edges, leaving a clean, vintage finish.
3. The Blue Hooded Duffle Coat
A cozy, miniature blue jacket featuring an oversized hood and toggle closures.
- Cut the Jacket Panels: You will need one back piece, two front jacket panels, two sleeve pieces, and two hood halves cut from royal blue felt or heavy cotton fabric.
- Stitch the Body: Pin the front panels to the back panel at the shoulders and sides, right sides together, and sew. Attach the sleeves to the armholes.
- Construct the Hood: Sew the two curved hood pieces together along the back seam. Pin the bottom edge of the hood to the neckline of the jacket and stitch securely.
- Add Closures: Turn the jacket right side out. Hand-sew tiny wooden toggle buttons or loops made of twine to the front panels to mimic a traditional British duffle coat.
Pro Sewing Tips
- Felt is Your Friend: Using felt for the coat and hat eliminates the need for complex hemming, which speeds up the process significantly and helps the clothes hold their shape.
- Child Safety: If gifting this plushie to a child under three years old, substitute plastic safety eyes with embroidered black thread knots to avoid choking hazards.
