
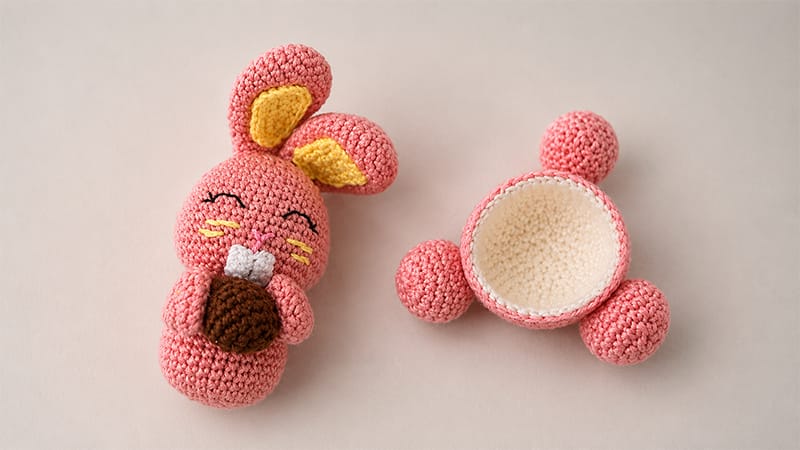
Welcome to crafting Roger, a charming Easter bunny amigurumi! This delightfully unique project features a floppy-eared rabbit sitting snugly inside a textured eggshell, complete with cute footpads, an adorable tiny tail, and his very own sweet chocolate egg.
Designed with fingering weight cotton, this pattern is perfect for intermediate crocheters seeking a festive holiday creation or a memorable handmade gift.
Follow the clear, step-by-step assembly and embroidery instructions below to bring every detail of this whimsical springtime character to life seamlessly.
Materials & Tools
- Yarn (Fingering Weight): Blue-grey (Body/Head/Ears), Yellow (Inner Ears), Nude (Eggshell), Chestnut Brown (Egg), White (Teeth), Pink (Nose)
- Embroidery Thread: Fine black thread for eyes
- Tools: 2.0 mm crochet hook, tapestry needle, embroidery needle, stitch markers, pins, scissors, fiberfill stuffing
Pattern Abbreviations (US Terms)
- MR: Magic ring | Ch: Chain | R: Round
- Sc: Single crochet | Hdc: Half double crochet | Dc: Double crochet
- Htc: Half treble crochet | Inc: Increase | Dec: Decrease
- Sl st: Slip stitch | Fo: Fasten off
Head & Body Component
Head (Blue-Grey)
- R1: 6 sc in MR (6)
- R2: 6 inc (12)
- R3: (1 sc, inc) ×6 (18)
- R4: (1 sc, inc, 1 sc) ×6 (24)
- R5: 24 sc (24)
- R6: (3 sc, inc) ×6 (30)
- R7: 30 sc (30)
- R8: (2 sc, inc, 2 sc) ×6 (36)
- R9–13: 36 sc across [5 rounds] (36)
- R14: (2 inc, 16 sc) ×2 (40)
- R15: 1 sc, 2 inc, 18 sc, 2 inc, 17 sc (44)
- R16: (4 dec, 14 sc) ×2 (36)
- R17: (4 sc, dec) ×6 (30)
- R18: (3 sc, dec) ×6 (24)
- R19: (2 sc, dec) ×6 (18)
Stuff firmly.
- R20: (1 sc, dec) ×6 (12)
- R21: 6 dec (6)
Sl st, Fo, weave end closed.
Main Body (Blue-Grey)
- R1: 6 sc in MR (6)
- R2: 6 inc (12)
- R3: (1 sc, inc) ×6 (18)
- R4: (1 sc, inc, 1 sc) ×6 (24)
- R5: (3 sc, inc) ×6 (30)
- R6–11: 30 sc across [6 rounds] (30)
- R12: (3 sc, dec) ×6 (24)
- R13: 24 sc (24)
- R14: (2 sc, dec) ×6 (18)
- R15–16: 18 sc (18)
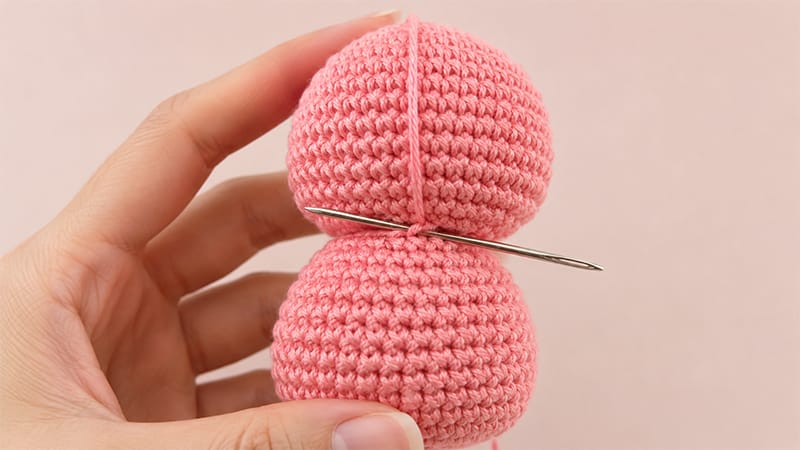
Sl st, fo leaving a long tail. Stuff firmly and stitch to the head.
Eggshell Base & Feet
Cracked Eggshell (Nude)
- R1: 6 sc in MR (6)
- R2: 6 inc (12)
- R3: (1 sc, inc) ×6 (18)
- R4: (1 sc, inc, 1 sc) ×6 (24)
- R5: (3 sc, inc) ×6 (30)
- R6: (2 sc, inc, 2 sc) ×6 (36)
- R7–11: 36 sc across [5 rounds] (36)
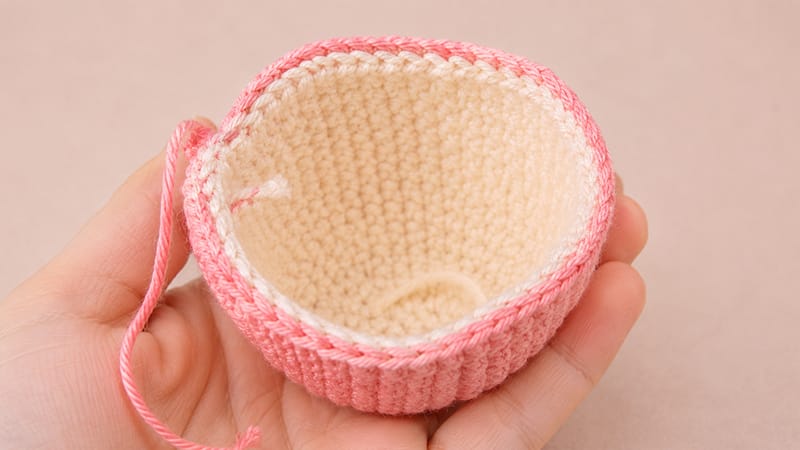
- R12 (Jagged Edge): 1 sc, 1 hdc, 1 dc, [2 htc in same st], 1 dc, 1 hdc, 1 sc, 1 hdc, 1 dc, 1 hdc, 1 sc, 1 dc, [2 htc in same st], 1 hdc, 1 sc, 1 sl st, 1 sc, 1 hdc, [1 dc, ch 1, 1 dc in same st], 1 hdc, 1 htc, 1 dc, 1 hdc, 1 sc, 1 sl st, 1 hdc, 1 sc, 1 sl st, 1 sc, 1 hdc, 2 dc, 1 hdc, 1 sc, 1 sl st (39)
Fo, secure ends.
Feet (Make 2, Blue-Grey)
- R1: 6 sc in MR (6)
- R2: 6 inc (12)
- R3–4: 12 sc (12)
- R5: (inc, 5 sc) ×2 (14)
- R6: (inc, 6 sc) ×2 (16)
- R7–10: 16 sc across [4 rounds] (16)
- R11: (dec, 6 sc) ×2 (14)
- R12: (dec, 5 sc) ×2 (12)
Add light stuffing.
- R13: 6 dec (6)
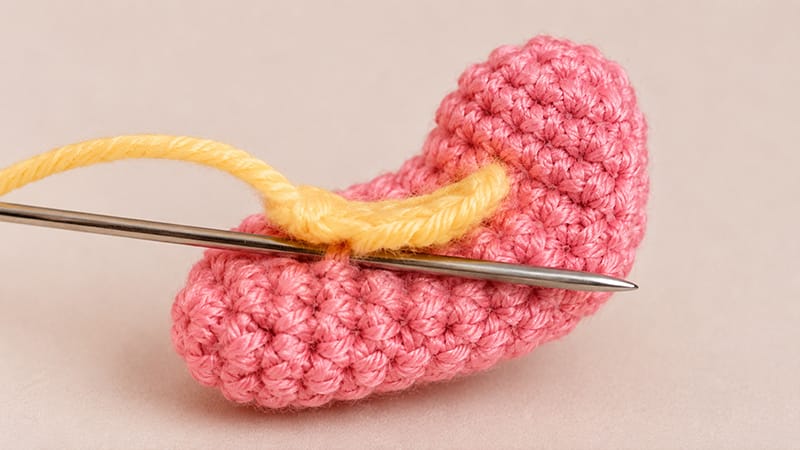
Pass yarn through front loops to draw closed. Thread through the 5th round down and cinch slightly to create a bend.
Paw Pads (Make 2, Nude)
- R1: Ch 3.
- R2: 1 sc, [3 sc in end ch], 1 sc, inc in initial ch (7)
- R3: 2 sc, 2 inc, 3 sc (9)
Sl st, Fo with tail. Attach to foot soles.
Ears, Limbs & Accessories
Outer Ears (Make 2, Blue-Grey)
- R1: 6 sc in MR (6)
- R2: 6 inc (12)
- R3: (1 sc, inc) ×6 (18)
- R4: (1 sc, inc, 1 sc) ×6 (24)
- R5–9: 24 sc across [5 rounds] (24)
- R10: (dec, 10 sc) ×2 (22)
- R11: (dec, 9 sc) ×2 (20)
- R12: (dec, 8 sc) ×2 (18)
- R13: (dec, 7 sc) ×2 (16)
- R14: (dec, 6 sc) ×2 (14)
- R15: (dec, 5 sc) ×2 (12)
- R16: (dec, 4 sc) ×2 (10)
Sl st, Fo with tail. Stuff top portion gently.
Inner Ear Inserts (Make 2, Yellow)
- R1: Ch 6.
- R2: 2 sc, 2 hdc, [6 dc in end ch], 2 hdc, 1 sc, inc in initial ch (15)
- R3: 5 sc, 2 inc, 1 sc, 2 inc, 3 sc, 2 inc (21)
Sl st, Fo with tail. Sew onto outer ears.
Arms (Make 2, Blue-Grey)
- R1: Ch 7.
- R2: 5 sc, inc, 4 sc, 1 sc in starting ch (12)
- R3: 11 sc (11)
- R4: (dec, 4 sc) ×2 (10)
- R5–7: 10 sc (10)
- R8: (dec, 3 sc) ×2 (8)
- R9: 8 sc (8)
Sl st, Fo with tail. Stuff lower half.
Tail (Blue-Grey)
- R1: 6 sc in MR (6)
- R2: 6 inc (12)
- R3: (1 sc, inc) ×6 (18)
- R4: (2 sc, inc) ×2, 6 sc, dec, 4 sc (19)
- R5: 19 sc (19)
- R6: 15 sc, dec, 2 sc (18)
- R7: 5 sc, dec, 9 sc, dec (16)
- R8: 14 sc, dec (15)
- R9: 6 sc, dec, 5 sc, dec (13)
Stuff progressively.
- R10: (1 sc, dec) ×4, 1 sc (9)
- R11: (1 sc, dec) ×3 (6)
- R12: 3 dec (3)
Sl st, Fo, weave closed.
Front Teeth (White)
- R1: Ch 4.
- R2: 3 sc, ch 1, turn (3)
- R3: 3 sc (3)
Sl st, Fo with long tail.
Chocolate Egg (Chestnut)
- R1: 6 sc in MR (6)
- R2: 6 inc (12)
- R3: (1 sc, inc) ×6 (18)
- R4–5: 18 sc (18)
- R6: (1 sc, dec) ×6 (12)
Stuff completely.
- R7–8: 12 sc (12)
- R9: 6 dec (6)
- R10: 3 dec (3)
Sl st, Fo, cinch shut.
Assembly & Embroidery
- Ears: Stitch to top of head across R1–R3.
- Teeth & Nose: Fasten teeth between R15–R16 of head. Embroider a pink nose 3 stitches wide directly above teeth.
- Eyes: Using black thread, embroider eye details between R11–R12.
- Arms: Attach to the body sides, positioned 2 rounds below the neck joint.
- Lower Assembly: Place bunny into shell; pin and attach feet and tail directly onto external shell surface. Secure chocolate egg in arms.
