
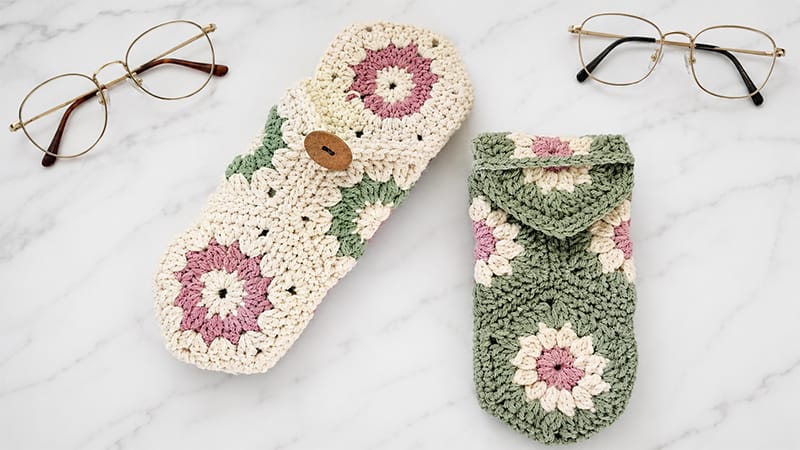
Looking for a stylish way to protect your frames or rescue your stray yarn scraps? This quick and beginner-friendly crochet project transforms five simple flower hexagons into a chic, cushioned eyeglass case.
Thanks to its geometric design, it easily doubles as a sleek smartphone pouch or a cozy holder for your favorite crochet hooks.
Materials & Project Specs
- Yarn: Worsted weight (Category 4) yarn. This is an excellent scrap-buster! You will need approximately 50 yards of your Main Color (MC) and 20 yards of a Contrasting Color (CC) for the floral details.
- Crochet Hook: 4.00 mm (US G/6) or size needed to obtain gauge.
- Notions: Yarn needle, scissors, and a few locking stitch markers.
- Closure (Optional): One 1/2″ to 7/8″ button, or you can use leftover yarn to create a simple button-free loop strap.
- Finished Size: Approximately 3frac1/4 inches wide by 6frac 3/4 inches long when laid flat.
Abbreviations & Special Stitches (US Terms)
- ch: chain
- st(s): stitch(es)
- sl st: slip stitch
- sc: single crochet
- dc: double crochet
- sp: space
- No-YO Puff Stitch: Insert your hook into the designated stitch, yarn over (yo), and pull up a loop. Yo, insert your hook back into the same stitch, yo, and pull up another loop. Yo, and pull through all 4 loops on your hook. (This creates a slightly flatter, sleeker puff).
- 3-dc Cluster (3dc-cl): Yo, insert hook in stitch, yo, pull up a loop, yo, pull through 2 loops. Yo, insert hook in same stitch, yo, pull up a loop, yo, pull through 2 loops. Repeat from * to * one more time. Yo, pull through all remaining loops on the hook.
Step-by-Step Hexagon Pattern
(Make 5 total)
Round 1 (Main Color)
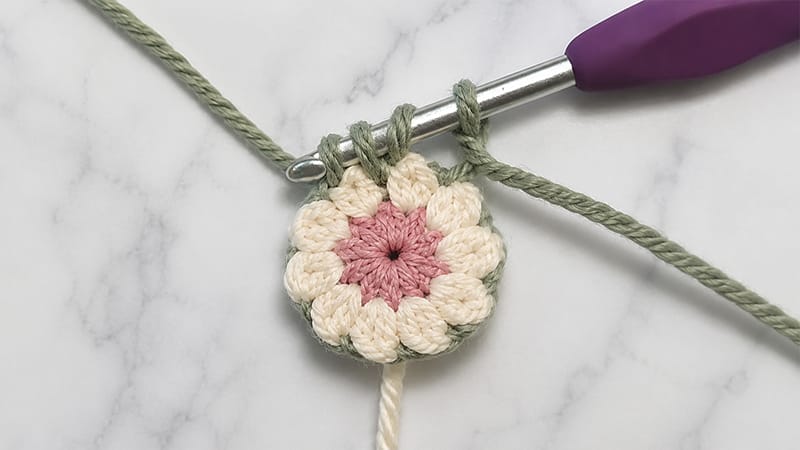
Start by working into a magic ring, or ch 2. Work 12 No-YO Puff Stitches into the second chain from your hook (or into the magic ring). Join with a sl st to the very first puff stitch. Fasten off your Main Color. (12 sts)
Round 2 (Contrasting Color)
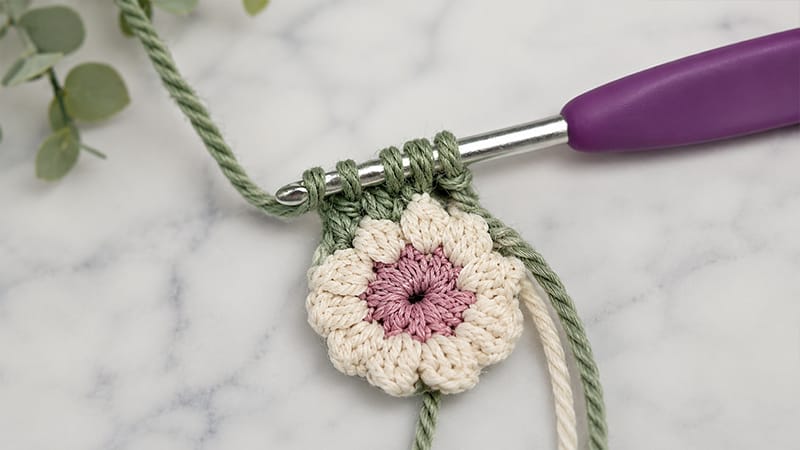
Attach your contrasting yarn with a standing 3dc-cl (or ch 2 and complete a cluster) in any stitch from the previous round. Ch 1. (Work a 3dc-cl in the next stitch, ch 1) in every stitch around. Join with a sl st to your first cluster. Fasten off the Contrasting Color. Your circle should measure roughly 2 inches across. (12 clusters, 12 ch-1 spaces)
Round 3 (Main Color)
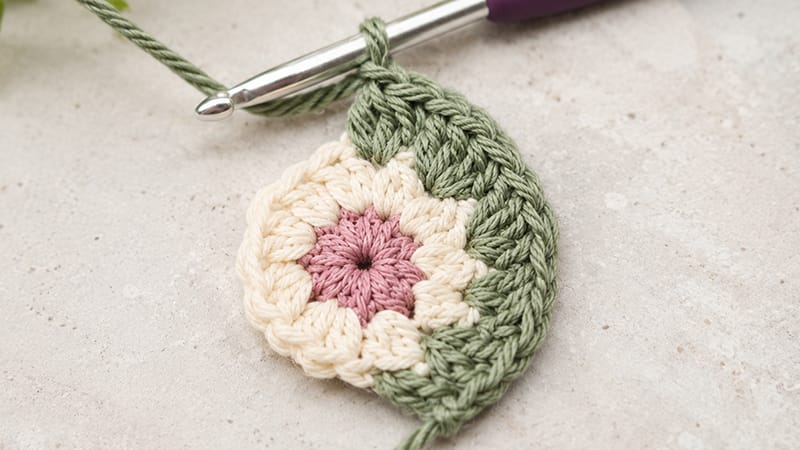
Join your Main Color with a standing double crochet (or join with a sl st and ch 2) in any ch-1 space from Round 2. Work 2 more dc into that same space.
- In the next ch-1 space, create a corner: (2dc-cl, ch 2, 2dc-cl).
- In the following ch-1 space, work 3 dc.
- Repeat this sequence around, alternating between 3 dc groups and the corner clusters until you have 6 defined corners. Join with a sl st to your first dc. (30 stitches, 6 corner ch-2 spaces)
Round 4 (Main Color)
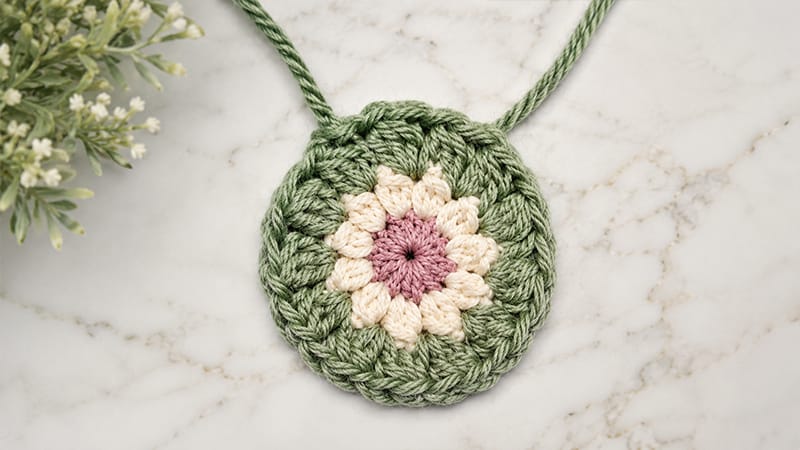
Ch 1. Work 1 sc into every stitch around, and place 3 sc into each of the ch-2 corner spaces. Join with a sl st to the first sc. Fasten off, leaving a tail, and weave in your loose ends. (48 sts total)
Check Your Size: Measured from flat side to flat side, each finished hexagon should be approximately 341 inches wide.
Assembly & Folding Instructions
1. The Flat Layout
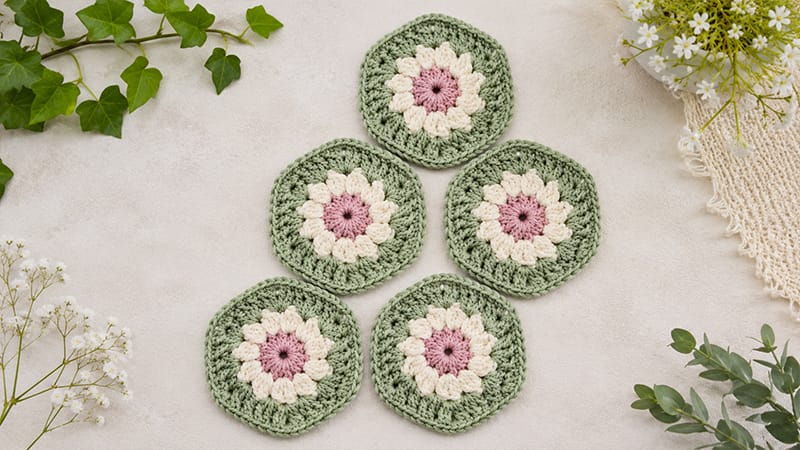
Lay your 5 completed hexagons flat on your workspace. Arrange them so they form a vertical zig-zag shape (similar to a staggered stack), ensuring the points of the hexagons are facing directly upward and downward, while the flat edges run vertically. Use your locking stitch markers to pin the touching edges together at their corner stitches.
2. Flat Seaming
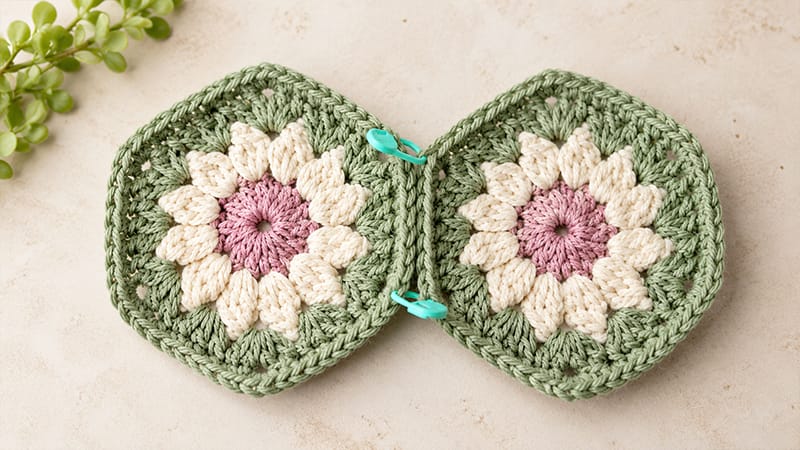
Using a yarn needle and a length of your Main Color yarn, whipstitch the touching edges together while they are flat. Once all 5 pieces are joined into one flat unit, weave in those structural ends.
3. Origami-Style Folding
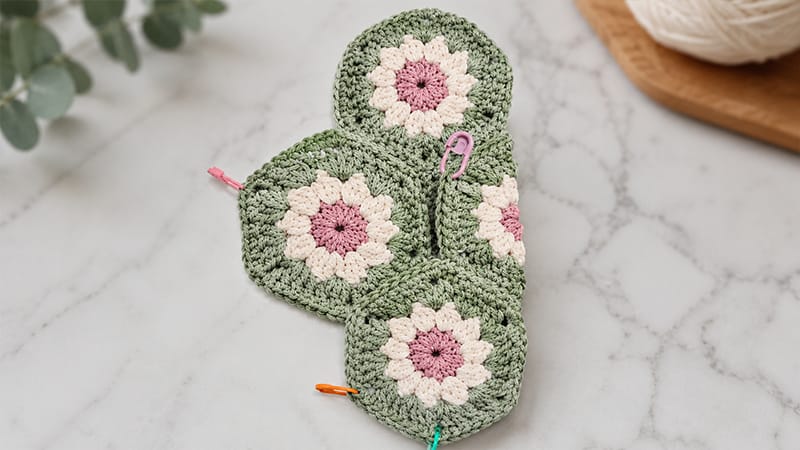
Flip your entire joined piece over so the wrong side is facing up.
- Fold the right side over toward the left, matching up the outer corner points. Secure them with stitch markers.
- Take the remaining loose flap on the upper left and fold it diagonally over toward the right to form the classic envelope pouch shape.
- Pin the remaining unseamed edges together with stitch markers to keep everything aligned.
4. Final Side Seams
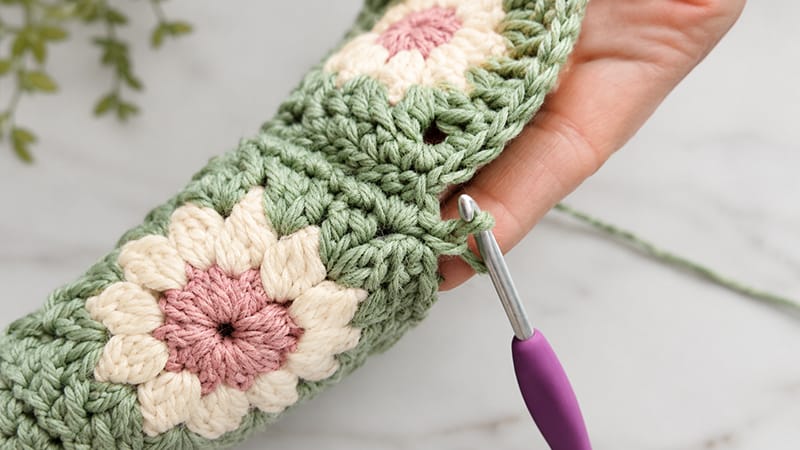
Thread your yarn needle with an 18-inch strand of yarn. Start at the bottom corner and whipstitch up the open sides of the pouch, following the geometric edges until the body of the case is fully closed, leaving the top triangle flap open. Secure and weave in your ends.
Adding Your Closure
Choose the closure method that matches your style:
- Option A (The Button): Sew a 21” to 87” button directly onto the front body of the case. The natural gap between the cluster stitches on the top hexagon flap serves as a built-in buttonhole!
- Option B (The Yarn Loop Strap): Attach your yarn with a slip stitch to one side of the top flap’s peak. Chain a length of stitches that is just slightly shorter than the width of the pouch (yarn stretches over time, so keep it snug!). Join the chain with a slip stitch to the opposite side of the peak, fasten off, and weave in the ends to create a handy flap-strap.
