
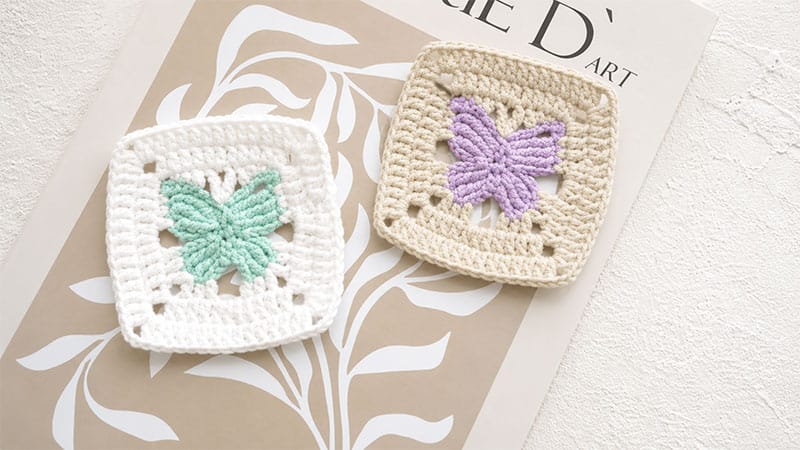
Create a beautiful, textured granny square featuring a 3D-style butterfly at its center. This pattern blends delicate lacework with a solid geometric border, making it an excellent choice for summery blankets, tote bags, or cardigans.
Below you will find the completely rewritten, detailed step-by-step instructions to guide you through crafting this piece.
Gather Your Supplies
- Yarn: Loopara 4-ply combed cotton (Featured here in Apricot 04 for a soft pop of color and Green 15 for a fresh backdrop).
- Hook Size: 2.0 mm
- Notions: Scissors and a yarn needle for finishing.
Abbreviations (US Crochet Terms)
- ch: chain
- sl st: slip stitch
- sc: single crochet
- hdc: half double crochet
- dc: double crochet
- tr: treble crochet
- dtr: double treble crochet
- tr tr: triple treble crochet
- picot: ch 3, sl st into the first chain made (creates a small decorative point).
Part 1: Crafting the Central Butterfly
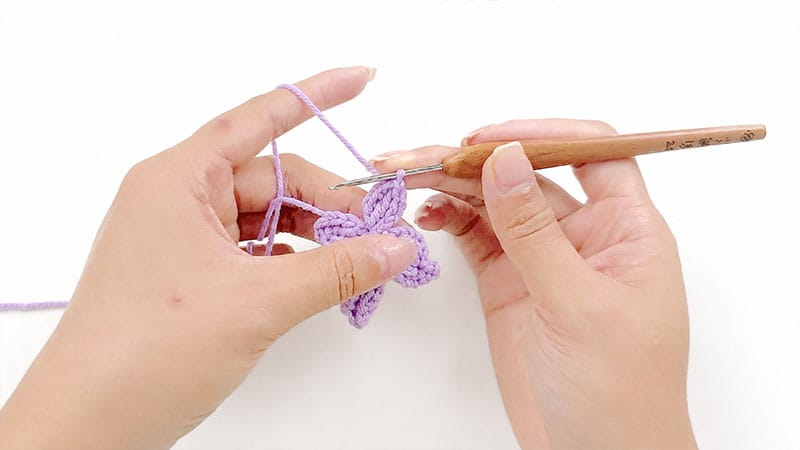
Use your accent color (e.g., Apricot) to create the central butterfly figure.
Round 1 (The Base):
Begin by chaining 5. Working back down the chain, starting from the second loop from your hook, place 4 single crochets. This forms the foundation body.
Round 2 (Lower Wing A):
Chain 4 to gain height. Work 2 double treble crochets into the base stitch. Chain 4, then anchor the wing section by making a slip stitch into the base.
Round 3 (Upper Wing A):
Chain 4. Into the next designated space, work 1 double treble crochet followed by 2 triple treble crochets. Create a tight picot for the wing tip texture. Chain 6, then secure the top wing with a slip stitch into the base.
Round 4 (Upper Wing B):
Chain 6, then immediately create a picot at the top. Work 2 triple treble crochets followed by 1 double treble crochet into the base to mirror the opposite side. Chain 4, and slip stitch down into the base.
Round 5 (Lower Wing B):
Chain 4, then work 2 double treble crochets into the final wing space. Chain 4, and slip stitch to close the butterfly shape. Break your yarn, fasten off, and carefully weave in your tails.
Pro Tip: Keep your tension uniform and pull your picot stitches firmly. This ensures the wing tips look sharp, crisp, and defined rather than loose.
Part 2: Framing the Square (The Connecting Border)
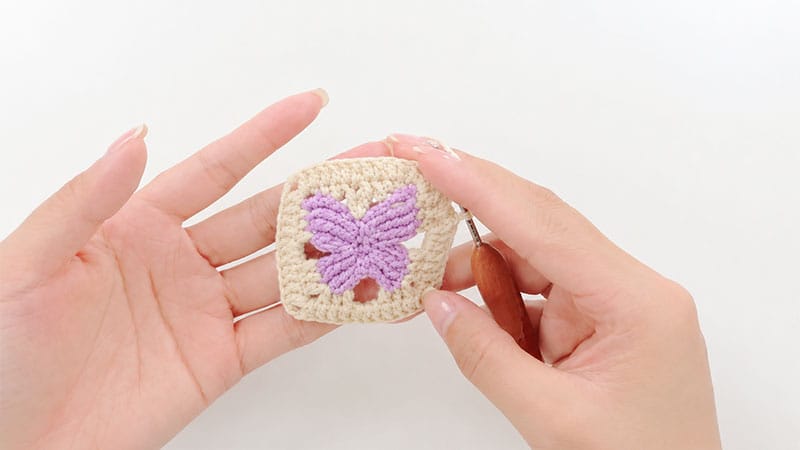
Switch to your background shade (e.g., Green) to transform the butterfly into a square motif.
Round 1 (The Transition):
Chain 2, work 2 sc, ch 3, 1 sc, 1 hdc, 1 dc. Skip the next 3 stitches on the butterfly body. In the next space, create a V-stitch by working (1 tr, ch 1, 1 tr). Skip another 3 stitches. Continue building the frame around the wings by working 1 dc, 1 hdc, 1 sc, ch 3, 2 sc, and 1 hdc.
To establish the remaining straight edges and corners, repeat the following sequence twice:
$$ch 3, 1 dc, 1 hdc, then create a corner grouping of (1 dc, ch 3, 1 dc) into the same space, followed by 1 hdc, 1 dc$$
. End the round with a final ch 3 and join with a sl st.
Round 2 (Solidifying the Border):
Chain 3 (counts as your first dc). Work 2 dc along the straight edge. In the corner space, create your turn by working (1 dc, ch 3, 1 dc). Next, work 9 dc evenly across the flat side, then place (1 dc, ch 3, 1 dc) into the corner chain space. Repeat the instruction between the asterisks (*) 3 times total around the perimeter. Finish the round by placing 6 dc across the remaining unworked edge, joining with a sl st to the top of your starting chain.
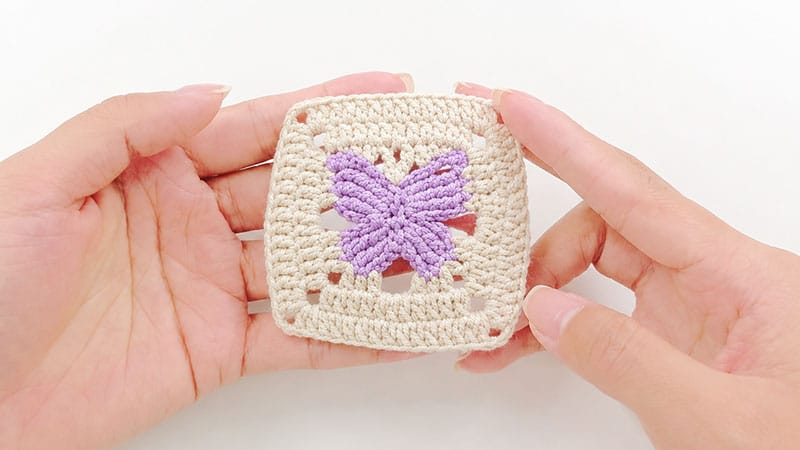
Round 3 (Final Extension):
Chain 3 (counts as your first dc). Place 3 dc across the starting edge. In the corner space, expand the block by working (2 dc, ch 3, 2 dc). Work 11 dc across the flat side, then place (2 dc, ch 3, 2 dc) into the corner chain space. Repeat the instruction between the asterisks (*) 3 times around. Complete the final edge with 7 dc, join with a sl st, cut your yarn, and weave in all loose ends cleanly.
Polishing & Finishing Touches
Assembly Options
Once you have accumulated a collection of these squares, you can assemble them into larger textiles like tote bags, sweaters, or throws.
Popular joining methods include the clean invisible mattress stitch for a perfectly flat seam, a slip stitch join for a raised decorative ridge, or the join-as-you-go (JAYG) method to attach them dynamically as you complete each final round.
Mastering Neat Color Changes
To keep your square looking professional, avoid bulky knots when swapping yarn colors. Instead, introduce your new yarn color on the final pull-through of the very last stitch of a round. This creates an invisible transition that keeps your stitch work looking seamless.
Securing Your Yarn Tails
Don’t let your hard work unravel over time. Use a blunt-tipped yarn needle to weave your tails back and forth through the dense clusters of double crochets on the backside of the square. Changing directions at least three times locks the yarn fibers together, making your project safe for everyday use.
Long-Term Fabric Care
- Washing Safely: Skip the agitation of washing machines. Submerge your completed work in lukewarm water mixed with a small amount of delicate wool wash or baby shampoo. Swish gently without rubbing, rinse thoroughly, and press the water out by rolling the square inside a dry towel. Never wring or twist the crochet stitches.
- Drying & Shaping: Lay your wet squares flat on a blocking mat or fresh towel. Pin the corners into a perfect square shape and gently pull the butterfly wings to make sure they dry symmetrically. Allow them to air dry away from heat sources.
- Smart Storage: Keep your finished items in a dry environment. Store them inside breathable canvas bags or cotton storage boxes rather than airtight plastic bins, which can lock in ambient humidity. Stack them with sheets of tissue paper between layers to prevent the yarn colors from rubbing off on one another. Keep them tucked away from direct sunlight to prevent UV fading.
