
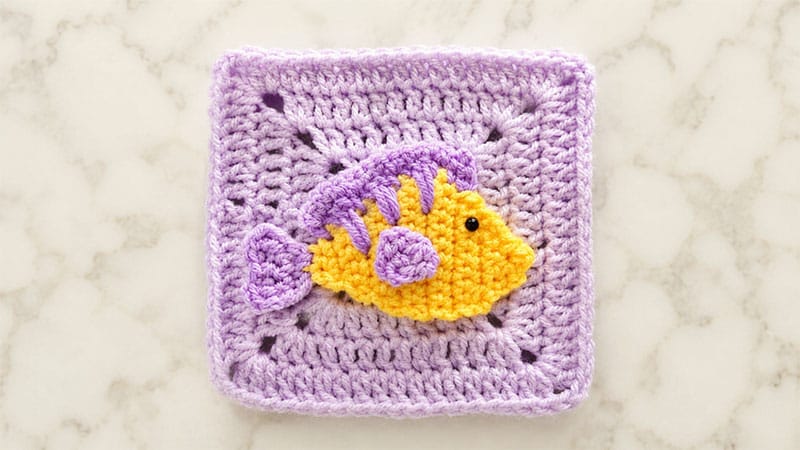
This pattern blends amigurumi-style shaping with traditional stitch geometry. You will first crochet the fish’s body and tail in rows, work a border around it to transform the organic fish shape into a sturdy circle, and finally square off the corners using escalating stitch heights.
Materials
- Yarn: Worsted weight yarn (4-medium) in three colors:
- Color A: Yellow (Fish Body)
- Color B: Teal (Fins and Tail)
- Color C: White or Seafoam Blue (Background Square)
- Hook: G/4.00 mm crochet hook
- Notions: 6mm safety eye (or black embroidery floss), tapestry needle, and scissors.
Pattern Notes
- Abbreviations (US Terms): Ch = chain, Sl st = slip stitch, Sc = single crochet, Hdc = half double crochet, Dc = double crochet, Tr = treble crochet, St = stitch, Sc2tog = single crochet two together.
- The fish is worked from nose to tail first, then the background is built around it.
Pattern Instructions
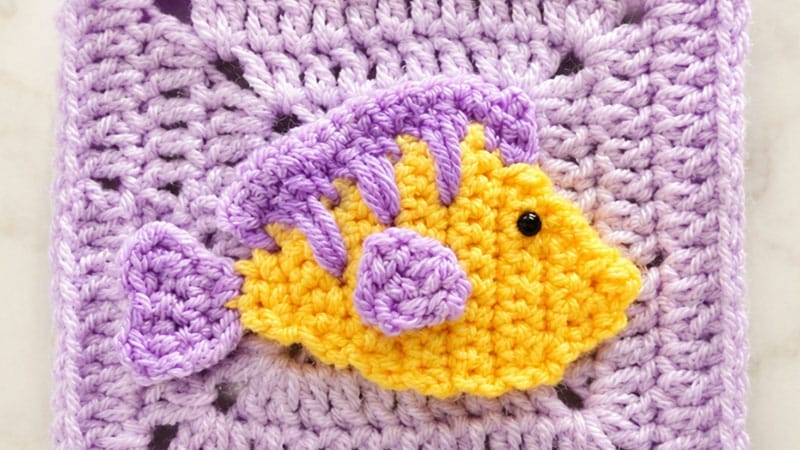
Phase 1: The Fish Body & Tail
Using Color A (Yellow).
- Row 1: Ch 2. Work 2 sc in the 2nd ch from the hook. Turn. (2 sts)
- Row 2: Ch 1, 2 sc in each st across. Turn. (4 sts)
- Row 3: Ch 1, 2 sc in first st, sc in next 2 sts, 2 sc in last st. Turn. (6 sts)
- Rows 4–6: Ch 1, sc in each st across. Turn.
- Row 7: Ch 1, sc2tog, sc in next 2 sts, sc2tog. Turn. (4 sts)
- Row 8: Ch 1, sc2tog twice. Turn. (2 sts)
- Row 9: Ch 1, sc2tog. (1st). Do not fasten off.
The Tail: Switch to Color B (Teal) in the final pull-through of Row 9.
- Row 10: Ch 2 (counts as hdc). In that same single remaining stitch, work (1 hdc, 2 dc). Turn. (4 sts)
- Row 11: Ch 3 (counts as dc), 1 dc in same st. Dc in next 2 sts, 2 dc in the top of the turning ch-2. Fasten off and weave in ends.
Eye Placement: Insert the 6mm safety eye between Rows 2 and 3 of the yellow body, secure the backer.
Phase 2: Turning the Fish into a Circle
Attach Color C (Background) to the very tip of the fish’s nose (Row 1).
We will now work in a continuous round around the perimeter of the fish to create a circular base.
- Round 1: Ch 1. Evenly work 24 sc around the entire edge of the fish (approximately 9 sc along the top belly, 3 sc across the tail edge, 9 sc along the bottom belly, and 3 sc near the face). Sl st to the first sc to join. (24 sts)
- Round 2: Ch 2 (does not count as st). Hdc in next 3 sts, 2 hdc in the next st. Repeat from * to * around. Sl st to join. (30 sts)
Phase 3: Squaring the Circle
Continuing with Color C.
To turn the circle into a square, we use shorter stitches on the wide sides and taller stitches to reach out into the corners.
- Round 3: Ch 1. Sc in next 3 sts, hdc in next 2 sts, dc in next st.
- First Corner: In the next st, work (2 tr, ch 2, 2 tr).
- Side 1: Dc in next st, hdc in next 2 sts, sc in next 3 sts, hdc in next 2 sts, dc in next st.
- Second Corner: In the next st, work (2 tr, ch 2, 2 tr).
- Side 2: Dc in next st, hdc in next 2 sts, sc in next 3 sts, hdc in next 2 sts, dc in next st.
- Third Corner: In the next st, work (2 tr, ch 2, 2 tr).
- Side 3: Dc in next st, hdc in next 2 sts, sc in next 3 sts, hdc in next 2 sts, dc in next st.
- Fourth Corner: In the next st, work (2 tr, ch 2, 2 tr).
- Finish: Dc in last st, hdc in next 2 sts. Sl st to the first sc of the round to close.
Phase 4: The Final Granny Border
You can continue with Color C or switch back to Color B for a framed look.
- Round 4: Ch 3 (counts as dc). Dc in each st until you reach the ch-2 corner space. In the corner space, work (2 dc, ch 2, 2 dc). Dc in each st across to the next corner. Repeat from * to * around. Sl st to the top of the beginning ch-3 to join.
Fasten off, cut yarn, and weave in all loose ends. Block your completed square to make the edges perfectly crisp!
