
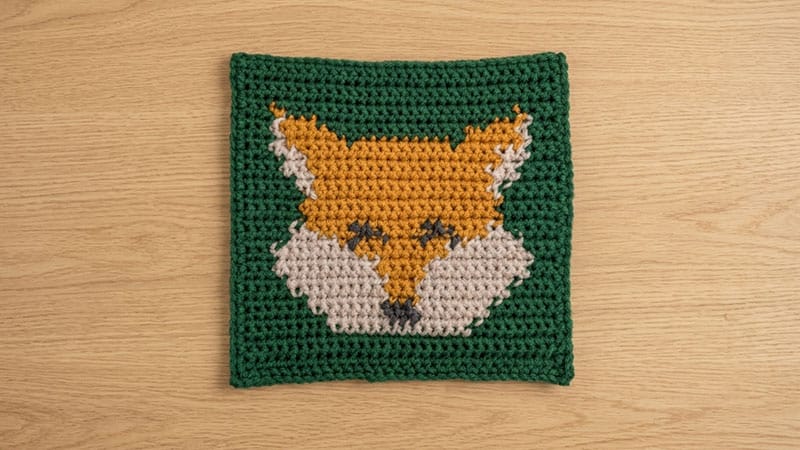
This project transforms a simple grid graph into a vibrant, structured square featuring a friendly forest fox.
By working entirely in single crochet and carrying your yarn, you will create a clean graphic design. The pattern is completely symmetrical, making it easy to follow whether you crochet right- or left-handed.
Materials & Tools
- Yarn: Medium-weight (Category 4) acrylic yarn (e.g., Red Heart Super Saver)
- Color A (Background): Turquoise / Light Blue (< 100 yds)
- Color B (Main Fox Body): Coral / Orange (< 100 yds)
- Color C (Snout & Ears): Aran / Cream (< 100 yds)
- Color D (Eyes & Nose): Black (Small scrap amount)
- Hook: Size H/5.0mm
- Notions: Scissors, yarn needle for weaving in ends
Project Specs & Notes
- Gauge: 17 stitches × 17 rows = 4″ square (Keep tension even and relatively tight so the carried yarn doesn’t peek through).
- Finished Size: Approximately 8″ × 8″ square.
- Stitch Count: Every single row maintains a strict count of 31 stitches.
- Turning Chains: The $ch\ 1$ at the start of rows does not count as a stitch.
Step-by-Step Written Pattern
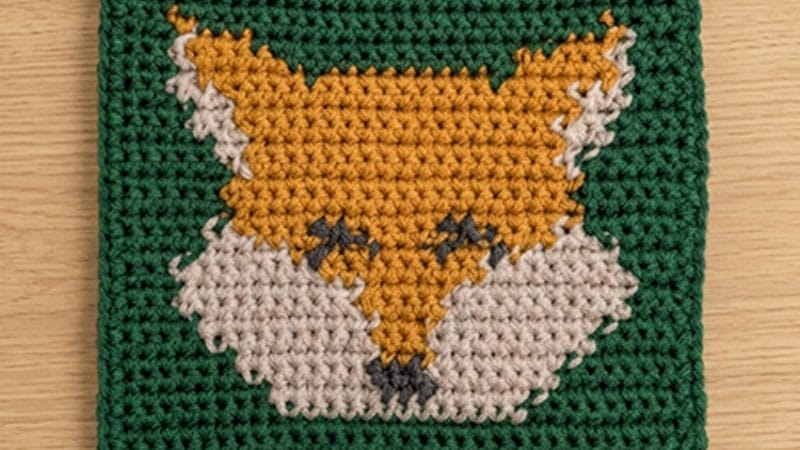
Base & Bottom Border
Row 1: Using Color A, chain 32. Turn and place 1 SC into the second chain from your hook. SC in each remaining chain across. (31 sts)
Rows 2–4: Ch 1, turn. SC in every stitch across using Color A.
Lower Face & Snout Setup
Row 5: Ch 1, turn. 9 SC in A, 13 SC in C, 9 SC in A.
Row 6: Ch 1, turn. 8 SC in A, 6 SC in C, 3 SC in D (nose tip), 6 SC in C, 8 SC in A.
Row 7: Ch 1, turn. 7 SC in A, 7 SC in C, 3 SC in D, 7 SC in C, 7 SC in A.
Row 8: Ch 1, turn. 6 SC in A, 8 SC in C, 3 SC in B, 8 SC in C, 6 SC in A.
Row 9: Ch 1, turn. 5 SC in A, 9 SC in C, 3 SC in B, 9 SC in C, 5 SC in A.
Row 10: Ch 1, turn. 4 SC in A, 10 SC in C, 3 SC in B, 10 SC in C, 4 SC in A.
Rows 11–12: Ch 1, turn. 3 SC in A, 10 SC in C, 5 SC in B, 10 SC in C, 3 SC in A.
Row 13: Ch 1, turn. 3 SC in A, 8 SC in C, 9 SC in B, 8 SC in C, 3 SC in A.
The Eyes & Cheeks
Row 14: Ch 1, turn. 4 A, 5 C, 1 B, 1 D (eye), 2 B, 1 D (eye), 3 B, 1 D (eye), 2 B, 1 D (eye), 1 B, 5 C, 4 A.
Row 15: Ch 1, turn. 5 A, 2 C, 4 B, 2 D, 5 B, 2 D, 4 B, 2 C, 5 A.
Mid-Head & Upper Face
Rows 16–18: Ch 1, turn. 6 SC in A, 19 SC in B, 6 SC in A.
Row 19: Ch 1, turn. 6 SC in A, 1 SC in C, 17 SC in B, 1 SC in C, 6 SC in A.
Row 20: Ch 1, turn. 5 SC in A, 2 SC in C, 17 SC in B, 2 SC in C, 5 SC in A.
Row 21: Ch 1, turn. 4 SC in A, 3 SC in C, 17 SC in B, 3 SC in C, 4 SC in A.
Ears Structure
Row 22: Ch 1, turn. 4 SC in A, 2 SC in C, 19 SC in B, 2 SC in C, 4 SC in A.
Row 23: Ch 1, turn. 3 SC in A, 3 SC in C, 19 SC in B, 3 SC in C, 3 SC in A.
Row 24: Ch 1, turn. 3 SC in A, 2 SC in C, 5 SC in B, 1 SC in A, 9 SC in B, 1 SC in A, 5 SC in B, 2 SC in C, 3 SC in A.
Row 25: Ch 1, turn. 3 SC in A, 1 SC in C, 5 SC in B, 13 SC in A, 5 SC in B, 1 SC in C, 3 SC in A.
Row 26: Ch 1, turn. 3 SC in A, 1 SC in C, 3 SC in B, 17 SC in A, 3 SC in B, 1 SC in C, 3 SC in A.
Row 27: Ch 1, turn. 3 SC in A, 1 SC in B, 23 SC in A, 1 SC in B, 3 SC in A.
Top Border
Rows 28–31: Ch 1, turn. SC across all 31 stitches using Color A only.
Finishing Border
To give your square clean edges for joining later, complete the piece with a structured frame:
- At the end of Row 31, do not break your yarn. Chain 1.
- Turn your work slightly to begin working down the raw side edges.
- Place 31 SC stitches evenly along each of the four sides of the square.
- When reaching a corner, Chain 1 to cleanly turn the edge.
- Slip stitch into the very first boundary stitch to close the border loop. Fasten off and weave in all loose yarn ends securely on the back side.
