
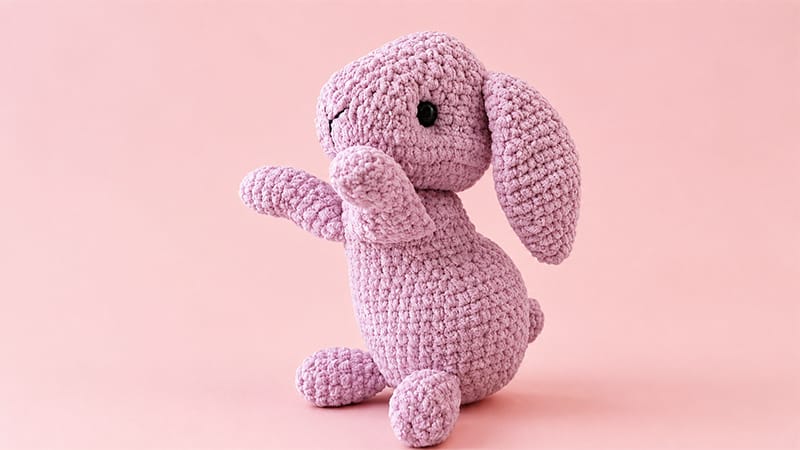
If you are looking for a quick, rewarding project that yields an incredibly soft plushie, this pattern is for you!
Using thick, velvety yarn paired with a smaller hook creates a dense fabric that keeps stuffing hidden while giving the finished toy a smooth, rounded finish.
Crafting Overview
- Skill Level: Easy / Intermediate
- Finished Size: Approx. 20 cm (8 inches) tall when using recommended materials
- Construction: Worked continuously in spirals (no joining chain needed at the end of rounds unless specified)
Pro Tip: Plush yarn can make stitches tricky to see. Use a stitch marker to track the first stitch of every round, and count your stitches regularly!
Materials & Tools
- Main Body Yarn: 1 skein of Plush/Velvet Super Bulky Yarn (Gray or preferred color)
- Embroidery Thread: Small amount of fine black cotton yarn for detailing the nose
- Crochet Hook: 4.0 mm
- Safety Eyes: 12–13 mm size (1 pair)
- Stuffing: Polyester Fiberfill
- Notions: Yarn needle, scissors, pins, and stitch markers
Pattern Abbreviations & Stitches
| Abbreviation | Stitch / Technique |
|---|---|
| MR | Magic Ring / Magic Circle |
| sc | Single Crochet |
| inc | Single Crochet Increase (2 sc in the same stitch) |
| dec | Single Crochet Decrease (Invisible decrease recommended) |
| sl st | Slip Stitch |
| st | Stitch |
Step-by-Step Instructions
Step 1: Lower Limbs (Make 2)
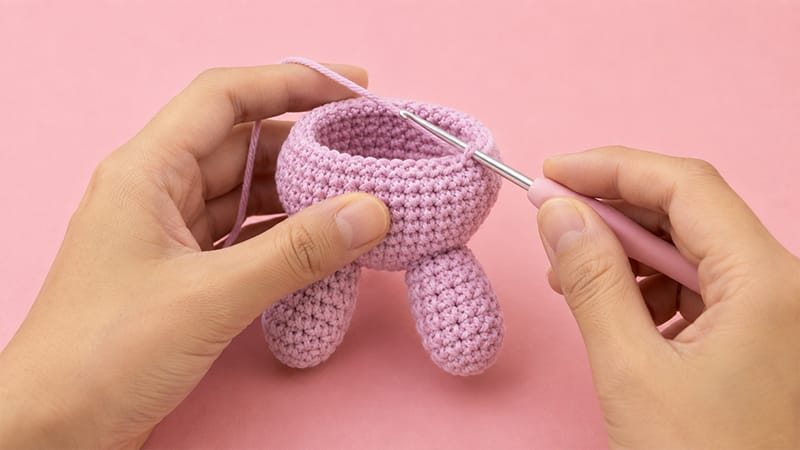
We will start by making the feet and legs so they are ready to be attached as we crochet the body.
- Round 1: Start with 6 sc in an MR. (6)
- Round 2: [inc] in each stitch around. (12)
- Rounds 3–6: 1 sc in each stitch around. (12)
Stuff the bottom half of the leg firmly at this stage.
- Round 7: [1 sc, dec] 4 times. (8)
- Round 8: 1 sc in each stitch around. (8)
Fasten off and cut the yarn. Leave the top unstuffed so the legs lay flat against the body later. Flatten the opening for joining.
Step 2: Upper Limbs (Make 2)
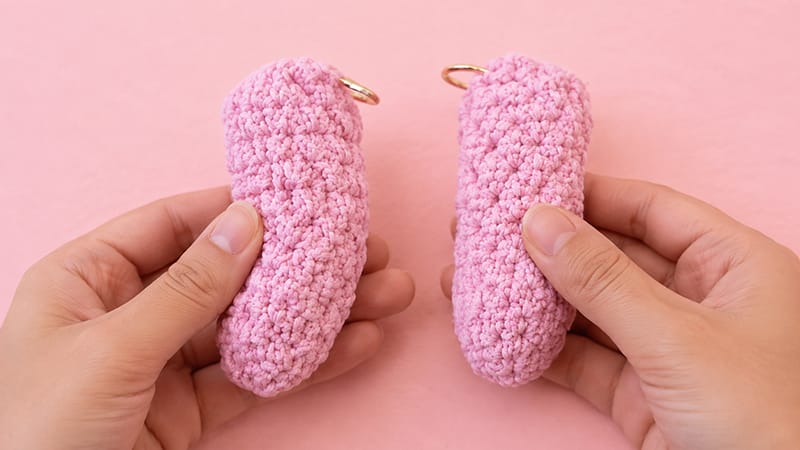
- Round 1: Start with 5 sc in a MR. (5)
- Round 2: [inc] in each stitch around. (10)
- Round 3: 1 sc in each stitch around. (10)
- Round 4: [4 sc, inc] 2 times. (12)
- Round 5: 1 sc in each stitch around. (12)
- Rounds 6–8: 5 sl st, 7 sc. (12 for 3 rounds)
- Round 9: [5 sc, inc] 2 times. (14)
- Rounds 10–12: 1 sc in each stitch around. (14 for 3 rounds)
Fasten off and cut the thread. Do not stuff the arms. Flatten the opening for joining later.
Step 3: Combined Body & Head
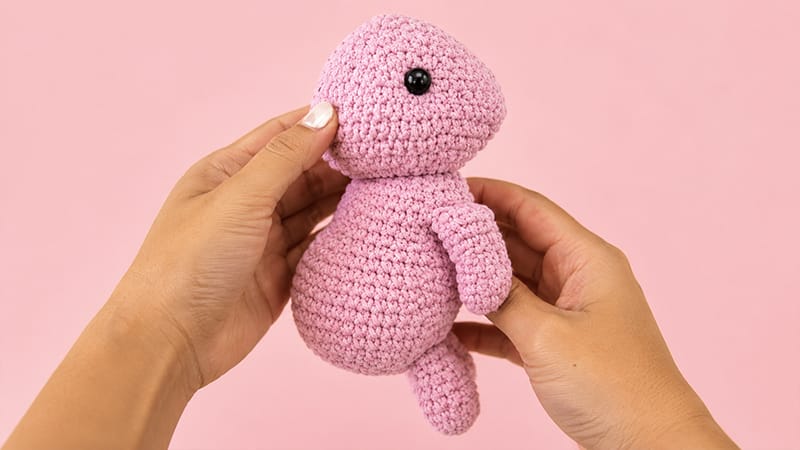
The body is worked from the bottom up, incorporating the legs and arms as you go.
The Lower Body & Leg Joining
- Round 1: 6 sc in a MR. (6)
- Round 2: [inc] 6 times. (12)
- Round 3: [1 sc, inc] 6 times. (18)
- Round 4: [2 sc, inc] 6 times. (24)
- Round 5: [3 sc, inc] 6 times. (30)
- Round 6: [4 sc, inc] 6 times. (36)
- Round 7: [5 sc, inc] 6 times. (42)
- Round 8 (Attaching Legs): 15 sc, crochet 4 sc catching both the body stitch and the flattened leg, 4 sc, crochet 4 sc catching the body and second leg, 15 sc. (42)
- Rounds 9–11: 1 sc in each stitch around. (42 for 3 rounds)
- Round 12: [6 sc, inc] 6 times. (48)
- Rounds 13–15: 1 sc in each stitch around. (48 for 3 rounds)
Shaping the Waist
- Round 16: [7 sc, dec] 2 times, 15 sc, dec, 7 sc, dec, 4 sc. (44)
- Round 17: 7 sc, 2 dec, 2 sc, 2 dec, 14 sc, 2 dec, 2 sc, 2 dec, 1 sc, dec. (35)
- Round 18: [1 sc, dec] 2 times, 1 sc, 3 dec, 14 sc, 3 dec, 2 sc. (27)
- Round 19: 4 sc, [3 sc, inc] 5 times, inc, 2 sc. (33)
- Rounds 20–21: 1 sc in each stitch around. (33 for 2 rounds)
Attaching Arms & Neck Base
- Round 22 (Attaching Arms): [1 sc, dec] 2 times, 3 sc, inc, work 3 sc through the body and first arm, inc, 3 sc through arm/body, inc, work 3 sc through body and second arm, inc, 3 sc through arm/body, inc, 1 sc, [1 sc, dec] 2 times. (34)
Begin adding stuffing firmly into the torso.
- Round 23: 1 sc in each stitch around. (34)
- Round 24: 4 sc, dec, [3 sc, dec] 5 times, 3 sc. (28)
- Round 25: [4 sc, dec] 4 times, 4 sc. (24)
- Round 26: [2 sc, dec] 6 times. (18)
Head Expansion & Muzzle Shaping
- Round 27: [2 sc, inc] 6 times. (24)
- Round 28: [3 sc, inc] 6 times. (30)
- Round 29: [4 sc, inc] 6 times. (36)
- Round 30: [5 sc, inc] 2 times, [1 sc, inc] 6 times, [5 sc, inc] 2 times. (46)
- Round 31: 14 sc, [2 sc, inc] 2 times, [2 sc, inc] 2 times, [2 sc, inc] 2 times, 14 sc. (52)
- Round 32: 22 sc, [3 sc, inc] 2 times, 22 sc. (54)
- Round 33: 1 sc in each stitch around. (54)
Crown Shaping & Eyes Placement
- Round 34: [7 sc, dec] 6 times. (48)
- Round 35: [6 sc, dec] 6 times. (42)
- Round 36: 12 sc, [1 sc, dec] 2 times, [1 sc, dec] 2 times, [1 sc, dec] 2 times, 12 sc. (36)
- Round 37: 12 sc, 6 dec, 12 sc. (30)
- Round 38: 1 sc in each stitch around. (30)
- Round 39: [3 sc, dec] 6 times. (24)
Eyes Placement Note: Place safety eyes between Rounds 35 and 36, leaving roughly 14 stitches of separation centered over the snout expansion.
- Stuff the head generously, focusing on forming a soft, plump snout.
- Round 40: [2 sc, dec] 6 times. (18)
- Round 41: [1 sc, dec] 6 times. (12)
- Round 42: 6 dec. (6)
Cut yarn, leaving a short tail. Weave the tail through the front loops of the remaining stitches, pull tight to seal the top, and hide the yarn end inside the head.
Step 4: Long Ears (Make 2)
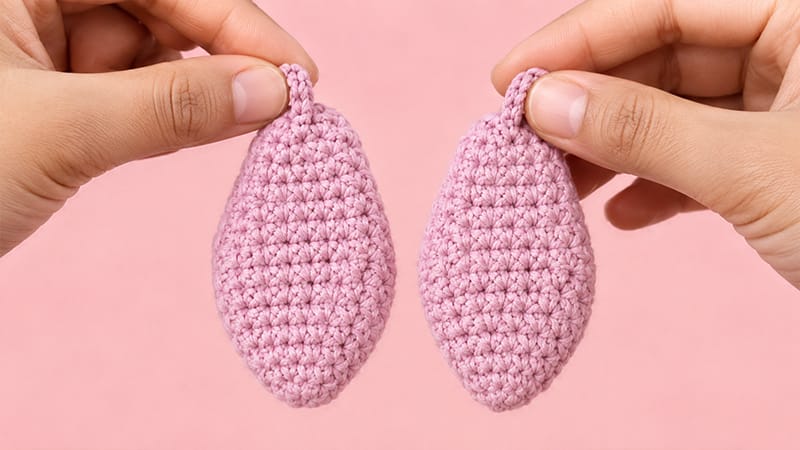
- Round 1: 6 sc in a MR. (6)
- Round 2: [inc] 6 times. (12)
- Round 3: 1 sc in each stitch around. (12)
- Round 4: [1 sc, inc] 6 times. (18)
- Round 5: [2 sc, inc] 6 times. (24)
- Round 6: 1 sc in each stitch around. (24)
- Round 7: [3 sc, inc] 6 times. (30)
- Rounds 8–11: 1 sc in each stitch around. (30 for 4 rounds)
- Round 12: [3 sc, dec] 6 times. (24)
- Round 13: 1 sc in each stitch around. (24)
- Round 14: [2 sc, dec] 6 times. (18)
- Rounds 15–16: 1 sc in each stitch around. (18 for 2 rounds)
- Round 17: [1 sc, dec] 6 times. (12)
- Rounds 18–19: 1 sc in each stitch around. (12 for 2 rounds)
Fasten off, leaving a tail for assembly. Do not stuff ears. Sew symmetrically on either side of the head near Round 38.
Step 5: The Tail
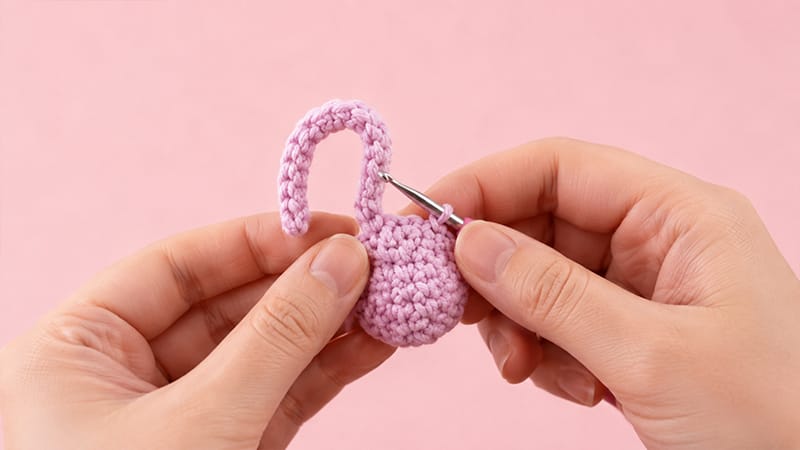
- Round 1: 6 sc in a MR. (6)
- Round 2: [inc] 6 times. (12)
- Rounds 3–4: 1 sc in each stitch around. (12 for 2 rounds)
- Round 5: [1 sc, dec] 4 times. (8)
Fasten off, add a small piece of fiberfill inside, and sew onto the back lower portion of the body (around Round 8).
Assembly & Expressive Finishing
               [ Eye Placement ]
            R35:  ( O )    ( O )
                    \  14 st /
            R34:  --- Nose ---
1. Facial Sculpting (Sinking Eyes & Muzzle)
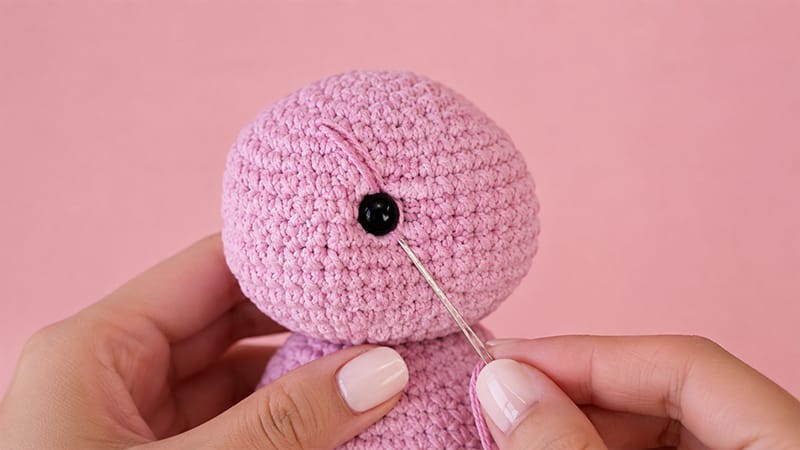
- Thread a long piece of matching plush or strong yarn through a needle.
- Insert from the base of the neck, pull out right below the left safety eye, pass across to the inner corner, then re-insert down to the base of the neck.
- Repeat for the right eye. Pull slightly on both ends to create sunken eye sockets, which give the face depth and charm. Knot securely at the base and tuck in ends.
2. Embroidering the Nose
- Use thin black yarn to mark horizontal guidelines across 5 stitches between Rounds 34 and 35.
- Pass the thread vertically to form a neat triangular nose shape.
- Run a straight vertical stitch down from the bottom center of the nose by 2 rows to create the mouth line. Tie off and conceal the ends within the head.
