
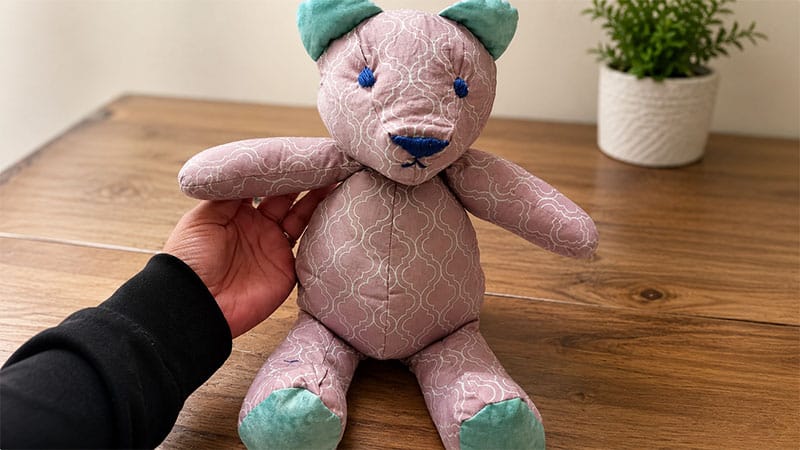
Vintage-style teddy bears possess a timeless, nostalgic appeal. Unlike sleek modern plushies, heirloom bears feature distinct characteristics: elongated limbs, a pronounced snout, a prominent head gusset, and a wonderfully collaborative mix of textures.
This comprehensive guide walks you through crafting your own vintage-inspired companion from scratch, combining old-world aesthetics with straightforward construction techniques.
Tools and Materials
Before beginning, gather your supplies. Choosing high-quality materials ensures your heirloom bear will last for generations.
- Fabric: 1/4 yard of main fabric (mohair, faux fur, linen, or distressed velvet). Optional: A contrasting fabric texture or color for the inner ears and footpads.
- The Pattern: Printed on heavy cardstock or glued to cardboard for durability.
- Marking Tool: A fabric chalk or disappearing ink pen that won’t bleed through your textiles.
- Sewing Essentials: Sharp fabric shears, straight pins, a sewing machine, or heavy-duty hand-sewing needles.
- Thread: Strong upholstery or polyester thread matching your primary fabric.
- Stuffing: Premium polyester fiberfill or wool roving.
- Face Details: Black embroidery floss or perle cotton for the nose and mouth; glass or safety eyes.
Step-by-Step Construction Guide
Step 1: Prepping and Cutting the Pattern
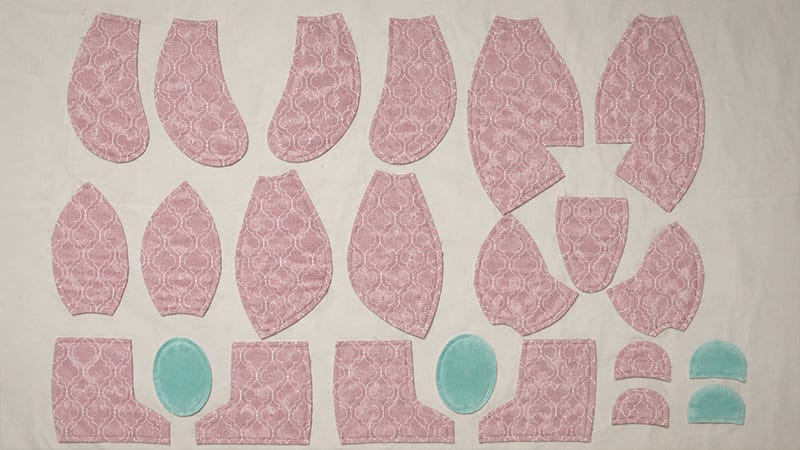
- Prepare the Templates: Print your pattern pieces out. Transfer them onto thick cardstock or cardboard so they are easy to trace repeatedly without fraying at the edges.
- Trace onto Fabric: Turn your fabric face down. Trace your pattern pieces onto the wrong side of the fabric. Pay close attention to the fabric grain lines and the direction of the fur pile (if using plush material, ensure the fur lies downward toward the paws).
- Cut with Seam Allowances: Remember to add a uniform $1/4\text{-inch}$ seam allowance around all pieces if your pattern doesn’t already include it. Carefully cut out your pieces using fabric shears.
Pro Tip: If you want contrasting accents, cut two inner ear pieces and two footpads out of your secondary fabric color.
Step 2: Crafting the Head and Face
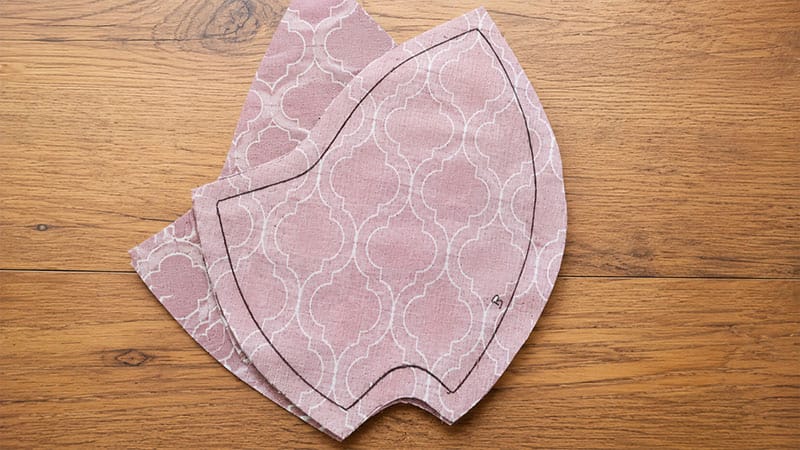
- Sew the Snout: Take the two mirrored face pieces and pin them right sides together. Sew along the center front seam, starting from the tip of the nose down to the bottom of the neck.
- Insert the Head Gusset: Open up the joined face pieces. Take the top head gusset piece and pin it down the middle, matching the center front tip precisely to the nose seam. Carefully stitch down one side of the gusset to the neck, then repeat for the other side.
- Assemble the Ears: Pair one front ear piece with one back ear piece (right sides together). Stitch around the curved upper edge, leaving the flat bottom edge open. Flip the ears right side out. You can add a tiny pinch of stuffing inside each ear to give them a cute, plump look.
- Attach the Ears: Baste or pin the open edges of the ears onto the designated markings on the newly formed head front, facing inward.
- Close the Back of the Head: Pin the two back head pieces right sides together and stitch down the central seam.
- Complete the Head Capsule: Place the assembled front face and the back head pieces right sides together, keeping the ears tucked neatly inside. Stitch all the way around the outer circumference, leaving a structural opening at the very bottom of the neck.
Step 3: Constructing the Body and Darts
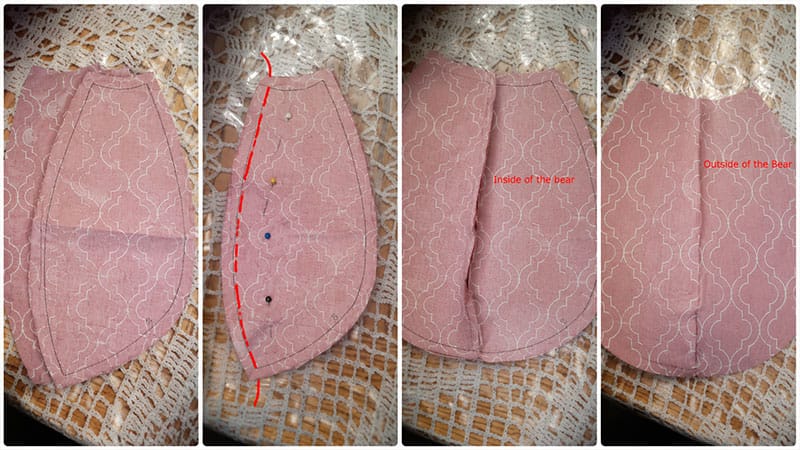
- Join the Front Torso: Pin the two front body halves right sides together. Stitch down the long center seam to create a solid front panel.
- Sew the Body Darts: Look at your back body pieces. You will notice small V-shaped cutouts known as darts. Fold these cutouts right sides together and stitch along the lines. This creates the rounded, vintage “belly” and hip shape for your bear.
- Join the Back Torso: Stitch the two back body pieces together along the center seam, but leave a 2-to 3-inch gap in the middle of the back. This opening is crucial for stuffing the bear later.
- Merge Front and Back: Lay your completed front body and back body pieces right sides together. Sew securely all the way around the perimeter, leaving the neck opening completely clear.
Step 4: Building the Limbs
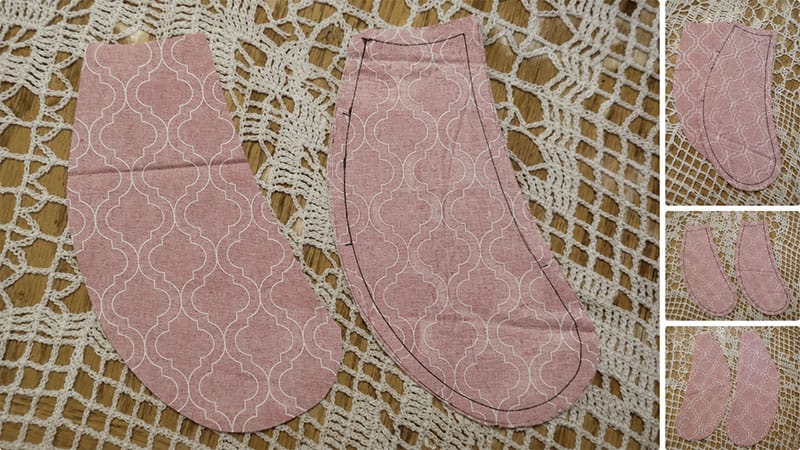
- Assemble the Legs: For each leg, pin the two mirrored leg pieces right sides together. Sew from the top thigh area down around the toe and heel, leaving the flat bottom edge of the foot completely open, as well as a small turning gap on the back of the leg.
- Attach the Footpads: Pin the oval footpad pieces into the open bottom circular spaces of each foot. Because of the curves, this can be tricky; take your time pinning heavily, or hand-baste it first before running it through your machine. Turn the legs right side out.
- Sew the Arms: Pin the arm pieces right sides together. Stitch around the curved perimeter, leaving a small opening on the upper back part of the arm for stuffing. Turn the arms right side out.
Step 5: Final Assembly, Stuffing, and Facial Features
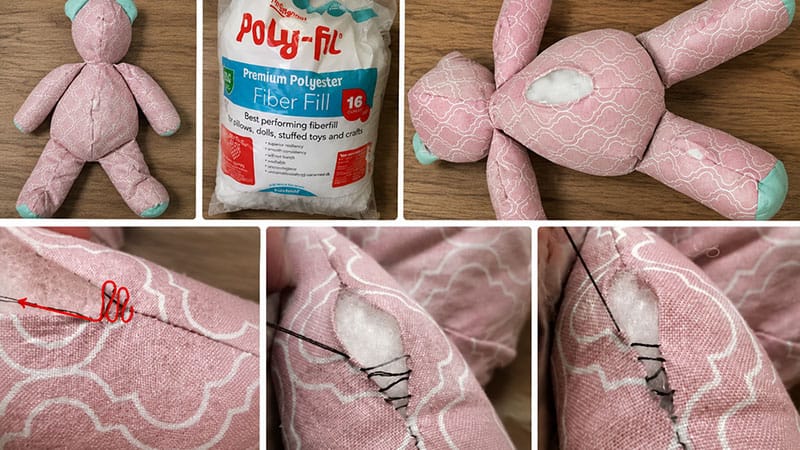
- Connect Head to Body: Keep the body inside out. Turn the completed head right side out. Push the head down inside the body’s neck opening so the right sides of the fabric face each other. Align the front of the face with the front of the body. Stitch firmly around the circular neck seam twice for extra durability.
- Invert the Bear: Pull the entire bear right side out carefully through the opening left in the back of the torso.
- Stuffing Your Bear: Use a chopstick or stuffing tool to firmly push fiberfill into the snout, limbs, and head. Vintage bears are traditionally stuffed quite firmly to help them maintain their shape and sit upright.
- Close the Openings: Using a matching thread, use a neat ladder stitch (hidden stitch) to seamlessly close up the gaps on the arms, legs, and back of the torso.
- Embroider the Features: Using your black embroidery thread, stitch a classic inverted triangle shape for the nose, and a simple “Y” shape for the mouth. Attach your safety or glass eyes right above the snout to give your new vintage friend their final, heartwarming personality!
