
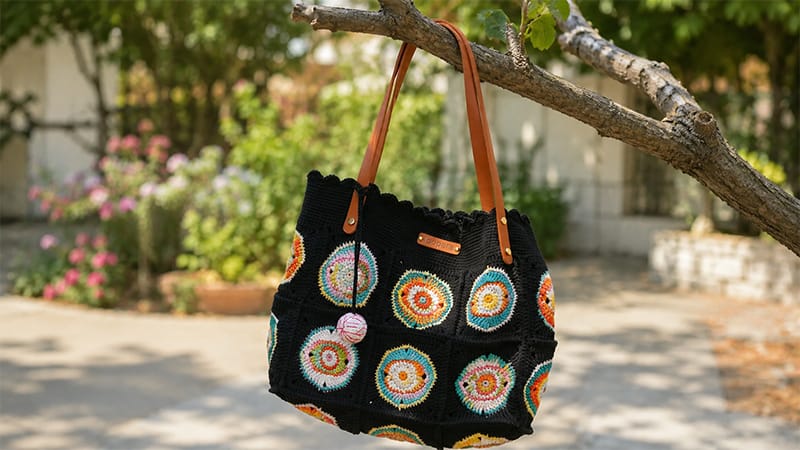
This chic, structured gothic tote blends classic granny square geometry with an edgy, surrealist eyeball charm.
Made with sturdy 5-ply combed milk cotton yarn, this project offers the perfect balance of a sophisticated monochromatic palette and a whimsical pop of horror.
Project Overview & Finished Dimensions
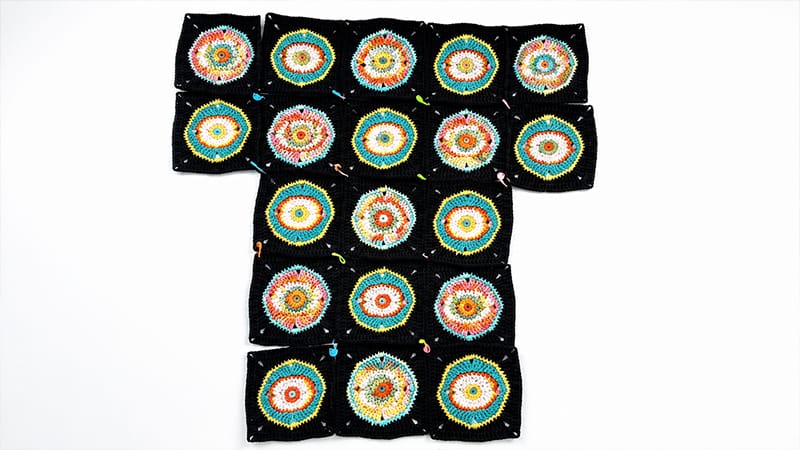
- Total Squares Needed: 19 individual squares
- Single Square Size: $3.9 \times 3.9 \text{ inches}$ ($10 \times 10 \text{ cm}$)
- Final Bag Dimensions: $12.4 \text{ inches}$ wide by $10.6 \text{ inches}$ high ($31.5 \times 27 \text{ cm}$)
- Design Aesthetic: While written for a classic matte black, you can elevate the texture by mixing matte black with a metallic or shimmery black yarn, or by using starkly contrasting yarn colors for each round of the squares.
Materials & Tools
Yarn Requirements
- Main Yarn: Loopara 5-ply combed milk cotton (or equivalent weight sport/baby yarn).
- Colors Used: Jet Black (for the bag body). For the structural tutorial or contrast variation, choose high-contrast shades (e.g., creams, greys, or vibrant hues). For the eyeball charms, you will need small amounts of White, Iris Blue/Green/Brown, Black, and a strand of Red for embroidery.
Hardware & Notions
- Crochet Hook: 3.0 mm (Size C-2 or D-3) to ensure tight, secure stitches that hold their shape without a fabric lining.
- Structural Hardware: A pre-made leather or faux-leather bag strap with matching clip-on hardware (D-rings or rivets).
- Finishing Tools: Sharp embroidery scissors, a blunt-tipped yarn needle, 4 to 6 locking stitch markers, a pair of tweezers (for precise stuffing placement), and a custom handmade fabric label (optional).
- Stuffing: A small handful of polyester fiberfill.
Crochet Abbreviations (US Terms)
- ch: Chain
- sl st: Slip stitch
- sc: Single crochet
- hdc: Half double crochet
- dc: Double crochet
- tr: Treble crochet
- sc inc: Single crochet increase (2 sc in the same stitch)
- hdc inc: Half double crochet increase (2 hdc in the same stitch)
- dc inc: Double crochet increase (2 dc in the same stitch)
- tr inc: Treble crochet increase (2 tr in the same stitch)
- sc2tog: Single crochet 2 together (decrease)
Step-by-Step Stitch Guide
1. The Engineered Granny Square (Make 19)
If you are making a multi-colored or high-contrast variant, switch colors at the start of every round from Round 2 through Round 8.
- Round 1: Form a magic ring. Work 8 sc into the loop. Pull the ring tight and join with a sl st to the very first sc. (8 sts)
- Round 2: Ch 1. Work a hdc inc into every stitch around. Join with a sl st to the initial hdc. (16 sts)
- Round 3: Ch 1. *Work 1 sc inc, then work 7 sc consecutively.* Repeat from * to * one more time. Join with a sl st to the first sc. (18 sts)
- Round 4: Ch 1. *Work 4 sc, 1 hdc, 1 dc inc. In the next stitch, create a corner by working: [1 tr inc, ch 3, 1 tr inc]. Follow this with 1 dc inc, and 1 hdc.* Repeat from * to * once more. Join with a sl st to the first sc.
- Round 5: Ch 1. Work 16 sc evenly along the edge. Ch 2 for the corner space. Work 18 sc along the next side. Ch 2 for the second corner space. Work 2 final sc. Join with a sl st to the first sc.
- Round 6: Ch 1. *Work 2 sc, 3 hdc, 3 dc, 1 tr. In the corner space, work 3 tr all into the same space, ch 2, and work another 3 tr into that same space. Mirror the side by working 1 tr, 3 dc, 3 hdc, and 5 sc.* Repeat this sequence for the remaining sides to form a balanced square. Join with a sl st to the first sc.
- Round 7: Ch 1. Work 6 sc, 1 sc inc, 13 sc, 1 sc inc, 5 sc. In the corner stitch, work 3 sc to turn. Work 5 sc, 1 sc inc, 13 sc, 1 sc inc, 5 sc, 1 sc inc. Join with a sl st to the first sc.
- Round 8: Ch 1. *Work 1 sc, 2 hdc, 3 dc, 1 tr. In the corner space, work [1 tr inc, ch 2, 1 tr inc]. Continue down the side with 1 tr, 3 dc, and 2 hdc.* Repeat this complete sequence 4 times around the perimeter. Join with a sl st to the first sc.
- Round 9 (Final Border): Ch 2. *Work 17 dc evenly across the side strategy. In the ch-2 corner cavity, work [2 dc, ch 2, 2 dc].* Repeat this framework 4 times around. Join with a clean sl st into the top of your initial dc. Fasten off and weave in all yarn tails completely.
2. The Surrealist Eyeball Charm (Make 2)
- Round 1 (Pupil): Using Black yarn, launch a magic ring. Ch 1, work 6 sc into the ring. Join with a sl st. (6 sts)
- Round 2 (Iris): Switch to your chosen iris color (e.g., Blue or Green). Ch 1, work an sc inc in every stitch around. Join with a sl st. (12 sts)
- Round 3 (Sclera / Whites): Switch to White yarn. Ch 1, *work 1 sc inc, followed by 1 sc.* Repeat from * to * 6 times total. Join with a sl st. (18 sts)
- Round 4: Continuing in White, *work 1 sc inc, followed by 2 sc.* Repeat from * to * 6 times total. Join with a sl st. (24 sts)
- Rounds 5–9 (Building Depth): Ch 1. Work 24 sc flatly around without any increases. Join with a sl st at the end of each round. This will cause the piece to cup into a sphere.
- Round 10 (Beginning Decreases): Ch 1. *Work 1 sc2tog, then 2 sc.* Repeat from * to * 6 times total. Join with a sl st. (18 sts)
- Round 11: Ch 1. *Work 1 sc, then 1 sc2tog.* Repeat from * to * 6 times total. (12 sts). Stop here and use your tweezers to firmly pack the sphere with polyester fiberfill.
- Round 12: Work 6 consecutive sc2tog stitches to close the globe. (6 sts). Fasten off, leaving a long $12\text{-inch}$ tail. Thread your yarn needle through the remaining stitches, pull tight to seal, and leave the remaining tail for assembly.
Gothic Customization: Thread your yarn needle with red embroidery floss or yarn. Sew jagged, radiating lines from the iris outward across the white sclera to simulate realistic, bloodshot veins. Crochet a simple ch stitch cord to your desired length and sew either end to the back of the two eyeballs to create a draped double-charm accent.
Assembly & Construction
    Bag Layout Scheme (Origami Tri-Fold Style)
            /\  /\
           /  \/  \
          /\  /\  /\
         /  \/  \/  \
         \  /\  /\  /
          \/  \/  \/
           \  /\  /
            \/  \/
Seaming the Body
- Layout Strategy: Lay your 19 squares flat on a table in a dynamic grid pattern (as shown above). Use locking stitch markers to pin the edges together temporary so you can visualize the 3D construction.
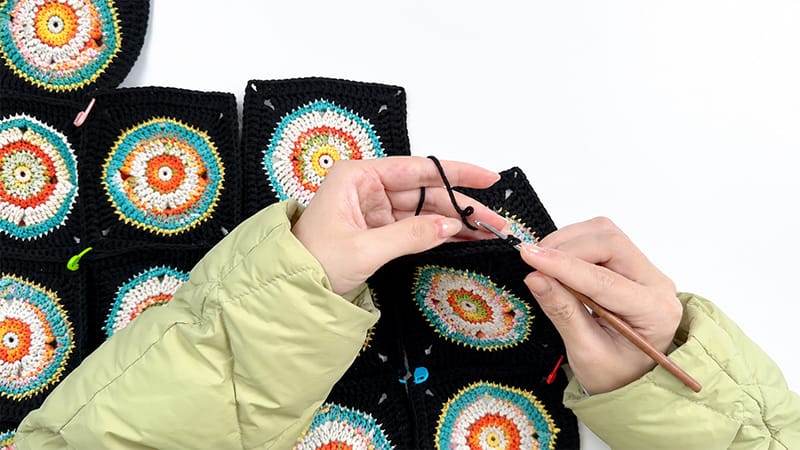
- The Structural Single Crochet Join: Place two adjacent squares face-to-face (right sides together). Insert your hook through the back loops only (or both loops for a prominent ridge look) of both squares. Create a standing sc, then sc smoothly down the edge.
- Continuous Seaming Paths: To minimize loose ends, plan your joining paths in long, continuous grid lines. When crossing intersections, keep your tension relatively loose so the bag does not pucker or warp.
- The Structural Fold: Fold the flat grid in half along its horizontal centerline. Pin the sides together with stitch markers.
- Seaming the Edges: Join the outer bottom seams using the same sc joining method, running your hook along the perimeter until the base of the bag is fully secured. Fasten off and secure all ends.
Crocheting the Sculpted Bag Opening
- Rounds 1–2 (Foundation): Attach your black yarn to the bag’s waistline opening with a standing sc. Work 1 sc into every stitch around the entire perimeter, maintaining a uniform tension. Join with a sl st.
- Rounds 3–12 (The Structural Collar): Ch 1. Work sc in every stitch around. Join each round with a sl st. This thick $10\text{-round}$ band provides the structural integrity needed to prevent the bag from sagging when loaded with daily items.
- Round 13 (The Decorative Scallop Edge): *Skip 2 stitches from your current position. Work 7 dc all into the next stitch (creating a fan/scallop). Skip another 2 stitches, and secure the shell down with a sl st into the following stitch.* Repeat from * to * entirely around the opening rim. Join with a final sl st, fasten off, and weave in the tail.
Attaching Hardware & Straps
- Symmetry Check: Lay the bag flat and mark the exact placement for your strap anchors on either side of the bag opening collar.
- Mounting: Thread your leather strap’s D-rings or clip hardware through the sturdy sc columns of the bag’s collar. Secure them tightly using the included screw rivets or heavy-duty sewing thread.
- Charm Placement: Tie or sew your connected bloodshot eyeball chains around the base of one of the leather straps, allowing them to hang down the front face of the bag.
Preservation & Care
Daily Maintenance:
Milk cotton yarn has a beautiful sheen but can collect lint. Clean the surface occasionally with a sticky lint roller. Avoid carrying sharp, loose objects (like keys or open pens) inside the bag without a pouch to protect the structural stitches from snagging.
Washing Protocol:
Never machine wash or tumble dry this bag. Submerge it in cool water with a drop of delicate wool wash. Gently press the soapy water through the fibers.
Rinse thoroughly, press flat between two dry towels to extract moisture (never wring or twist), reshape the bag flat, and dry it away from direct sunlight.
Storage:
Store the tote in a breathable cotton dust bag. Stuff the interior lightly with acid-free tissue paper to preserve its geometric form while sitting on your closet shelf.
