
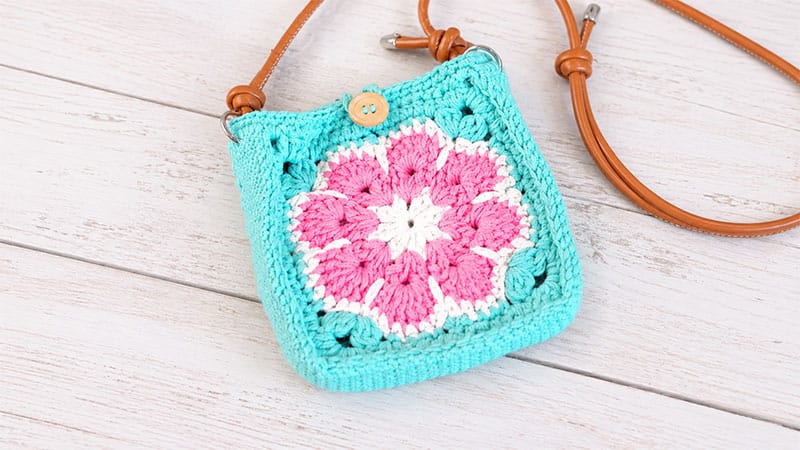
Welcome to your next favorite crochet project! This chic, vintage-inspired handbag combines the timeless elegance of the African Flower motif with a durable, structured side panel.
By following these comprehensive steps, you’ll create a beautifully finished, professional-grade accessory.
Master Checklist: Materials & Tools
Before picking up your hook, gather these essentials to ensure a smooth crafting experience:
| Material / Tool | Specifications | Purpose |
| Yarn | Loopara 5-ply combed cotton | Provides excellent stitch definition and structural integrity. |
| Crochet Hooks | 3.5mm and 4.0mm | Use the smaller hook for the squares and the larger one for the panel/borders. |
| Stitch Markers | Removable locking type | Essential for aligning pieces during final assembly. |
| Notions | Sharp scissors & a blunt yarn needle | For clean cuts and seamless yarn weaving. |
| Hardware / Extras | 1 Medium button & stabilizing binding | For the secure top closure and interior support. |
Stitch Key & Abbreviations (US Terminology)
- ch: Chain stitch
- sc: Single crochet
- hdc: Half double crochet
- dc: Double crochet
- tr: Treble (triple) crochet
- sk: Skip the next stitch
- sl st: Slip stitch
- puff st: Puff stitch
- tr puff st: Treble puff stitch
Part 1: The African Flower Granny Squares (Make 2)
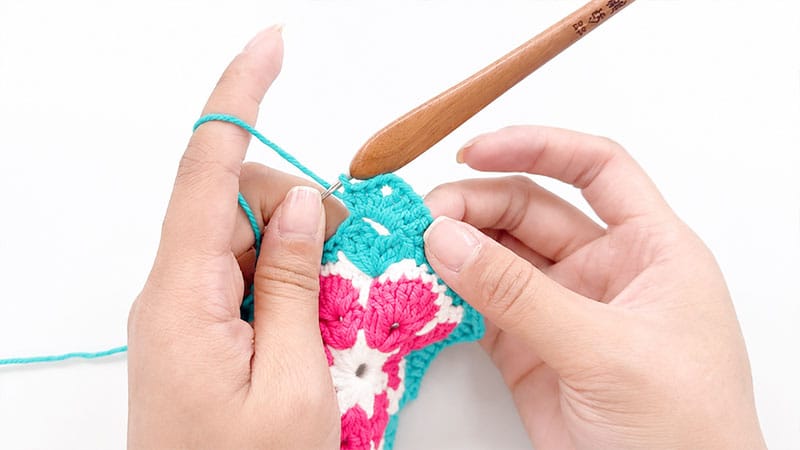
Use your 3.5mm hook for this section. To achieve a vibrant look, feel free to switch yarn colors at the start of any new round.
Round 1: The Core
Form a magic ring. Chain 3 (this counts as your first double crochet). Work 15 double crochets directly into the center of the ring.
Pull the yarn tail firmly to close the central hole. Finish the round by making a slip stitch into the third chain of your opening chain-3. (Total: 16 stitches)
Round 2: Setting the Petal Base
Attach your second color choice. Chain 3 and execute 1 double crochet into the very first stitch. Chain 1, then work 2 more double crochets into that same stitch. Skip the next stitch entirely.
[In the following stitch, work 2 double crochets, chain 1, and 2 double crochets. Skip the next stitch.] Repeat the sequence inside the brackets 7 times. Join the round with a slip stitch to the top of the initial chain-3. (You will have 8 distinct stitch clusters)
Round 3: Growing the Petals
Slip stitch over into the first chain-1 space of the previous round. Chain 3, then work 6 double crochets directly into that same space.
Move to the next chain-1 space and work 7 double crochets. [Work 7 double crochets into each remaining chain-1 space around.] Complete the round by executing a slip stitch into the top of the starting chain-3. (8 distinct flower petals created)
Round 4: The Outlining Border
Join your third yarn color. Work 1 single crochet into each of the next 7 double crochet stitches across the first petal. When you reach the gap between petals, work 1 elongated double crochet straight down into the skipped stitch from Round 2.
[Work 1 single crochet into each of the next 7 stitches, followed by 1 long double crochet into the Round 2 gap.] Repeat this sequence all the way around. Join with a slip stitch to your very first single crochet.
Round 5: Squaring the Circle
Attach your next color. This round transforms your round flower into a neat square.
- Step A: Work 1 single crochet into each of the next 4 stitches. Skip 2 stitches.
- Step B (The Corner): In the next stitch, work: (chain 1, a 3-treble puff stitch, chain 3, another 3-treble puff stitch, chain 1).
- Step C: Skip the next 2 stitches, then work 1 single crochet into each of the next 4 stitches. Skip 1 stitch, execute 1 half double crochet, then skip 1 final stitch.
- Step D: Repeat this entire sequence (Steps A through C) 4 times around the flower. Secure with a slip stitch into the initial single crochet of the round.
Round 6: The Structural Frame
Chain 2. Work 1 half double crochet into each of the next 6 stitches. When you reach the corner chain space, work your corner cluster: (3 double crochets, chain 2, 2 half double crochets). [Work 13 half double crochets along the straight side, then place (3 double crochets, chain 2, 2 half double crochets) into the corner space.]
Repeat this sequence 3 times. Complete the side by working 7 half double crochets, then slip stitch to the top of your starting chain-2. Fasten off and meticulously weave in your loose yarn ends.
Pro-Tip: To guarantee a perfectly square bag, block your two finished flower motifs before moving on to assembly. Pinning them out to identical measurements ensures they line up flawlessly.
Part 2: Crafting the Structured Side Panel
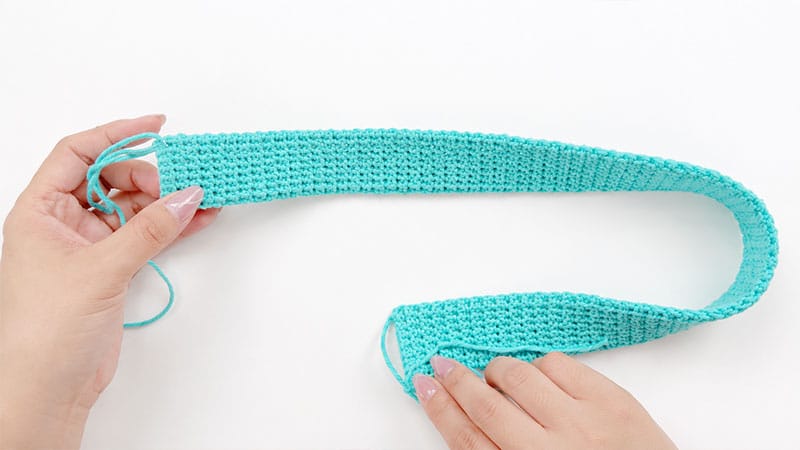
Switch to your 4.0mm hook. This section creates a thick, supportive band that gives your bag its depth.
- Step 1: Leave a generous yarn tail for seaming later. Create a standing single crochet stitch to anchor your yarn, then prepare to build your foundation using double braid stitches.
- Step 2: Bring your lower working strand up and over the front of your crochet hook.
- Step 3: Catch your main working yarn and carefully pull your hook through both loops currently sitting on the hook.
- Step 4: Repeat this specialized movement until you have built a foundation of 8 double braid stitches.
- Step 5: Secure the end of this foundation row with a single standing stitch.
- Step 6: Insert your hook through the back loop of the half stitch as well as the braid running directly beneath it. Work 1 standard single crochet.
- Step 7: Continue this placement across the row for a total of 8 single crochets.
- Step 8: Chain 1 to serve as your turning chain, then flip your work over.
- Step 9: For the main body rows, continuously insert your hook under the back half-stitches and the corresponding lower braids. Work 8 single crochets per row.
- Step 10: Repeat Row 9 continuously until your panel is long enough to wrap perfectly around three sides of your flower squares.
- Step 11: Chain 1 and turn your work for the final finishing row.
- Step 12: To create a sturdy, clean edge, insert your hook through three distinct strands: two top loops and the single braid underneath. Work 8 single crochets across.
- Step 13: Secure the final stitch with a chain. Fasten off your yarn, leaving a long tail.
Part 3: Bag Assembly & Finishing Touches
       [ Top Opening ]
      +---------------+
      |               |
[Side]|  Motif Face   |[Side]
Panel |   (Square)    | Panel
      |               |
      +---------------+
        [Bottom Panel]
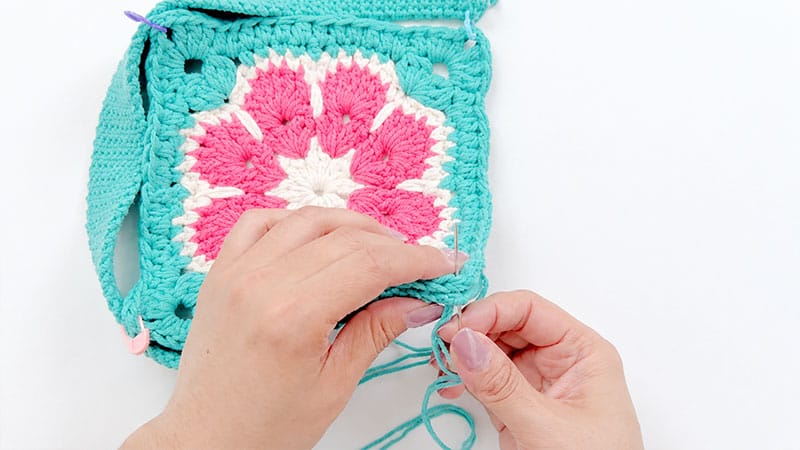
Step 1: Alignment
Lay your first flower square flat and position the side panel band along its left, bottom, and right edges. Use your locking stitch markers generously to pin the corners and sides together, ensuring the stitches align perfectly.
Step 2: Seaming the Main Body
Thread your blunt yarn needle with the primary body color yarn. Starting at the top left corner, pass the needle through the stitches of both the flower square and the side panel.
Use a consistent whipstitch or mattress stitch to join them. Keep your seam tension relaxed to prevent the edges from bunching up.
Step 3: Attaching the Second Face
Repeat the exact pinning and seaming process with your second African Flower square on the opposite side of the panel band. You will now have a U-shaped bag structure with an open top.
Step 4: The Top Rim Border
Attach your yarn to the open top rim of the bag. Using your hook, work 2 complete rounds of single crochet uniformly around the entire opening. This cleans up the raw edges and adds structural stability to the opening.
Step 5: Fastener & Closure
Find the exact center point of the front interior rim and firmly sew your button in place using a yarn needle. On the matching center point of the back rim, attach your yarn, chain a length long enough to comfortably loop over your button, and secure it back to the rim with a slip stitch. Fasten off and weave in any remaining yarn tails cleanly.
Preservation & Care Guidelines
Everyday Maintenance
To keep your cotton bag in pristine condition, gently brush away any surface dust or debris after use. Avoid overloading the bag with heavy items; cotton crochet stretches over time, and keeping contents light preserves its original shape. If a yarn end pops out, use a needle to weave it back in rather than cutting it.
Washing Protocol
When the bag requires cleaning, always opt for a gentle hand wash. Submerge the bag in lukewarm water mixed with mild, delicate detergent for 15 minutes.
Never wring, twist, or scrub the fabric. Instead, press it between a folded, clean towel to express the water. Reshape the bag while it is still damp and lay it flat to air-dry away from direct sunlight.
Storage Wisdom
When storing your bag long-term, stuff the inside lightly with acid-free tissue paper so it maintains its boxy profile.
Store it flat in a cool, dark drawer or inside a breathable cotton dust bag. Avoid hanging the bag by its strap on a hook for extended periods, as gravity will permanently distort the stitch tension.
